valentine's day almond cake

After last year's Valentine's cake disaster, there were some things at stake: my pride, my confidence in my ability to carry on my family's decades old tradition, my craving for this almond cake which had only grown stronger after having to practically miss out on it last year. Sure, it wasn’t the worst Valentine’s day situation there ever was (that’s what boys are for! hahaha, jkjk Eggboy), and sure I’d recovered from effed up Valentine’s cakes in the past, but gosh geez I just really wanted to make a fun pretty cake and once again justify my annual Valentine’s day candy aisle raid. 

My friend Randi asked me how I get through the winters up here. Usually when someone asks me that my knee jerk reaction is similar to how some people go gaga over the ~summer~ and that whole summer afternoon—summer afternoon; to me those have always been the two most beautiful words in the English language Henry James mushy shit. My version of that is WINTER EVENING! WINTER EVENING! GOIN TO BED @ 8, F YEAH! But *I* will even admit that this winter has been particularly nutso bonkers extreme stir crazy-ish and there were some mornings when I woke up with a hint of that dragging feeling that I’d wake up with in Januaries during college when I’d have to put on clothes and go to orchestra rehearsal and sit through three hours of Alfred Schnittke. 

So I threw even more weight behind Valentine’s Day. And decided that’s just what I’m going to do from now on anytime I have a winter blue and don’t have the option of weekending in Hawaii. I put out all of our red mugs, our heart shaped cocotte, the red tea pot, etc., and day dreamed endlessly about my cake. 

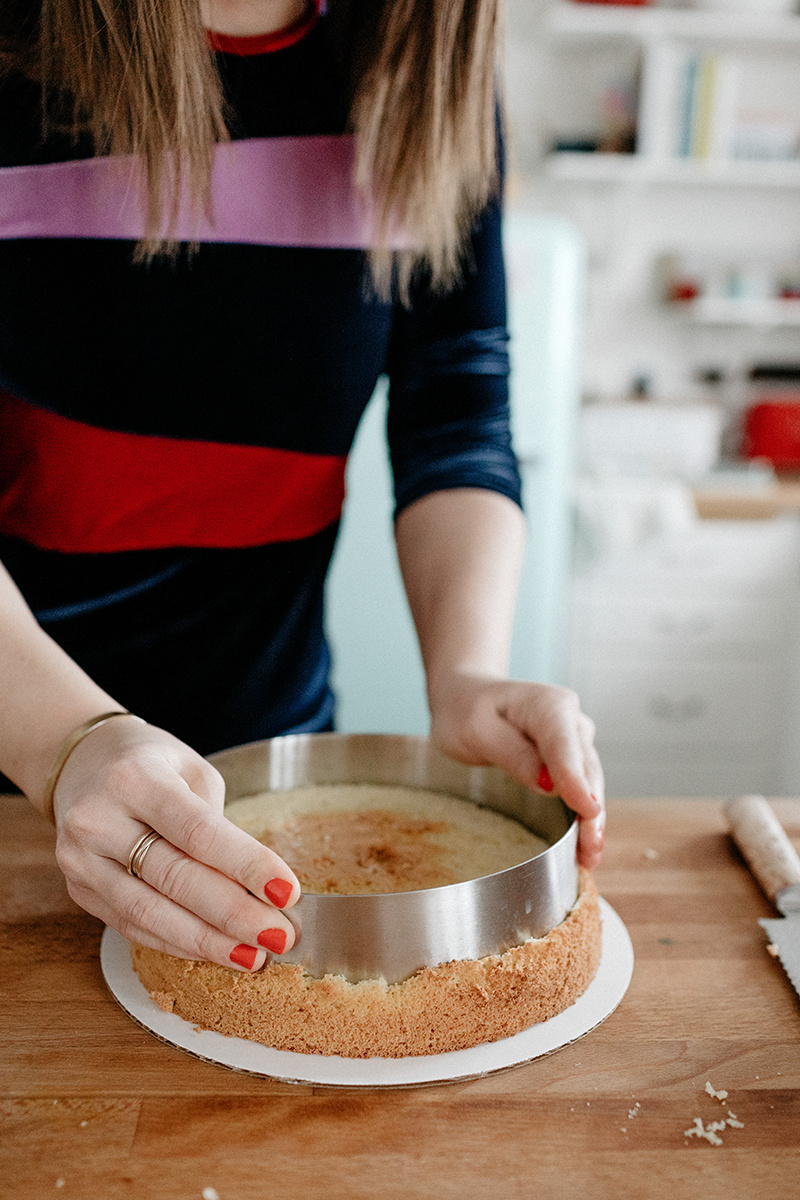
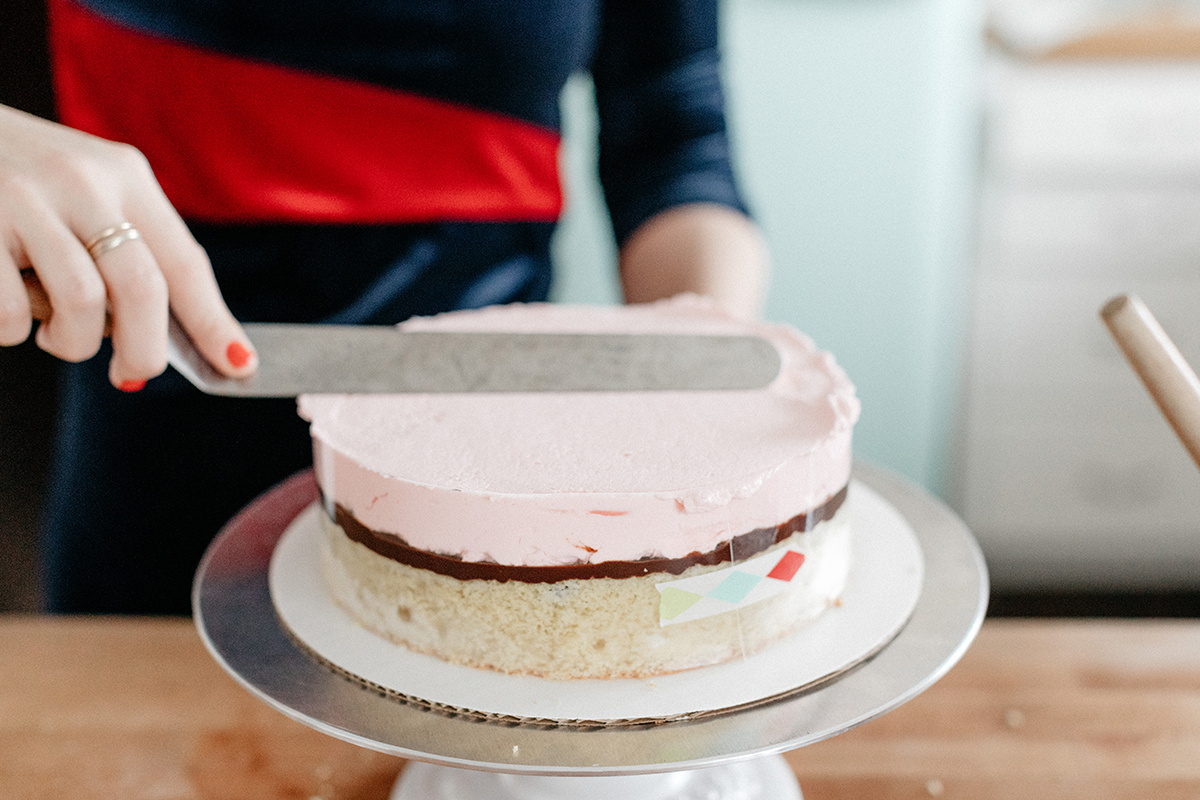
I knew I wanted to use this opportunity to get a cake ring and acetate and make a milk bar-inspired cake. But past that I was stumped. Should it have a border? Should there be lovey dovey animals on it? Should I add a couple of roses? I spent weeks looking for inspiration and nothing felt right. 
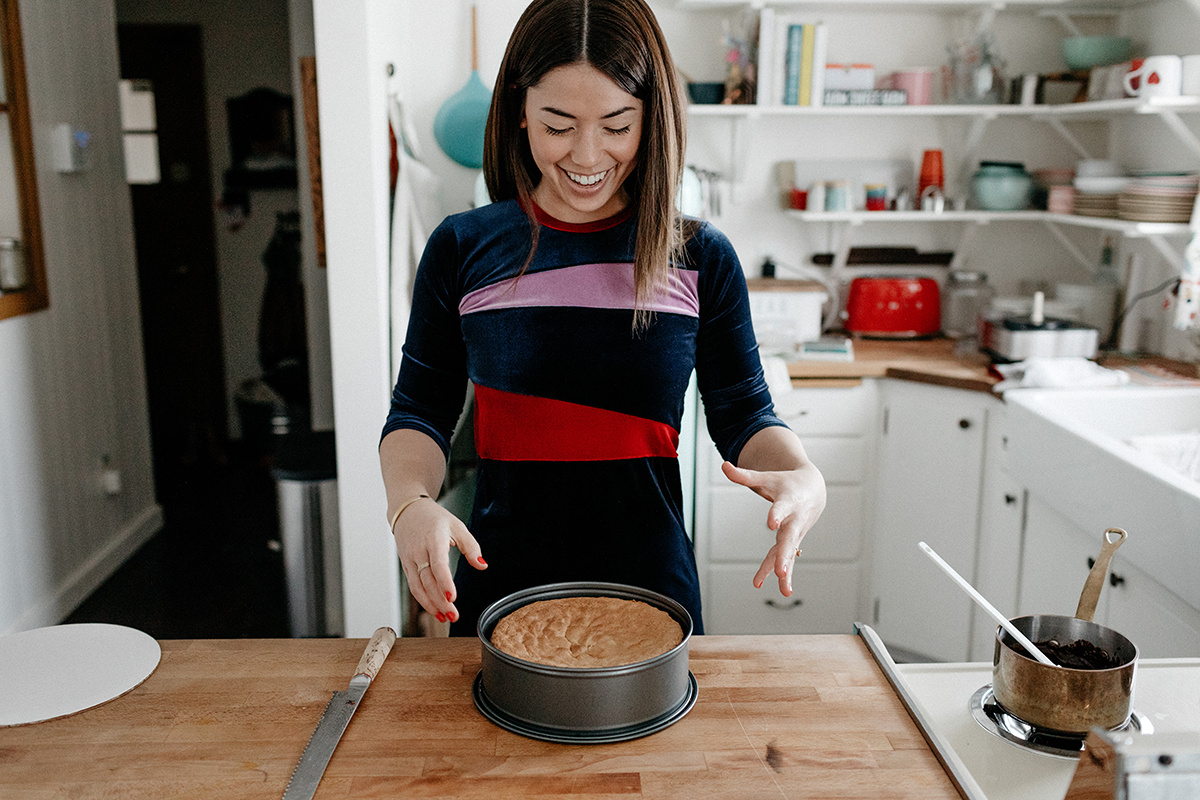
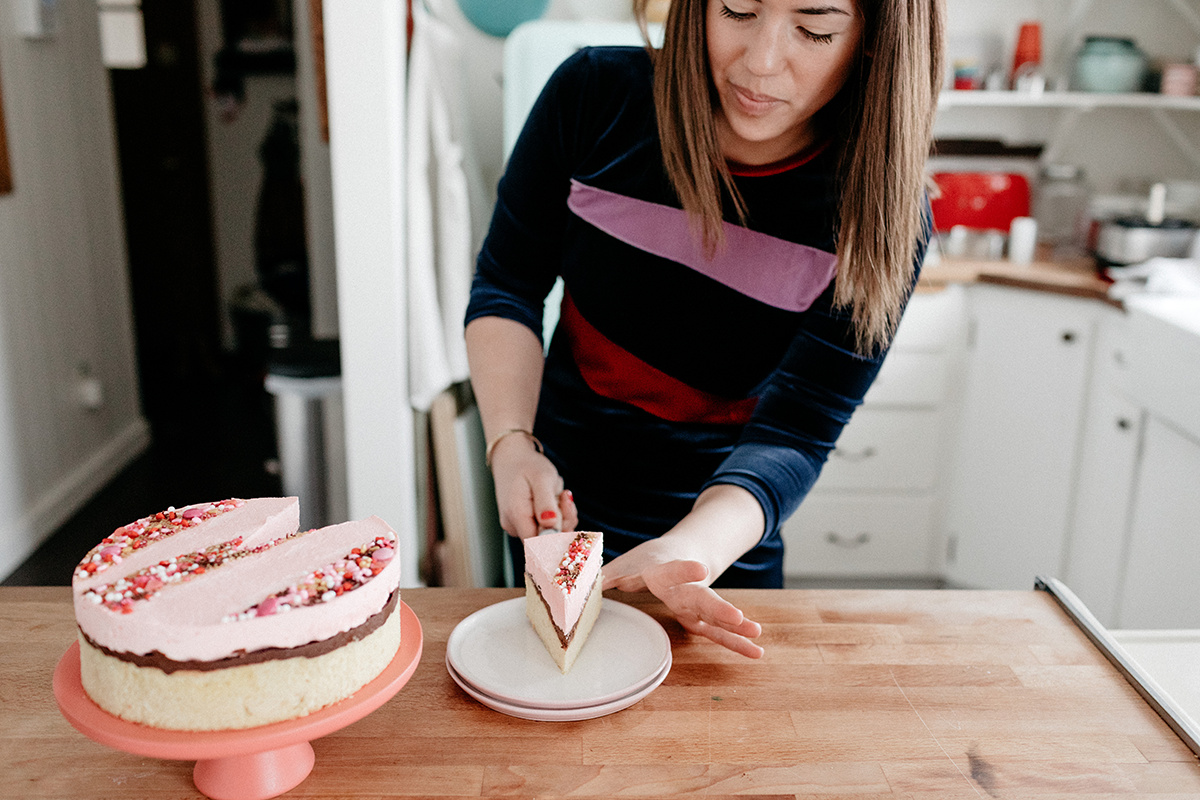
Until this dress arrived from Carleen

Kelsy, the designer, is a friend of a friend and she makes the coolest clothes, some are made out of reclaimed quilts, and they are all so lovable and unique. Valentine-y red has never been my color but I am so into the idea of a navy blue valentine sitch with just some red and purple. Navy is my color this year.

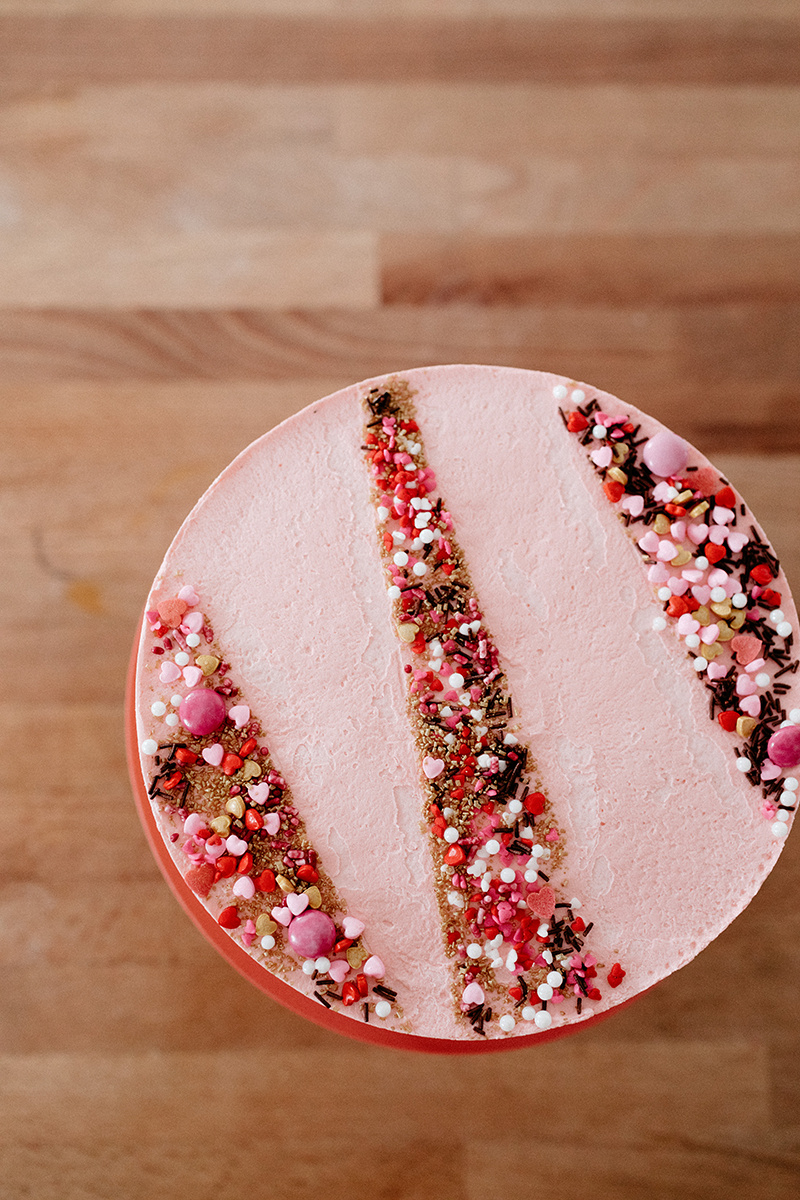
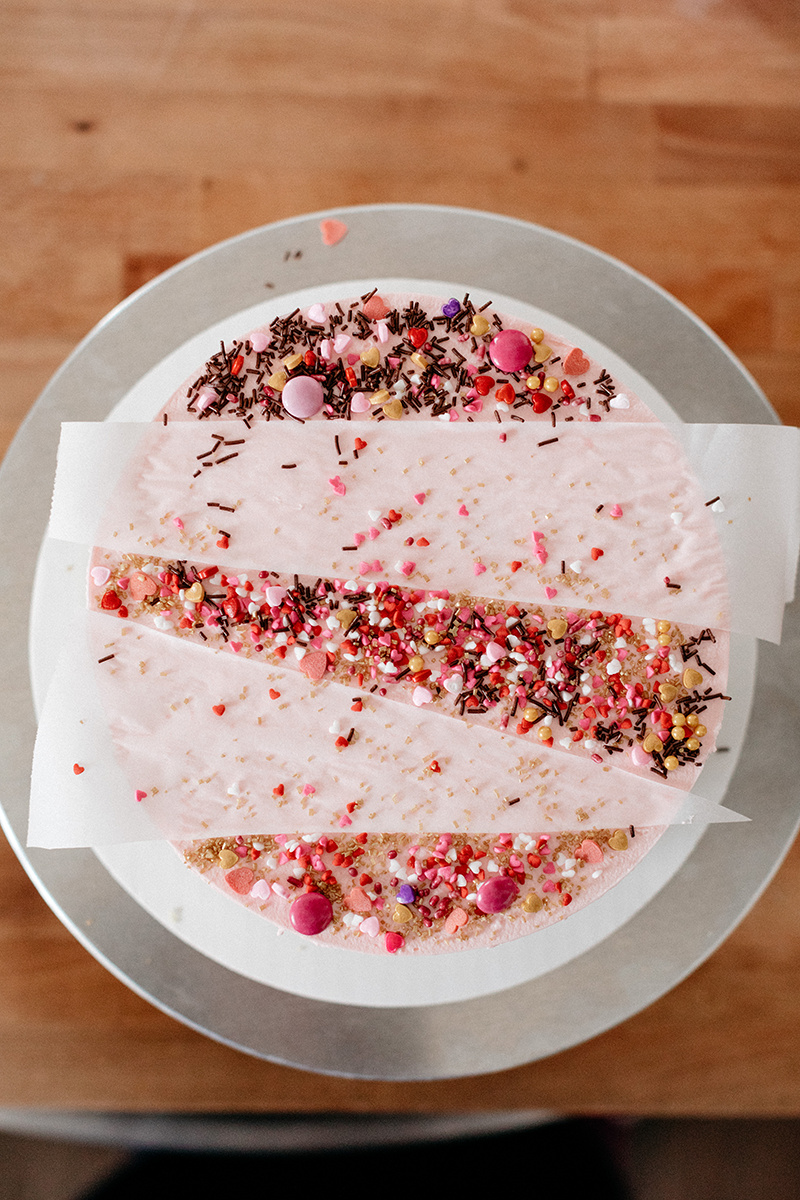
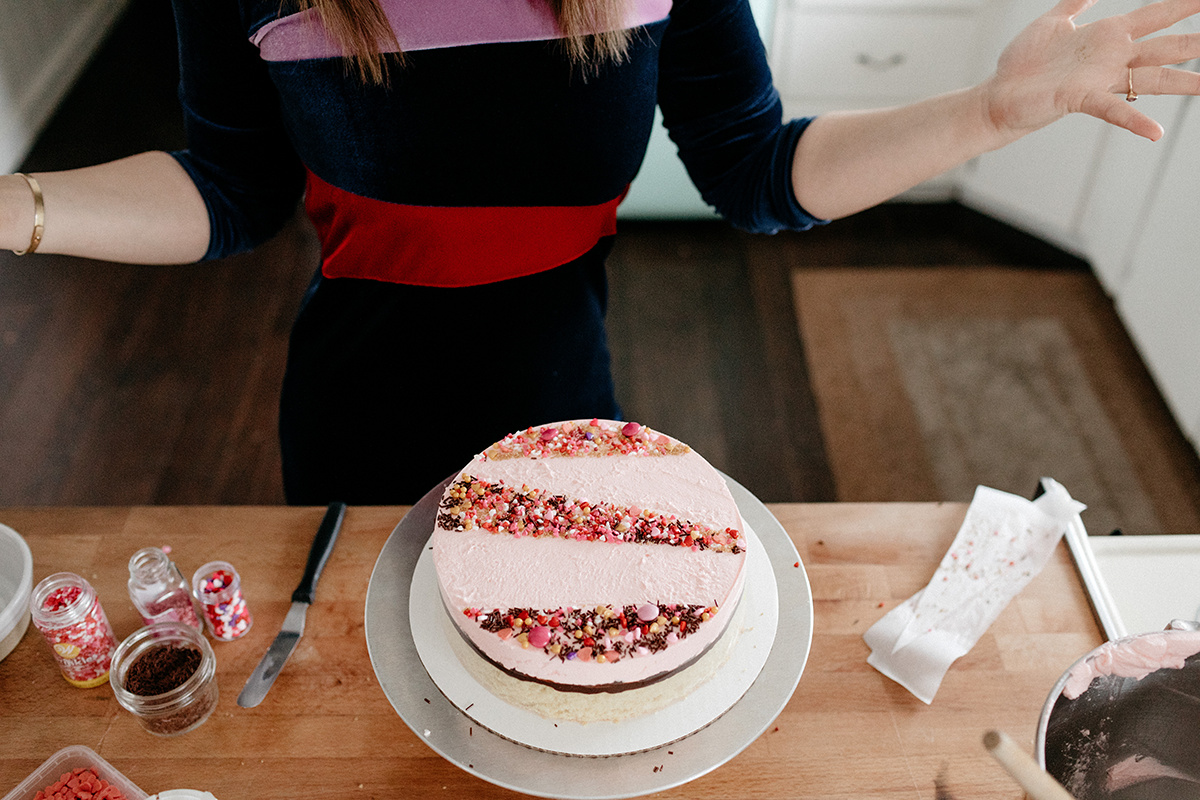
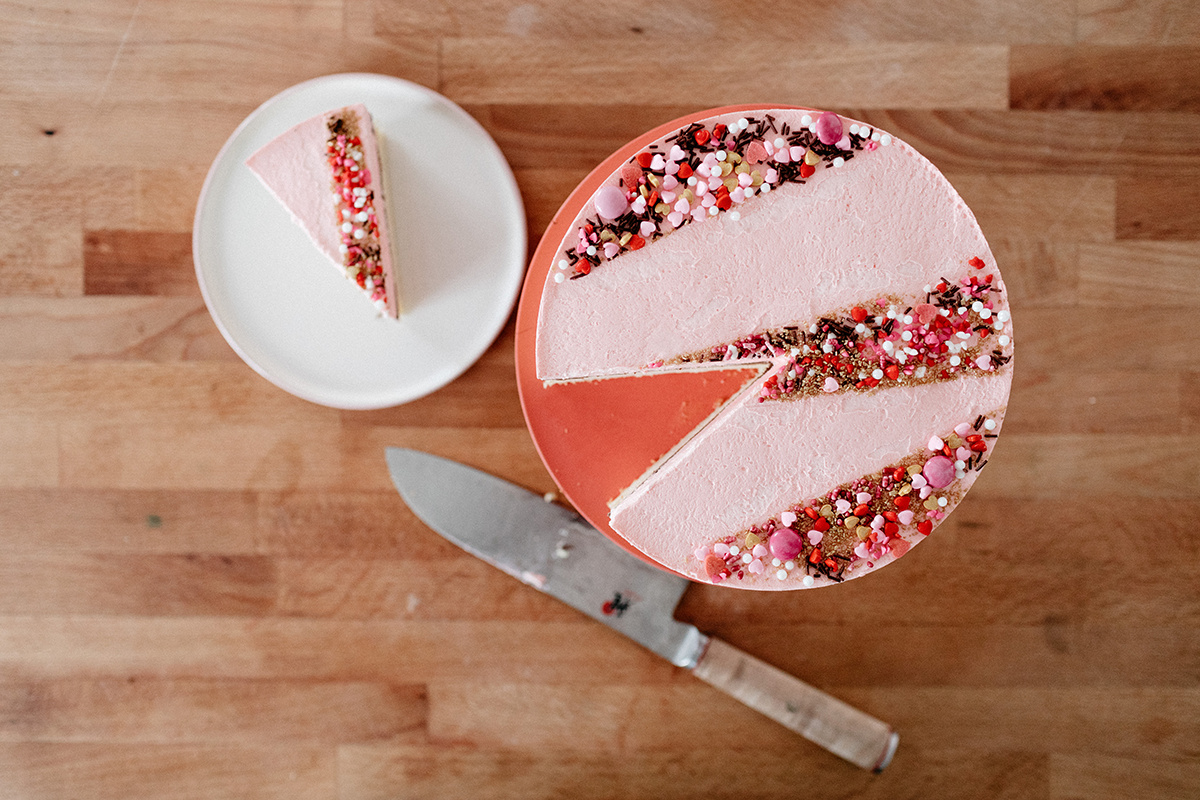
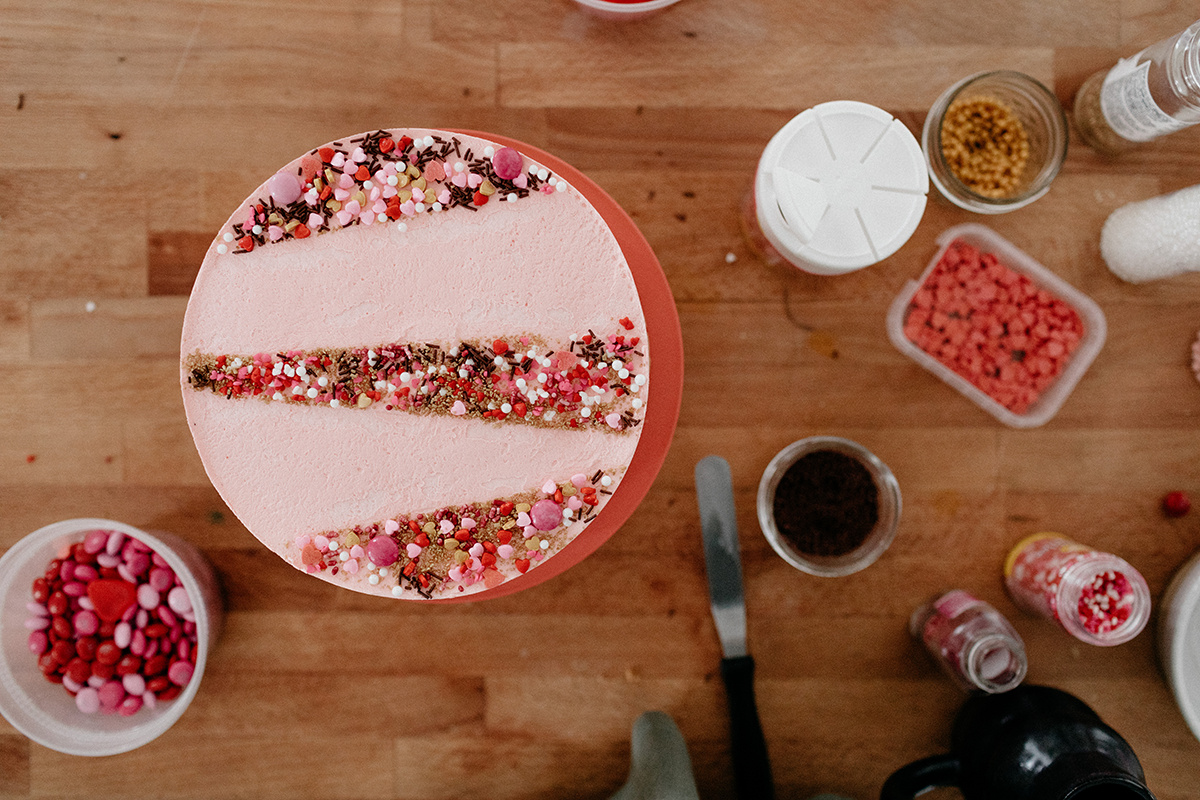
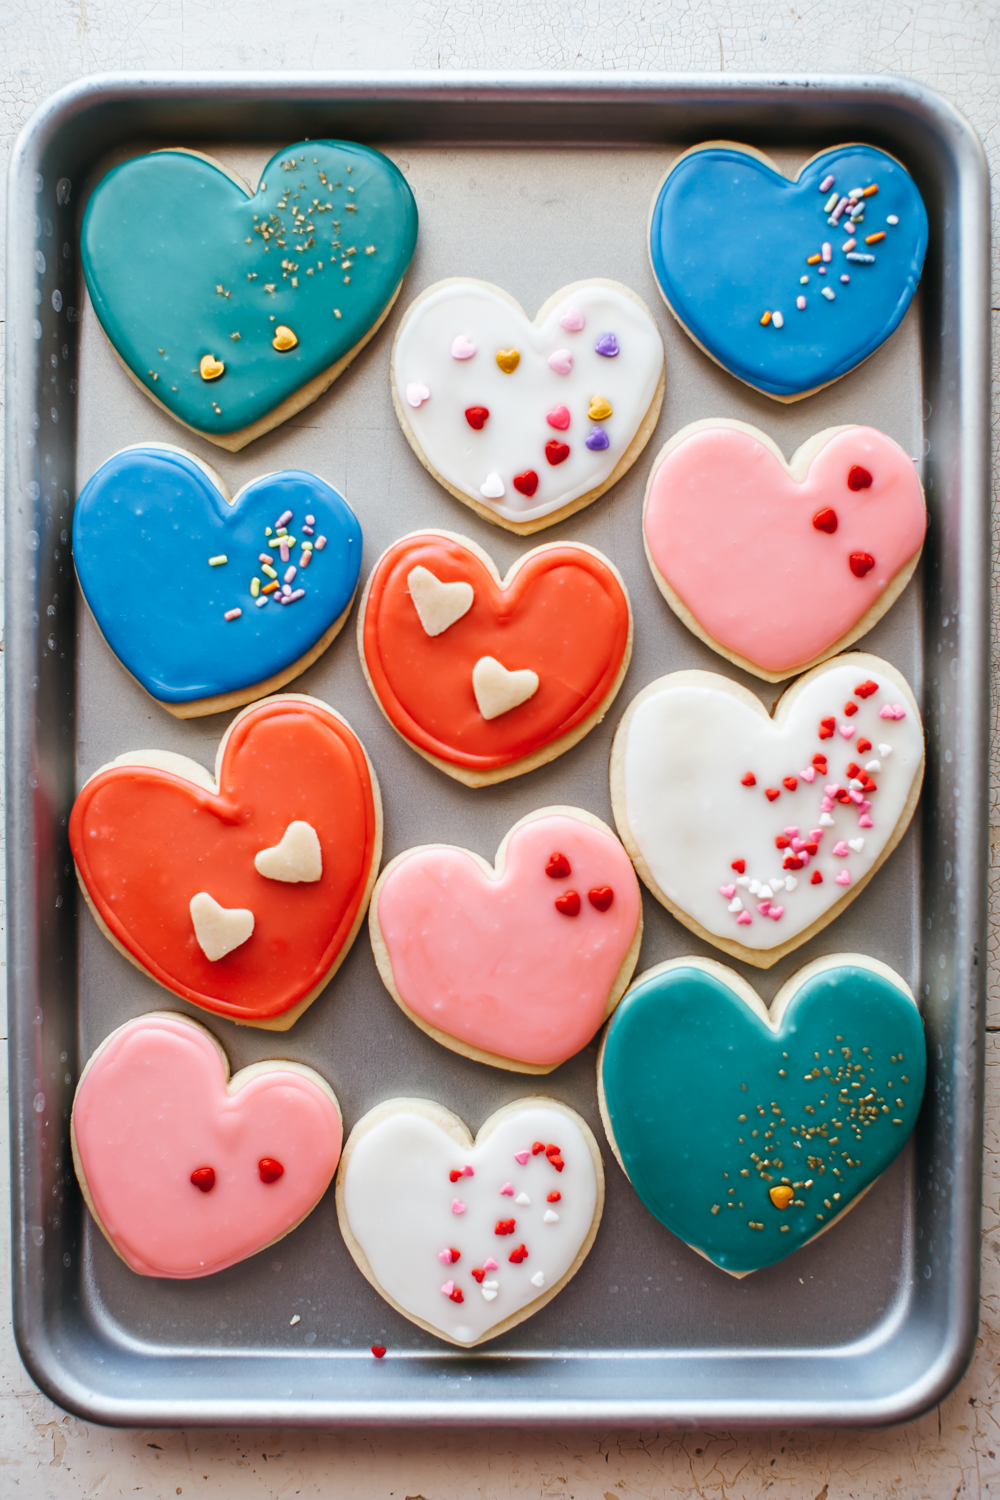
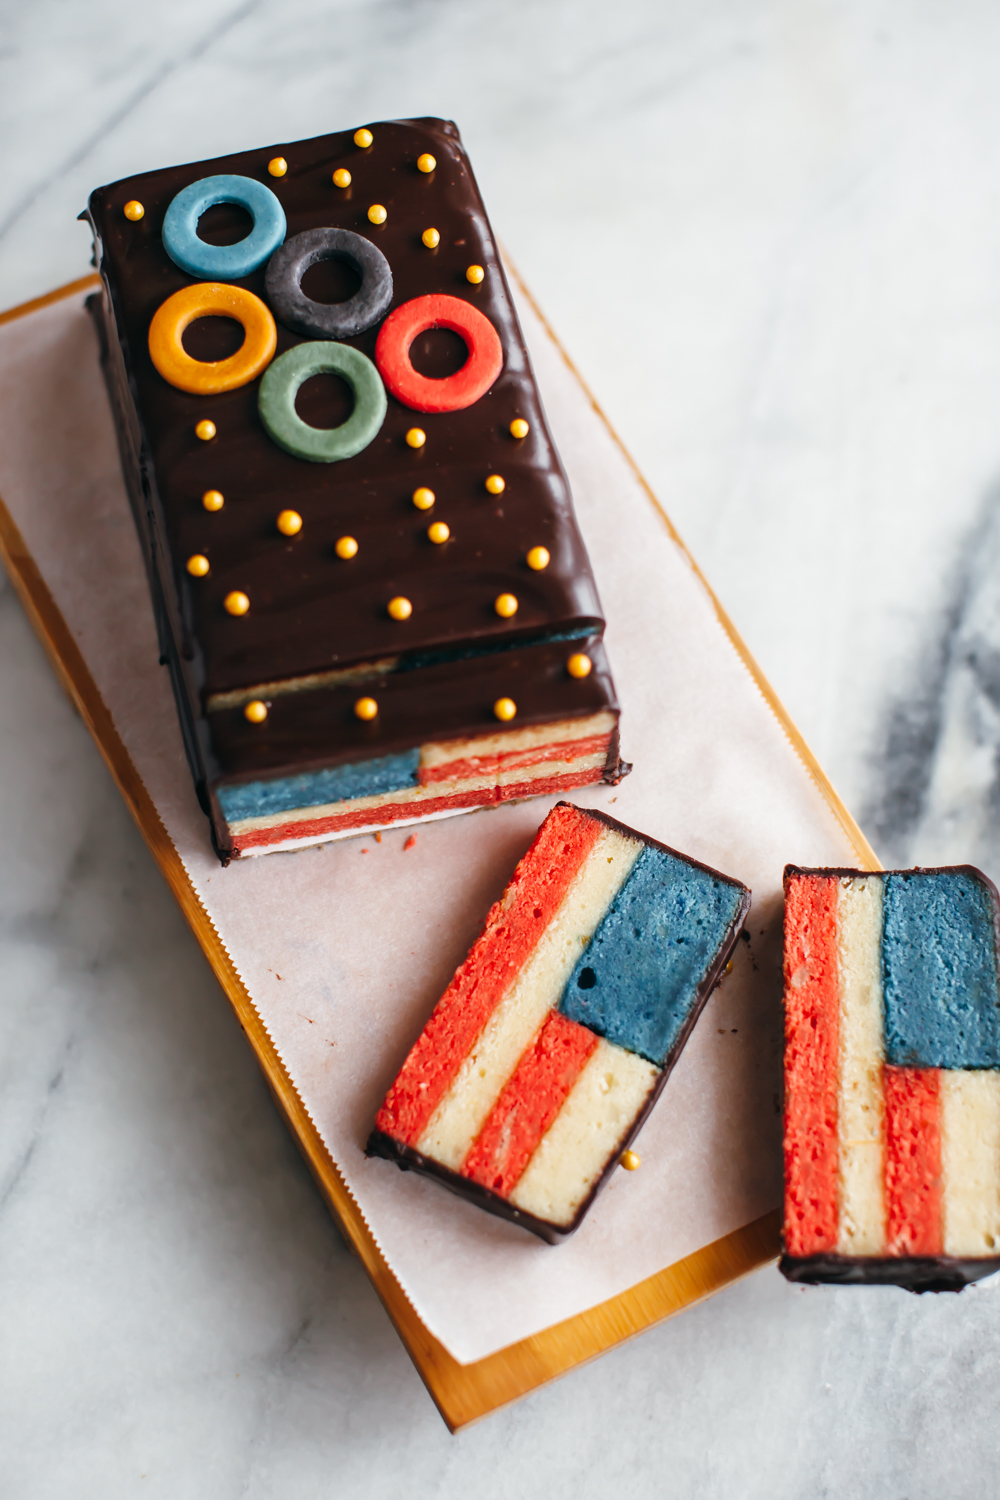
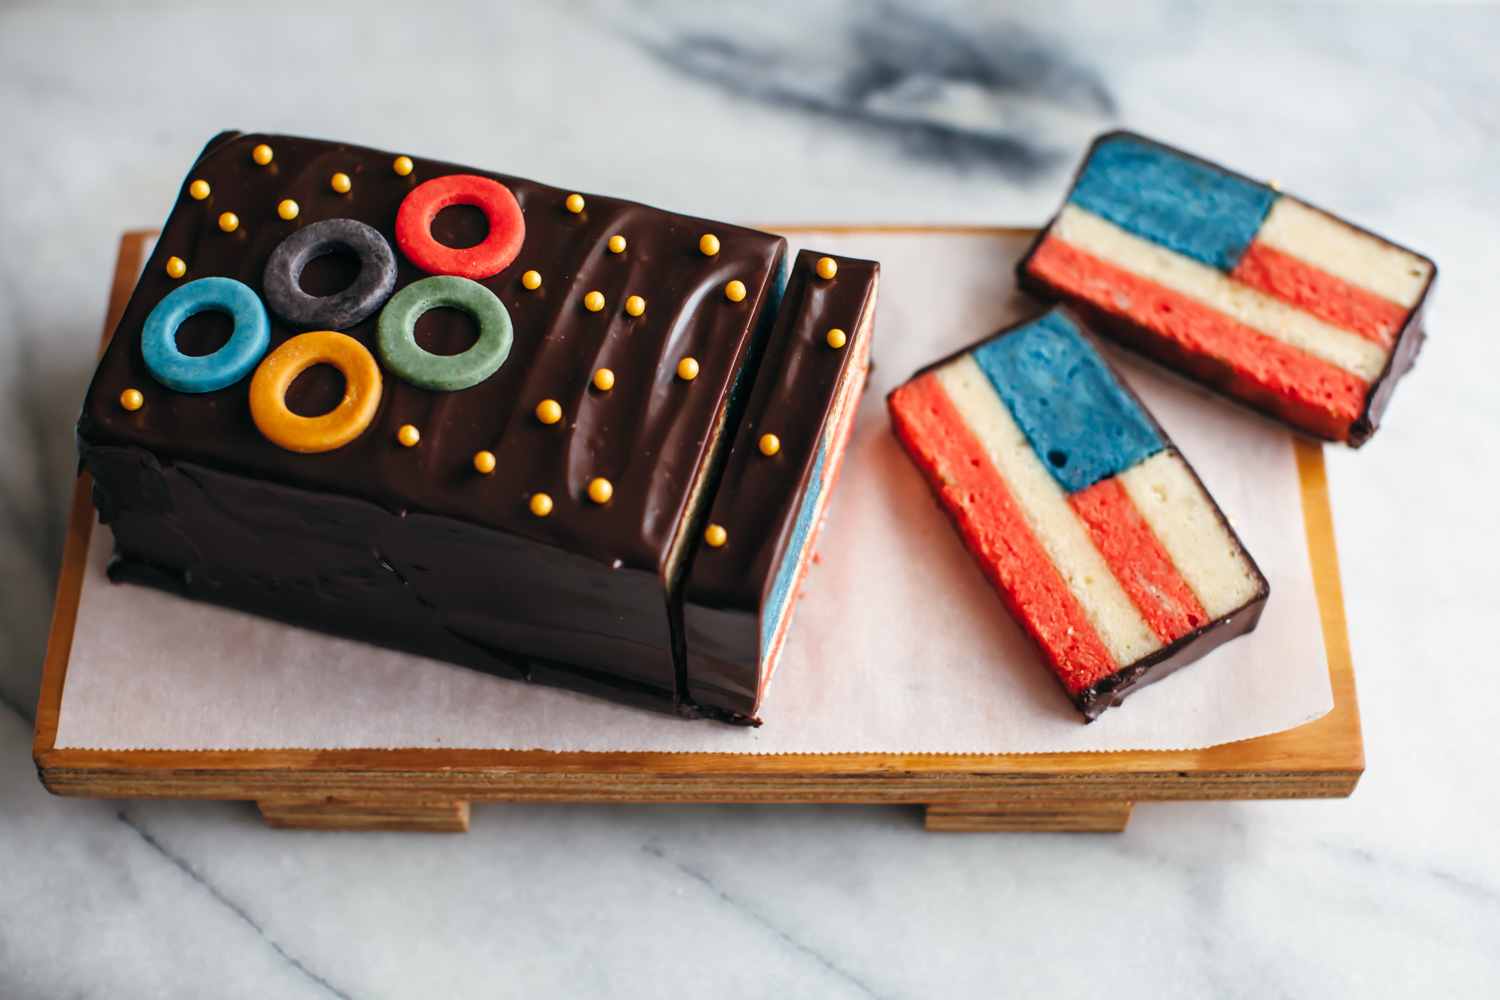
Anyway, so I drew from the pattern of the colors on this dress and used it as the inspiration for the sprinkle design on this cake. I used every sprinkle in my valentine’s day sprinkle collection and my 90s sand art training, and it was the most fun ever. The abundance of sprinkles added nice crunch. 

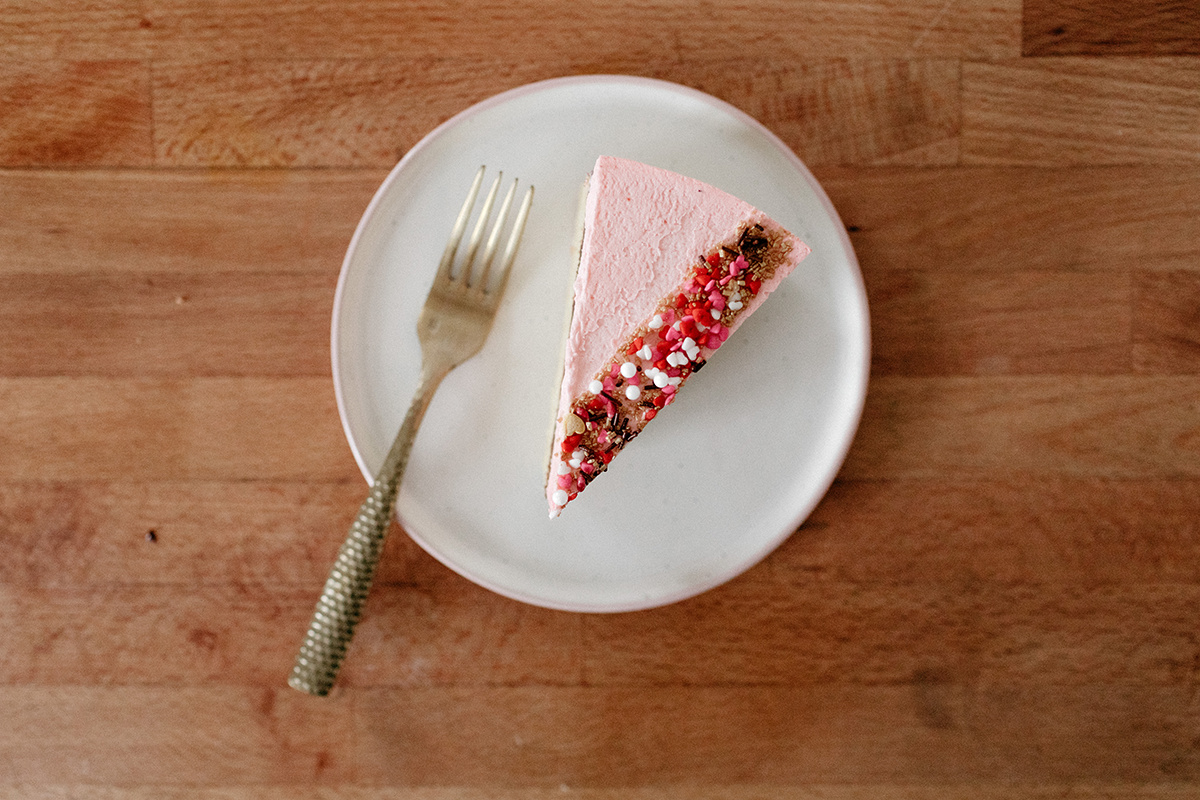
I was satisfied. I was also satisfied by the texture of the almond sponge cake. The more I think about it the more I think I over-beat last year’s yolks, not just the egg whites, which is why it was dry. One key is to not beat the yolks and the almond paste into such oblivion that the almond paste chunks disappear. You want some chunks because they’re good! They prevent the cake from being a sad dry one-dimensional thing. 

That’s all.

Ok, have a gander at Valentine’s day cakes through history: 2017's, 2016's2015's, 2014’s, 2013’s, 2012’s, 2011’s, and 2010’s.

And get to it.

Happy Valentine's Day!!!!! 


valentine's day almond cake

serves 10-12

ingredients

cake:

1/2 c (64g) all-purpose flour
1 tsp baking powder
8 oz almond paste
6 large eggs, separated
1/2 tsp kosher salt
1/2 c (100g) sugar
1 tsp vanilla extract
1/2 tsp almond extract

chocolate ganache:

5 oz semisweet or dark chocolate chips

1/4 c (60g) heavy whipping cream

whipped cream:

1 1/2 c (360g) heavy whipping cream
1/2 c (60g) powdered sugar
1 tsp almond extract

pink food coloring, optional

assembly:
sprinkles of all sorts

clues

Preheat the oven to 350ºF. Grease and line the bottom of a 9” springform pan and set aside.

In a small bowl, whisk together the flour and baking powder.

In the bowl of a stand mixer fitted with a whisk attachment, beat the egg whites and salt to soft peaks and then gradually beat in the sugar, about 1 tablespoon at a time. Continue beating to stiff peaks and then set aside.

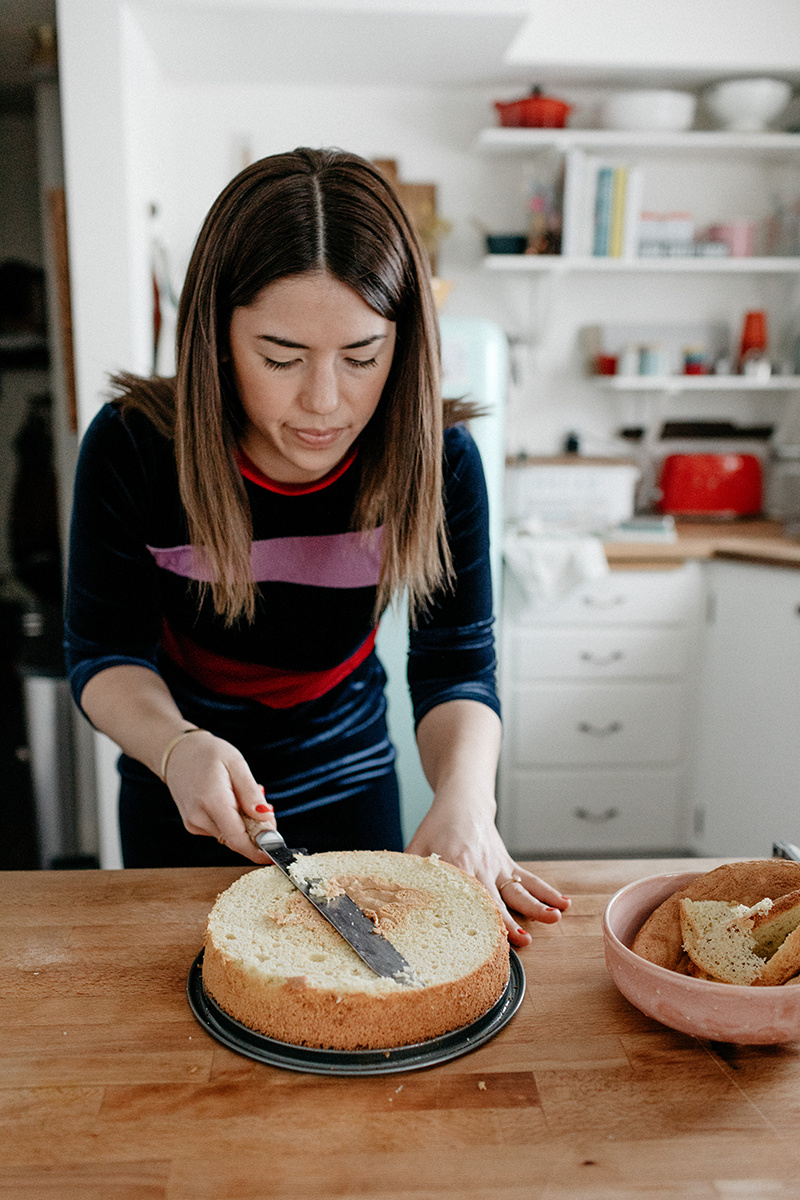
In the bowl of a stand mixer fitted with a paddle attachment (I usually just scoop the whites out of the bowl and transfer them to a separate bowl and then reuse my stand mixer bowl without having to wash it for this step), combine the almond paste and egg yolks and beat on high for 2 minutes until pale and fluffy (but allow some almond paste chunks to remain in tact), scraping down the sides of the bowl as needed. Mix in the vanilla and almond extract. Gently fold the whites into the yolk mixture and then fold in the flour mixture. Pour the batter into the pan and then bake until a toothpick inserted into the center comes out clean. Begin checking for doneness at 30 minutes.

Cool in the pan on a rack for 10 minutes and then remove to the rack to cool fully.

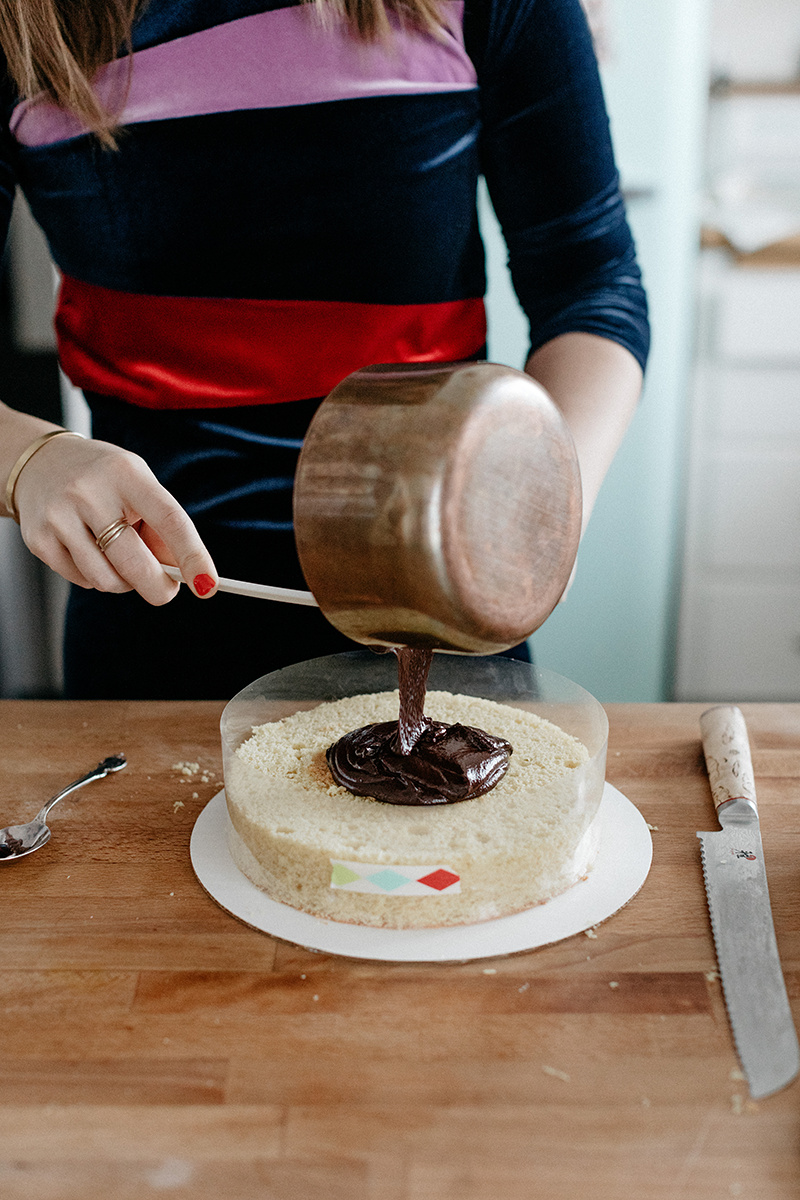
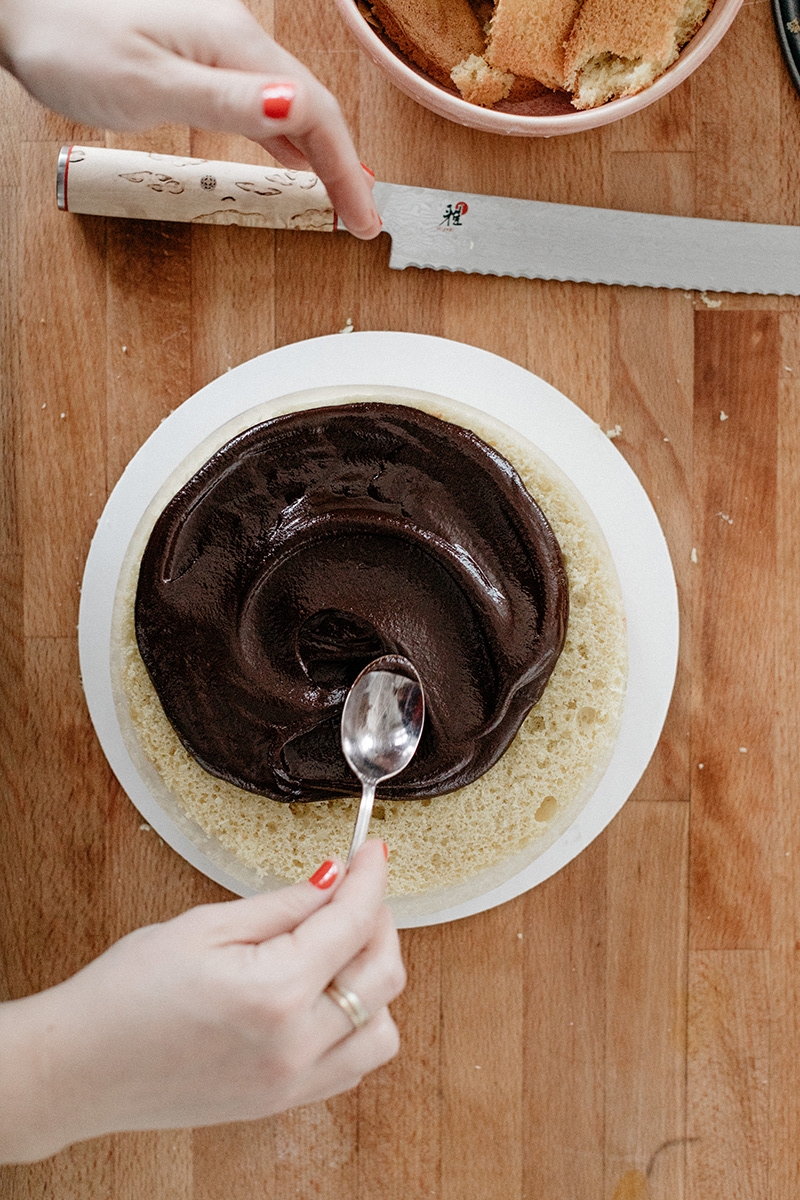
To make the ganache, combine the chocolate chips and heavy cream in a saucepan and heat over medium low, stirring continuously until melted.

At this point you can refer to the photos above and use a cake ring and acetate to help decorate your cake, or you can just pour the ganache right over the cake. Let it cool in the fridge or freezer until it's no longer hot (it doesn't need to be totally firm) and then you can go onto the whipped cream step.

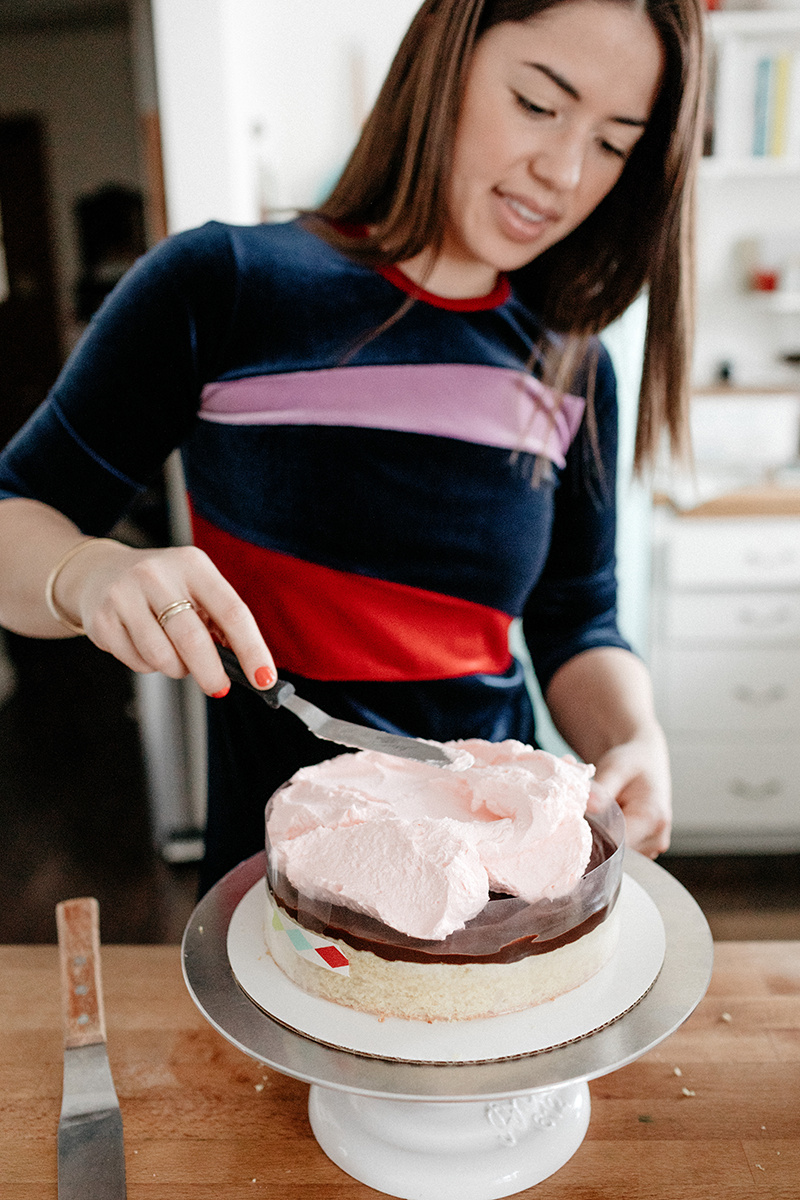
To make the whipped cream, in the bowl of a stand mixer fitted with a whisk attachment, beat the heavy cream, powdered sugar, and almond extract to stiff peaks. Add a few drops of pink food coloring if desired.

Spread the whipped cream on top of the cake. To do some sprinkle-y sand art, freeze the cake for about 20-30 minutes, or until the whipped cream is mostly firm (it doesn't need to be totally hard--rather, it shouldn't be so that the sprinkles stick, but if you do freeze it solid then let it soften just slightly before moving on) and then stick some parchment shapes or stripes on it, cover it with sprinkles, brush off any stray sprinkles that are lingering on the parchment, and then carefully lift the parchment off. Voila! 

Store leftovers in the fridge for up to a few days.


-yeh!

photos by chantell and brett!

soft almond sugar cookie cutouts that are very thick and glazed and fun

hello from korea, friends!!!!!!!! the last few days have been totally bonkers as the olympic channel has made every single one of my dreams come true and brought me over to pyeongchang to help cover the olympics. i am freaking out, it is still soaking in, and i have no idea what time it is where you are, but for now i have to dash over to gangnueng to watch nathan chen's short program, so i will tell you more about this later! follow along on instagram!

i really need to quickly tell you about these valentine's day cookies though because they are our new favorite cookies hands down. they are so freaking soft and thick and almondy, and i realize that i should just admit that this is an almond flavored blog already (yes, the annual almond cake is coming soon!!) but i know as soon as i do that i'm going to start hating almond. (haha, never!) but if you do hate almond, rest assured, this is actually about to become an ice skating blog this week.

i like these cookies because you can cut out thick shapes with them and you don't have to worry about refrigerating the dough (you can if you want) so these come together extremely quickly. the trick to getting the best texture is to take them out of the oven when they are just starting to think about turning brown but haven't yet. or maybe they have around the bottom edges but that's it. they will be too soft to handle immediately out of the oven but as they cool they'll firm up just slightly and achieve that perfect softness that's lofthouse-esque but way denser.

the thing i'm still working on is the decorating part. when i pipe freehand glaze lines i feel really clumsy! and i'm trying to figure out how to get the outlines of the glaze to zhoosh into the rest of the glaze better. michelle says to use a toothpick to help blend it. i tried it for two cookies and then got impatient! oh well, the good thing is that clumsy lines and poorly zhooshed glaze still taste really good but if you have ideas for how to make the outlines blend in better, please @ me.


soft almond sugar cookie cutouts

makes about 22 large (3" ish) cookies or 30 smaller (2" ish) ones

ingredients

For the cookies:

3 1/2 c (448g) all-purpose flour, plus more for dusting

1 1/3 c (150g) almond flour

1 tsp baking powder

3/4 tsp kosher salt

1 c (226g) unsalted butter, softened

2/3 c (137g) granulated sugar

2/3 c (80g) powdered sugar

zest from 1/2 of a lemon, optional

2 large eggs

1 tsp vanilla extract

1 tsp princess emulsion (or another tsp vanilla)

3/4 tsp almond extract

for the glaze:

2 cups (240g) powdered sugar
2 tb (40g) corn syrup
2-3 tb whole milk
1/2 tsp vanilla extract
1/4 tsp almond extract
Pinch of kosher salt
Food coloring

Sprinkles!
 

clues

To make the cookies, in a medium bowl, combine the flour, almond flour, baking powder, and salt and set aside. In the bowl of your stand mixer fitted with the paddle attachment, cream together the butter and the sugars until pale and fluffy, about 3-4 minutes. Add in the lemon zest if using and mix to combine. Add the eggs, one at a time, beating after each, and then add the extracts.


Add the flour mixture to the butter mixture, mixing until blended. At this point you can wrap the dough in plastic wrap and refrigerate for an hour, or up to two days, or you can get going on rolling out your dough and cutting out your cookies immediately. 

When ready to bake, preheat the oven to 350ºf. Line two baking sheets with parchment or a silicone mat and set aside. Working with half of the dough at a time, roll it out on a lightly floured surface to 1/2” thick. Cut out your shapes and then transfer to a baking sheet, 1" apart. Re-roll scraps and cut out more shapes. Bake until they’re just thinking about starting to turn brown, begin checking larger cookies for doneness at 12 minutes, and smaller cookies at 10 minutes. Let cool on the baking sheets for 5 minutes and then carefully transfer to a wire rack to cool completely. 

To make the glaze, whisk together the powdered sugar, corn syrup, 2 tablespoons milk, vanilla, almond extract, salt, and a few drops of food coloring until smooth. It should be very thick but just thin enough that when you lift up your spoon it falls off in smooth ribbons. If it’s too thick, add a couple more drops of milk, and if it’s too thin, add a few more spoonfuls of powdered sugar. Spoon a couple of spoonfuls into a piping bag and snip off 1/4" tip. Pipe around the borders of your cookies to make an outline. Thin the remaining glaze out with another teaspoon or so of milk, until it's easily spreadable. Fill in the outlines with the thinner glaze and top with sprinkles immediately before the glaze dries.

Let dry and enjoy!! 

These will keep at room temperature for a good few days, but you can also freeze them once the glaze is dry and they'll stay fresher longer!


-yeh!


team usa cake!

two. days. until. the. olympics!!!!!!!!!!! have you been following all of the ig stories of all of the skaters flying to korea and going through team processing and getting all of their fancy team outfits and rings and stuff?? it is so fun, i love looking behind the scenes.

but starting thursday, everybody please keep your voices down, i have to focus on every single figure skating event and also hockey and some speed skating and chloe kim and her great hair. it's going to be great. it's all in my ical.

please enjoy this cake that is my ode to team usa!! it's basically a big soft loaf of an italian almond cookie that's been shaped into an american flag and and topped with a marzipan olympic-y logo. it's sooo rich and almondy and requires so much butter (!!!!!). you're going to think that your stand mixer is gonna overflow, but don't worry, it won't (it shouldn't if you have at least a 5 qt), and this recipe makes two cakes so you can enjoy one during the opening ceremony and one during the closing ceremony. or share one with a friend who is equally excited about team usa figure skating. (are you that friend?? can you also be my friend? i think my friends are sick of me talking their ears off about axels.)

i thought it'd be easiest to show you how to build this cake rather than try to write down every direction, so my friend paul and i made the above video that will walk you through the steps! and the music is by my super cool bro-in-law, john cwiok! everybody check out his tunesthanks, paul and john!!! also big thanks to eggboy who did his best to be the rafael arutyunyan of this scenario. 


team usa cake

makes 2 loaf cakes

ingredients

6 large eggs, separated (see note)

1/4 c (50g) plus 1 1/4 c (250g) sugar

2 c (450g) unsalted butter, at room temperature

16 oz (450g) almond paste, chopped or torn into pieces

1 tsp kosher salt

1 tb lemon juice

1 tsp almond extract

3 c (384g) all-purpose flour

1 c (240g) whole milk

1 tsp blue liquid food coloring or a few drops of gel

1 tsp red liquid food coloring or a few drops of gel

1/2 c (150g) apricot or raspberry jam


Ganache

10 oz semisweet or dark chocolate chips

1 c (240g) heavy whipping cream


Topping

Marzipan kneaded with food coloring

Gold sprinkles

clues

preheat the oven to 350ºf. grease two 8” by 12” quarter sheet pans and one 8” by 4” loaf pan and line them with parchment paper that comes at least 2 inches up two of the sides of the pan.

in a large bowl or in a stand mixer fitted with a whisk attachment, beat the egg whites to soft peaks. with the mixer running on medium, gradually add the 1/4 cup of sugar. increase the speed to medium-high and beat to stiff peaks. set them aside (see note). in a large bowl or in a stand mixer fitted with a paddle attachment, beat together the butter, almond paste, salt, and remaining 1 1/4 cup sugar on medium-high speed until light and fluffy, 2 to 3 minutes. reduce the speed to medium and add the yolks, one at a time, beating well after each. beat in the lemon juice and almond extract, then reduce the speed to medium-low and gradually add the flour and milk in 2 or 3 alternating additions. mix to combine. use a rubber spatula to fold in the whites.

transfer 780g of the mixture to one of the quarter sheet pans and use a small offset spatula to spread it out evenly. transfer 525g of the mixture to a separate bowl and fold in the blue food coloring and spread evenly it in the loaf pan. fold the red food coloring into the remaining third and transfer it to the other quarter sheet pan, spreading it out evenly.

bake until the tops are just set and no longer shiny. begin checking for doneness at 15 minutes. the blue layer will need at least 5 more minutes than the other layers since it's quite a bit thicker. let cool in the pans.

refer to the above video on how to assemble, spreading the jam between each of the layers. wrap the loaf firmly in plastic wrap, weigh them down with a big cookbook, and refrigerate for 2 hours or overnight. tip: placing the loaf cakes on rectangles of cardboard will make transferring them easier!

trim the edges of the cakes and place them on a wire rack that's been place on top of a sheet pan. make the ganache: place the chocolate chips in a large heat safe bowl or measuring cup. bring the heavy cream to a boil in a medium saucepan (keep a close eye on it and remove it from heat as soon as it starts to boil otherwise it will boil over), pour the hot cream over the chocolate and let it sit for about 30 seconds. then stir it up until you have a smooth ganache. Pour it over the cake, allowing any excess ganache to drip down onto the sheet pan (you can reuse the ganache, reheating it if it firms up), and using an offset spatula to smooth it all over.

Top it with marzipan olympic rings and sprinkles. Enjoy immediately or stick it in the fridge for a few minutes for the ganache to firm up.

Leftovers will keep at room temp for a few days or in the refrigerator for a little longer.

Note: with any recipe that calls for beating something else in the same mixer, I do a few steps to cut down on dishes and ensure that my egg whites don't have any bit of yolk in them, which will cause them not to beat to stiff peaks. I first separate an egg into 2 medium bowls. I then pour the white into my mixer bowl. then I repeat for each egg, adding the whites one by one so that if one gets contaminated, they're not all ruined. and then i beat the whites to stiff peaks first, scoop them out of the mixer bowl, and then use the mixer bowl for the next step. if you use a rubber spatula to get 95 percent of the whites out, there's really no need to rinse the mixer bowl for the yolk step.


-yeh!

mini pizza bagels with sharp cheddar and walnut crumble

I have two scars on my face. One is boring and from a mole (#wearsunscreen! get your skin checked!) and the other is very old and from a pizza bagel! I was 7 years old and very impatient. The idea of waiting for a few minutes for a pizza bagel to cool down out of the microwave was complete lunacy to me and I dug in, only to have lava hot red sauce splat onto my chin, right below my lower lip. It left the tiniest little burn scar that’s not so big that I notice it all the time but when I look closely and do see that little raised bump I think about pizza bagels. It’s actually kind of so delightful that I’ve completely forgiven my impatient 7-year-old self (and pizza bagels and microwaves and red sauce). But despite the fact that I think about pizza bagels regularly, there was a really long time when I barely ate them at all. 

It’s because they’re a flawed food!

Common practice is that you retrieve an already made bagel, top it with pizza toppings, and cook it until the toppings are all melty and the pepperoni is crisp. Or someone else does this for you and all you have to do is open up your freezer and put the thing in an oven or microwave. The issue here is that both of these options start with a bagel that is already fully cooked, so by the time that it goes through more time in the oven or microwave to melt the cheese and crisp the meat, the bagel is overcooked and hard and awful. Allison called me a monster when I acknowledged this because she said that being over-baked is part of the experience. Which, as someone who secretly liked it when the TV dinner pudding overflowed and got on my macaroni and cheese, I can almost empathize with. But as a lover of doughy foods and, more specifically, appropriately chewy bagels, I say let’s make our bagels from scratch so we can par-bake those suckers and not make them turn into rocks in the oven!!

It’s true, my bagel journey is alive and well here on the farm and my belly is happier for it.

So here’s the rundown: all you have to do is make mini versions of these bagels and par-bake them until they’re jussssst starting to turn brown. Then you slice, top, and complete the bagel baking while the toppings are getting melty. Multitasking! There’s no need to fuss with an egg wash and everything bagel topping before you put the bagels in for their first bake because it’s way easier to just sprinkle some everything bagel topping on when you’re adding the rest of your pizza toppings. Or!!! You could use Cabot’s Everything Bagel Cheese, which I hoard like it’s going out of style. If you don’t have that, their Vermont Sharp Cheddar + topping works deliciously and it fits my need for a very sharp sharp cheddar. A little thyme at the end makes it all even better because cheddar and thyme are good friends.

Another great element here is a crunchy nutty topping that is off the chain! This is a walnut-based crumble that’s been one of our favorite pizza toppings for years. It’s spiced similarly to an Italian sausage and is almost like a very coarse pesto. It gets a little crunchy in the oven and is just so tasty. Here’s a closeup of the ingredients:

All it is is toasted walnuts, spices, cheese, garlic, and olive oil. Easy!

So all of these things result in the most deliciously chewy pizza bagel you never imagined could be possible. You’ll wish you didn’t invite so many people over to watch football so that you could eat them all yourself. Or you’ll just wish you made more. 

Note: These are super freezer friendly! Freeze the bagels after they’re par-baked and fully cooled and sliced, and then top and bake, or you can top the par-baked bagels and freeze them on a sheet tray, covered. Simply give them a few more minutes in the oven.


Mini Pizza Bagels with Sharp Cheddar and Walnut Crumble

Makes 24

Ingredients

Bagels

1 c (238g) warm water (105º-110º)

1 tsp active dry yeast

1 tsp + 1 tb (12g) brown sugar

1 1/2 tsp kosher salt

2 tb (42g) barley malt, divided

3 c (380g) high gluten flour, plus more for dusting

1 tb baking soda


Topping

1 c toasted walnuts

4 cloves garlic

1 tsp dried parsley

1 teaspoon dried onion

1/2 tsp fennel seeds

1/4 tsp crushed red pepper

1/4 tsp sweet paprika

1/4 tsp kosher salt

Black pepper

2 tb olive oil

8 oz Vermont Sharp Cheddar, shredded

8 oz pizza sauce

Everything bagel topping

Leaves from a couple of fresh thyme sprigs

Clues

In a large bowl, combine the water, yeast, and teaspoon of brown sugar and let sit until foamy, about 5 minutes. Add the remaining tablespoon of brown sugar, salt, 1 tablespoon barley malt, and flour and mix to form a stiff dough. Turn onto a floured surface and knead until smooth and slightly sticky. Transfer to an oiled bowl, cover with plastic wrap, and refrigerate overnight. 

Let the dough sit at room temperature for an hour and then turn it out onto a clean work surface. Divide it into 24 equal parts and stretch them into smooth balls, making sure to seal any dough seams well. Shape the bagels by sticking your thumb through the center of each ball and using your fingers to gently stretch a 1” hole. Cover the bagels with a towel and let rise for 15 minutes.

Meanwhile, preheat the oven to 450º. Bring a large pot of water to a boil and add the baking soda and remaining tablespoon of barley malt. Line two baking sheets with parchment paper and grease them well. Also lay out a clean kitchen towel near your pot of boiling water.

Working with 4 bagels at a time, boil them for 1 minute on each side (use a timer for this). With a slotted spoon or spatula, transfer them briefly to the kitchen towel to catch any excess moisture and then transfer them to the baking sheets. Bake for 8 minutes. Transfer them to a wire rack to cool slightly. (At this point you can let them cool fully, slice them, and then freeze them for future use).

Make the walnut crumble by combining the walnuts, garlic, dried parsley, dried onion, fennel, red, pepper, paprika, salt, a few turns of pepper, olive oil, and a heaping 1/2 cup (about 30g) of the shredded cheddar in a food processor. Pulse until the mixture clumps together. It will still look crumbly but it should hold together if you squeeze it in your hand. Taste and adjust seasoning as desired. 

Slice the bagels in half and place them back on the baking sheets. Top each with a spoonful of pizza sauce, a pile of cheddar, and lightly packed plops of the walnut mixture. Shower them with everything bagel topping and bake until the cheese is melted, and the walnut crumbles and bagel edges are browned; begin checking for doneness at 8 minutes. Top with a few scatterings of thyme and serve. 


This post is sponsored by Cabot Creamery Co-operative, a farming co-op that is 99 years old as of this year! 

-yeh!! 

photos by chantell and brett!