blog — molly yeh

dessert

Homemade Mini Ice Cream Cones + A Cookie DO Collab!

If I had a dollar for the amount of times since being pregnant that I’ve stared at a batch of cookie dough and wished with all of my might that I could eat a huge blob of it raw, I’d have Poppy Seed’s college tuition paid for already. Raw cookie dough is right up there with cold salami as the foods I miss most. Just like, sweet, doughy, buttery, chocolate chippiness, snuck by hand and licked off the mixer, my eyeballs are rolling back into my head just thinking about it.

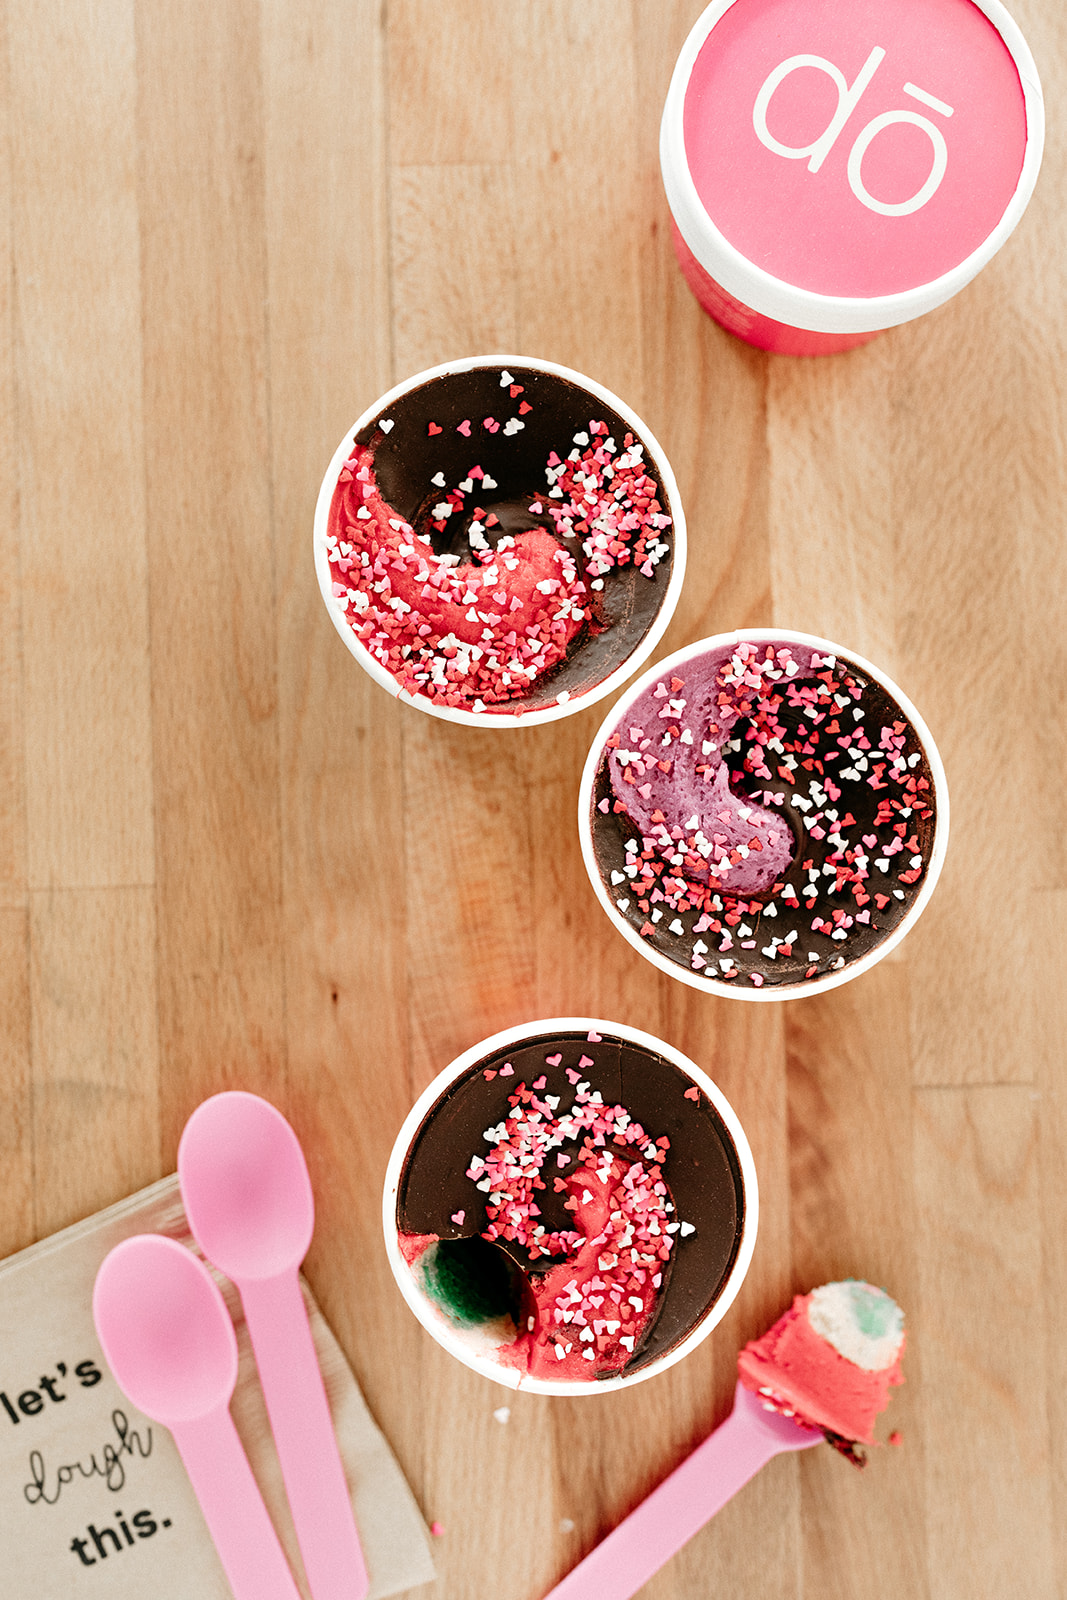
So when the idea of collaborating with Cookie Dō on a special edition flavor came up, I obviously almost passed out. Pregnant or not, Cookie DO is a dreamland. They have a million different insanely good cookie dough flavors that you just eat with a spoon!! Each one as addicting as the next, and as Kristen the owner and I started brainstorming ideas for our February collab, I foamed @ the mouth: tahini chocolate chip, matcha oreo, pistachio white chocolate, Italian rainbow cookie… When I tasted them all, the Italian rainbow cookie was the one I kept thinking about. I’d lie in bed, excited to wake up the next morning so that I could have a bite.

(Do we need to rehash my love for these soft almondy cookies?? I’ve made them into cake form, gelato sandwich form, and have made a matcha red bean version, but never have I had them in dough form!)

This dough is insanely good. It’s intensely almondy with chocolate chunks throughout, and the colors are so bright and happy. It’s my dream dough. So starting now and through the end of the month, you’ll be able to get it at DO, either in store or online.

And!! Portions of the proceeds will be going to Emma’s Torch, an amazing organization in Brooklyn that provides culinary training, ESL classes, and interview preparation to refugees. I first heard about Emma’s Torch when the director, Kerry, was interviewed on Unorthodox and immediately fell in love with the cause. You can listen to this episode here and learn more about Emma’s Torch here. I am soo excited that this cookie dough will help support this cause!

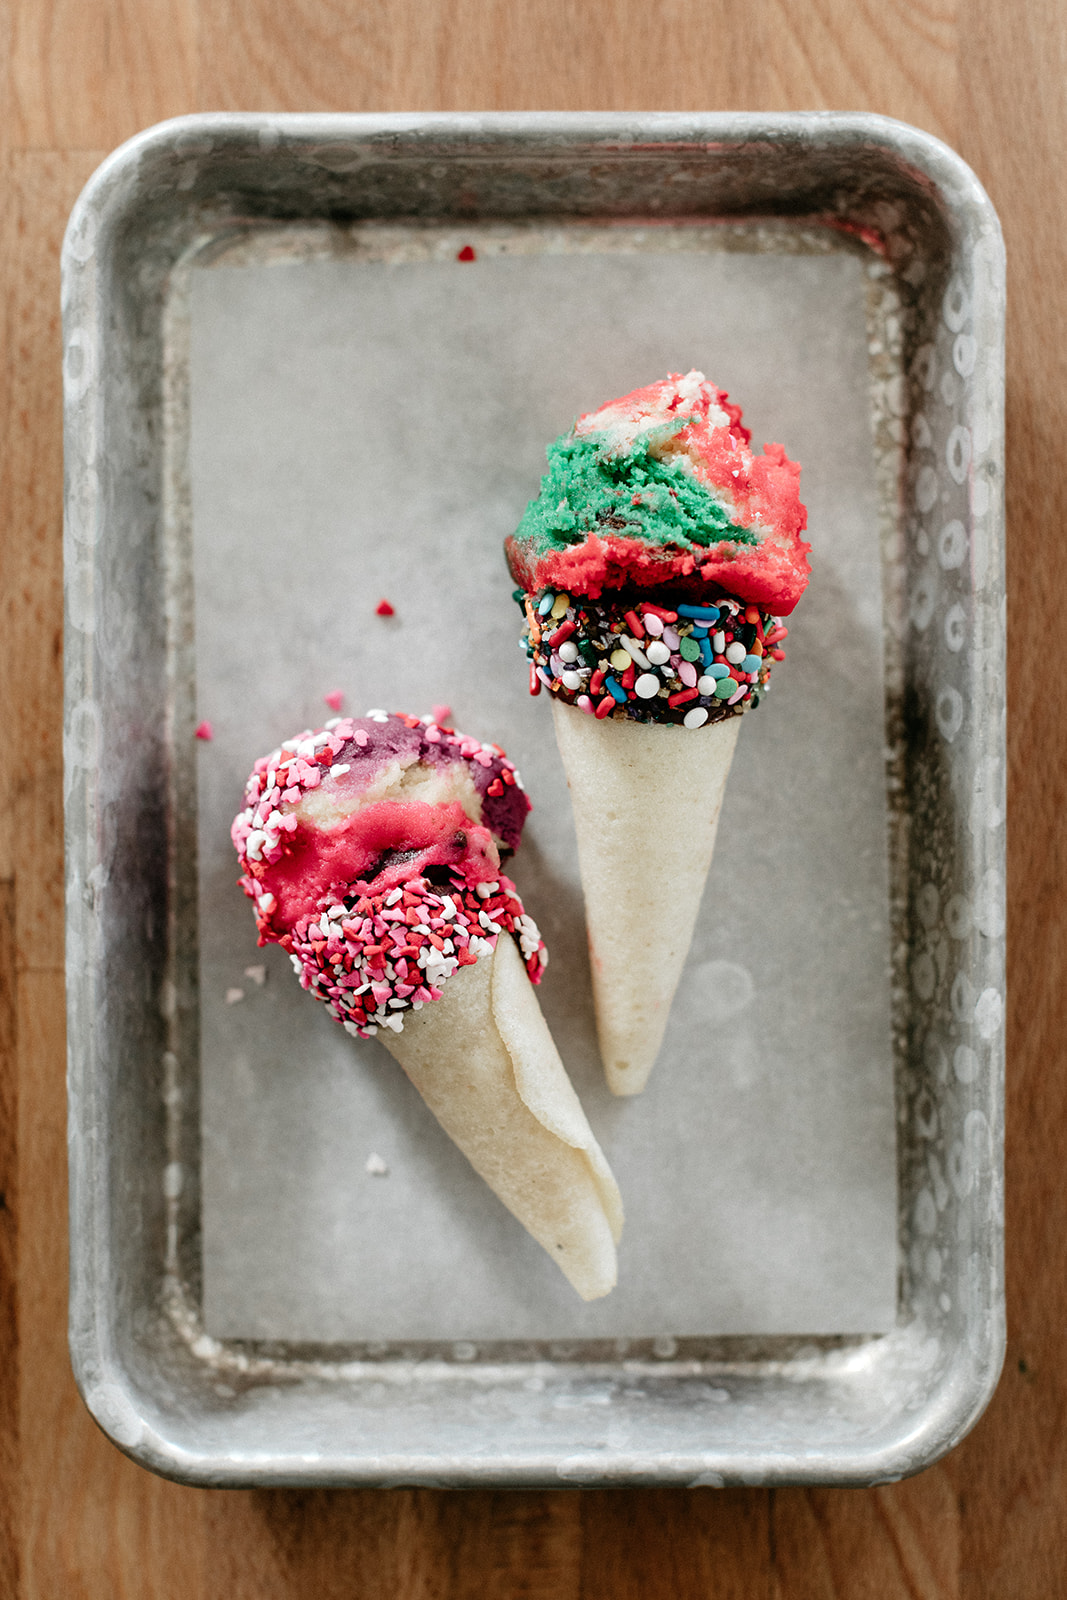
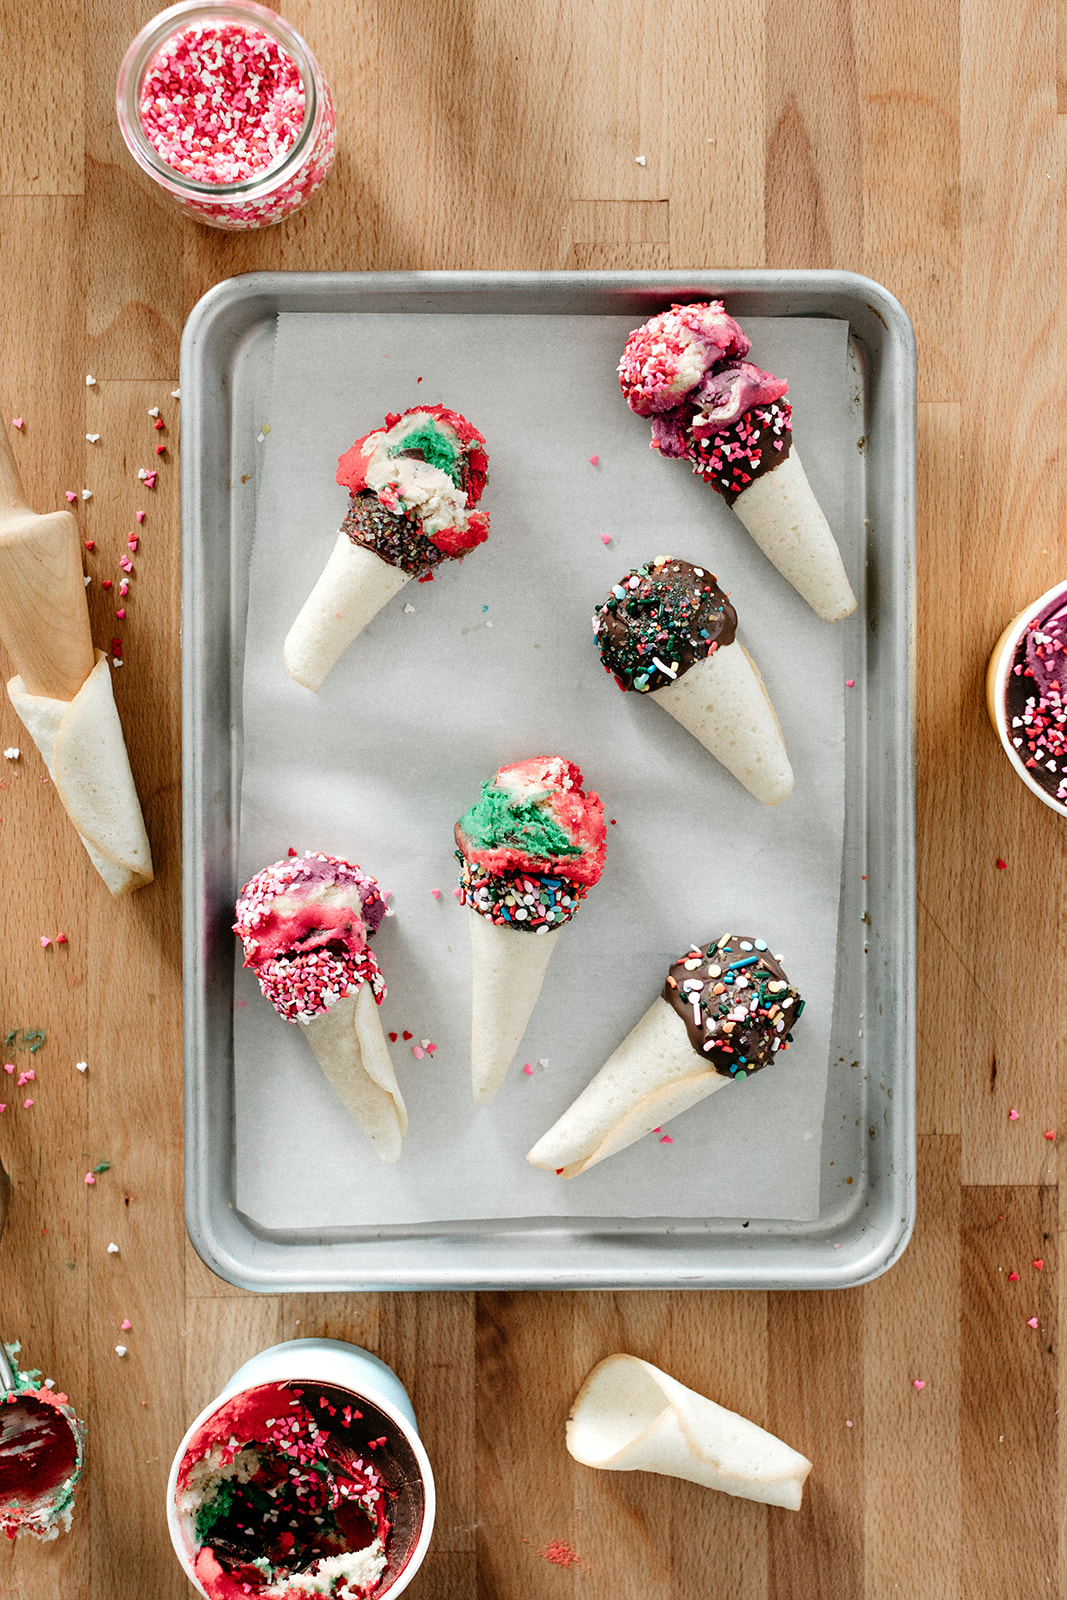
Because it’s fun to eat this dough in little scoops like an ice cream cone, I have a recipe for homemade mini cones today! They are not hard to make, you just need a cone mold (I use this krumkake mold) and an offset spatula. You can dip them in chocolate or leave em naked, and you can make them up to a few days in advance. Be prepared for your house to smell like an ice cream parlor! 


Homemade Mini Ice Cream Cones

yields 12

ingredients

1/2 c (100g) sugar

1/2 c (65g) all-purpose flour

1/2 tsp kosher salt

a pinch of ground cardamom

2 large egg whites

1/2 tsp vanilla extract

1/4 tsp almond extract

optional:

3 oz chocolate chips

sprinkles

clues

preheat oven to 375ºf. grease a baking sheet. grease a small (6”) wooden cone mold.

in a medium bowl, whisk together the sugar, flour, salt, and cardamom. add the egg whites and extracts and mix until you have a smooth spreadable batter, slightly thicker than the consistency of honey.

with a small offset spatula, spread two 1-tablespoon dollops of the batter into 3-inch rounds, at least 2 inches apart onto the greased baking sheet. this part gets a little sticky, but it doesn’t need to be perfect! (only bake 2 rounds at a time so that you have time to mold the cookies before they cool.)

bake until the edges are lightly browned, 5 to 8 minutes. working quickly (but carefully, so as not to burn your fingers), use a small offset spatula to flip a cookie over onto a work surface and then wrap it around the greased cone mold. remove it from the cone mold and then stand it up with the pointy end on top, propping it up as needed and cool fully.

repeat with the remaining batter, greasing the pan and cone mold each time. allow cones to cool to room temperature.

if desired, melt chocolate chips in a microwave or double boiler and dip the tops of the cooled cones into the melted chocolate and roll in sprinkles. place on a parchment lined plate and refrigerate until the chocolate is firm.

cones can be kept in the fridge or at room temperature for several days.


-yeh!

photos by chantell and brett!

black and white donuts + behind the scenes of a blog post!

Happy Tuesday, friends! Today I’m taking you behind the scenes of a blog post because behind the scenes stuff has always fascinated me and also because sometimes I get asked what a typical work day is like and by the time I’m finished explaining my answer I’ve usually lost whoever I’m talking to because it takes too long. My days are always different, one day I might be watching TV all day and making cake, other days I might be lying on the floor with all of my cookbooks open, reading about chicken. Ideally I’m wearing sweatpants but sometimes I brush my hair and put on lip gloss and we will get into when and why. Even though each individual day is different, the arc of creating a blog post, which typically happens over the course of a few weeks or months, is generally the same and fun though! So hold onto your butts because we’re about to get detailed. 

I’m partnering with Intel® on this post because their new Intel NUC Mini PC has helped me streamline the blog post writing process and make it even more fun and organized. 

Phase 1: brainstorming and research. I keep a list on my phone of recipes I want to make and add to it often. These are recipes that are inspired by my heritages, my travels, things I’ve learned about around town (like Funeral Hotdish!!), upcoming holidays, seasons, nostalgic food I grew up with, new ingredients, things I see on Instagram, and things I’m just really gosh darn craving. I schedule them out for blog posts based on what makes sense for upcoming holidays and seasons, and if there’s a recipe I want to make but there are already a million recipes for it on the internet and I don’t feel like I have anything to add to the world of, say, pumpkin blondies, I get rid of it.

When I commit to a recipe, I have a brainstorming session of what the outcome should be. It looks like me sitting on the couch, meditating on the theme of… well in this case, the donut. I think about how it should taste, what it should look like, ideally how it should be made, and, importantly, why I’m evening daring to take up space on the internet about it. Each recipe should serve a purpose, whether it’s to share a new idea or new-to-me ingredient or technique, tell a story, create a new design, or put my spin on an already existing idea. 

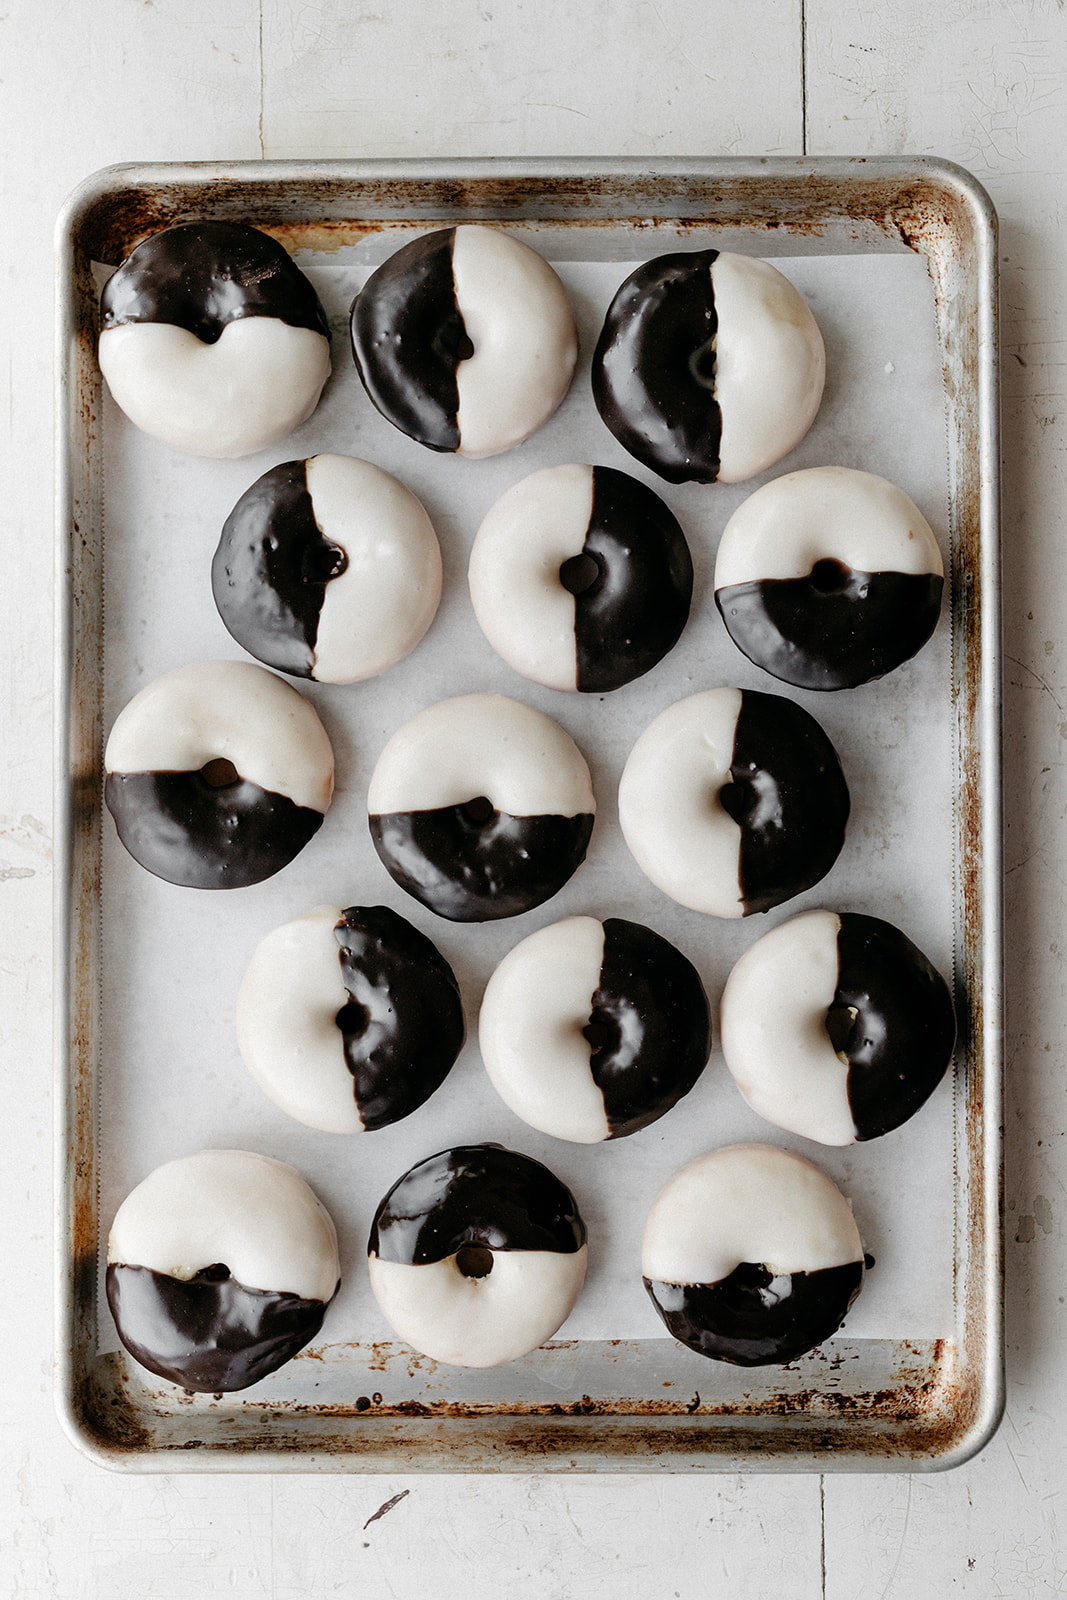
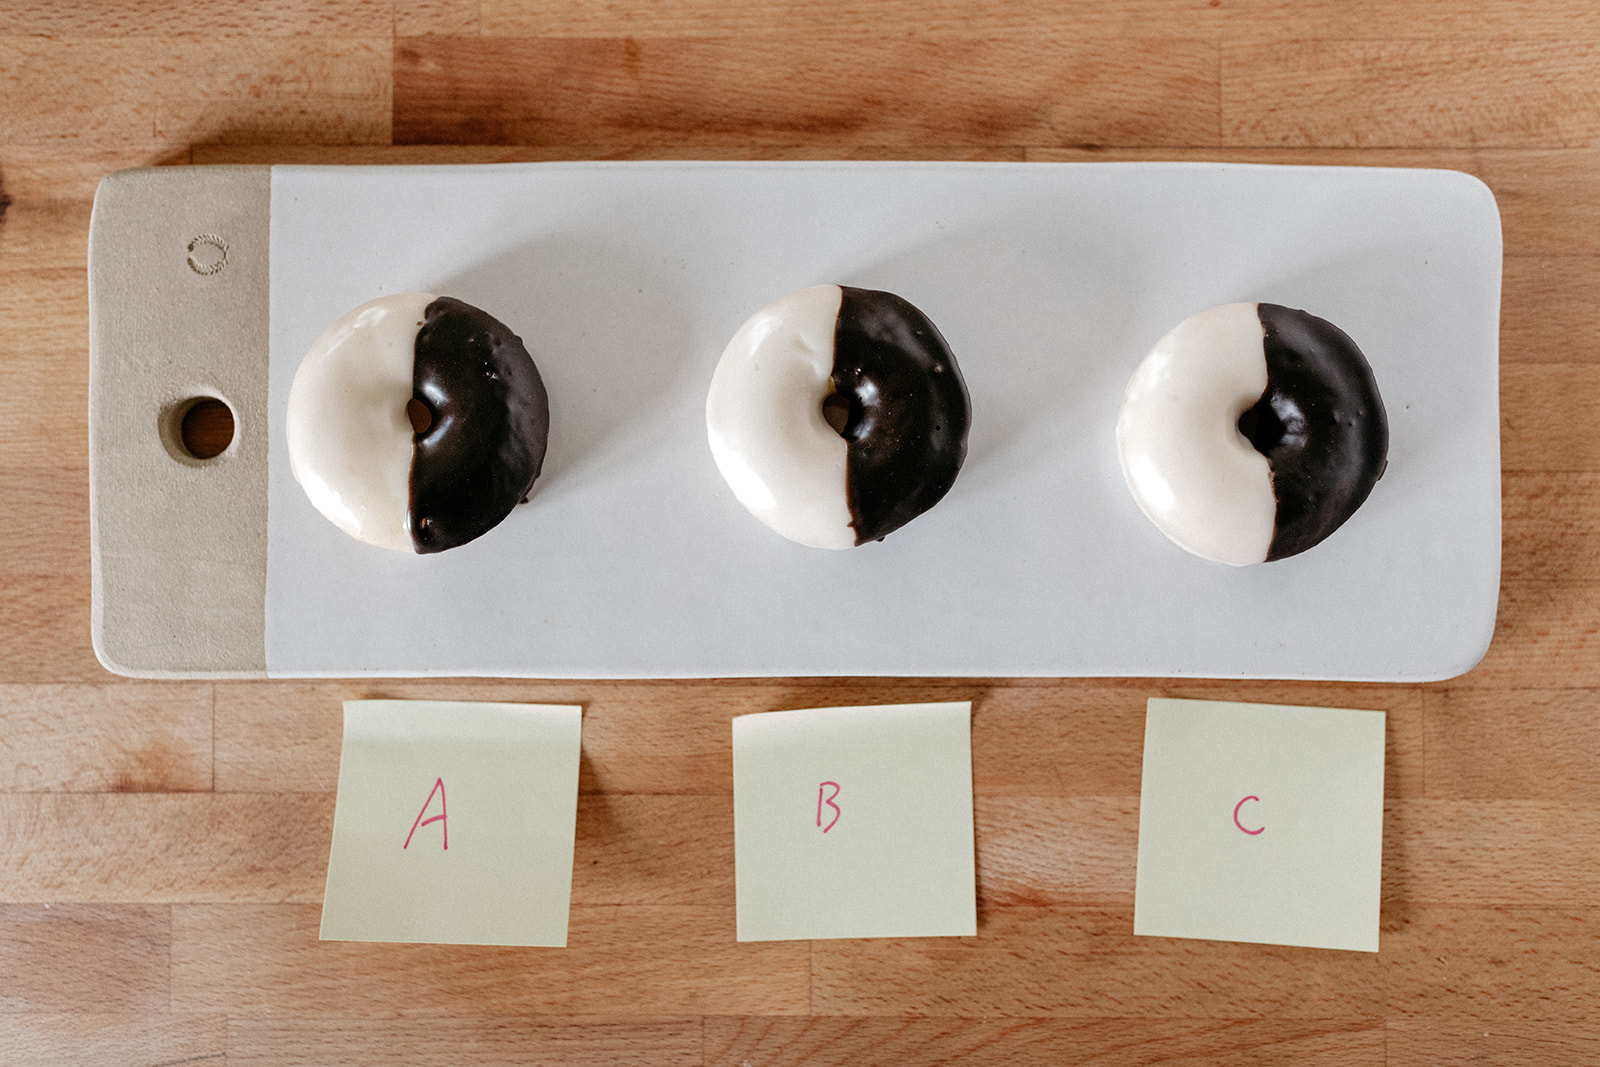
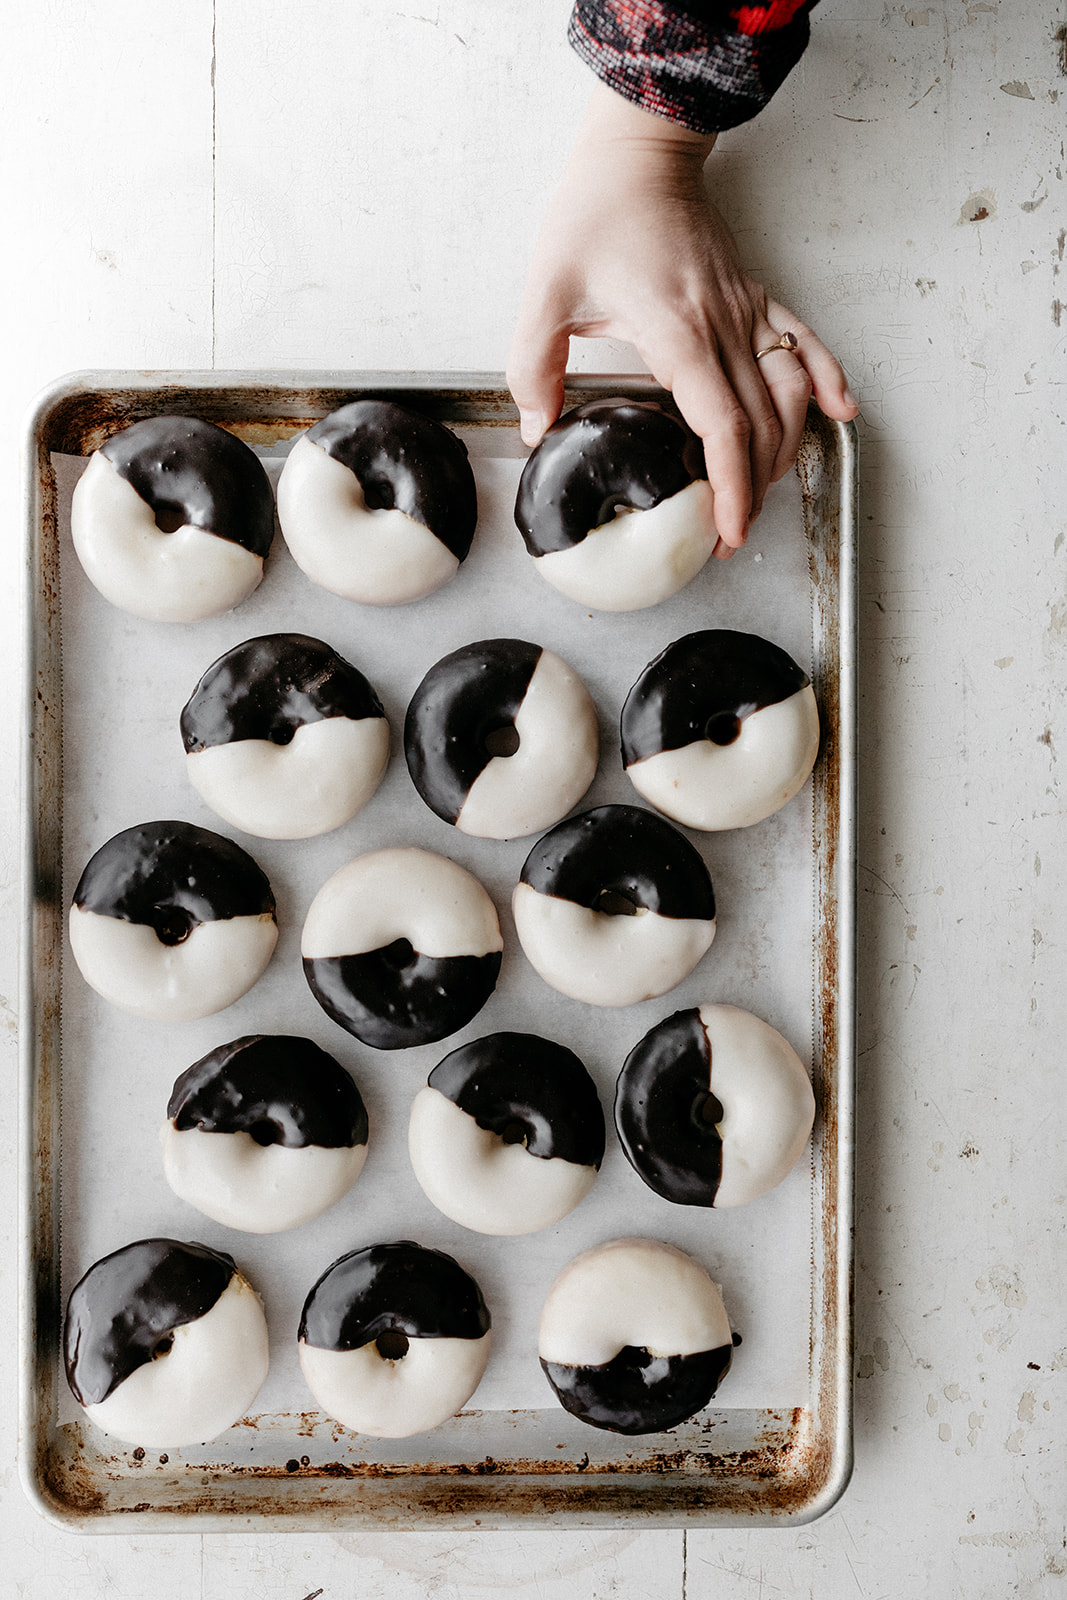
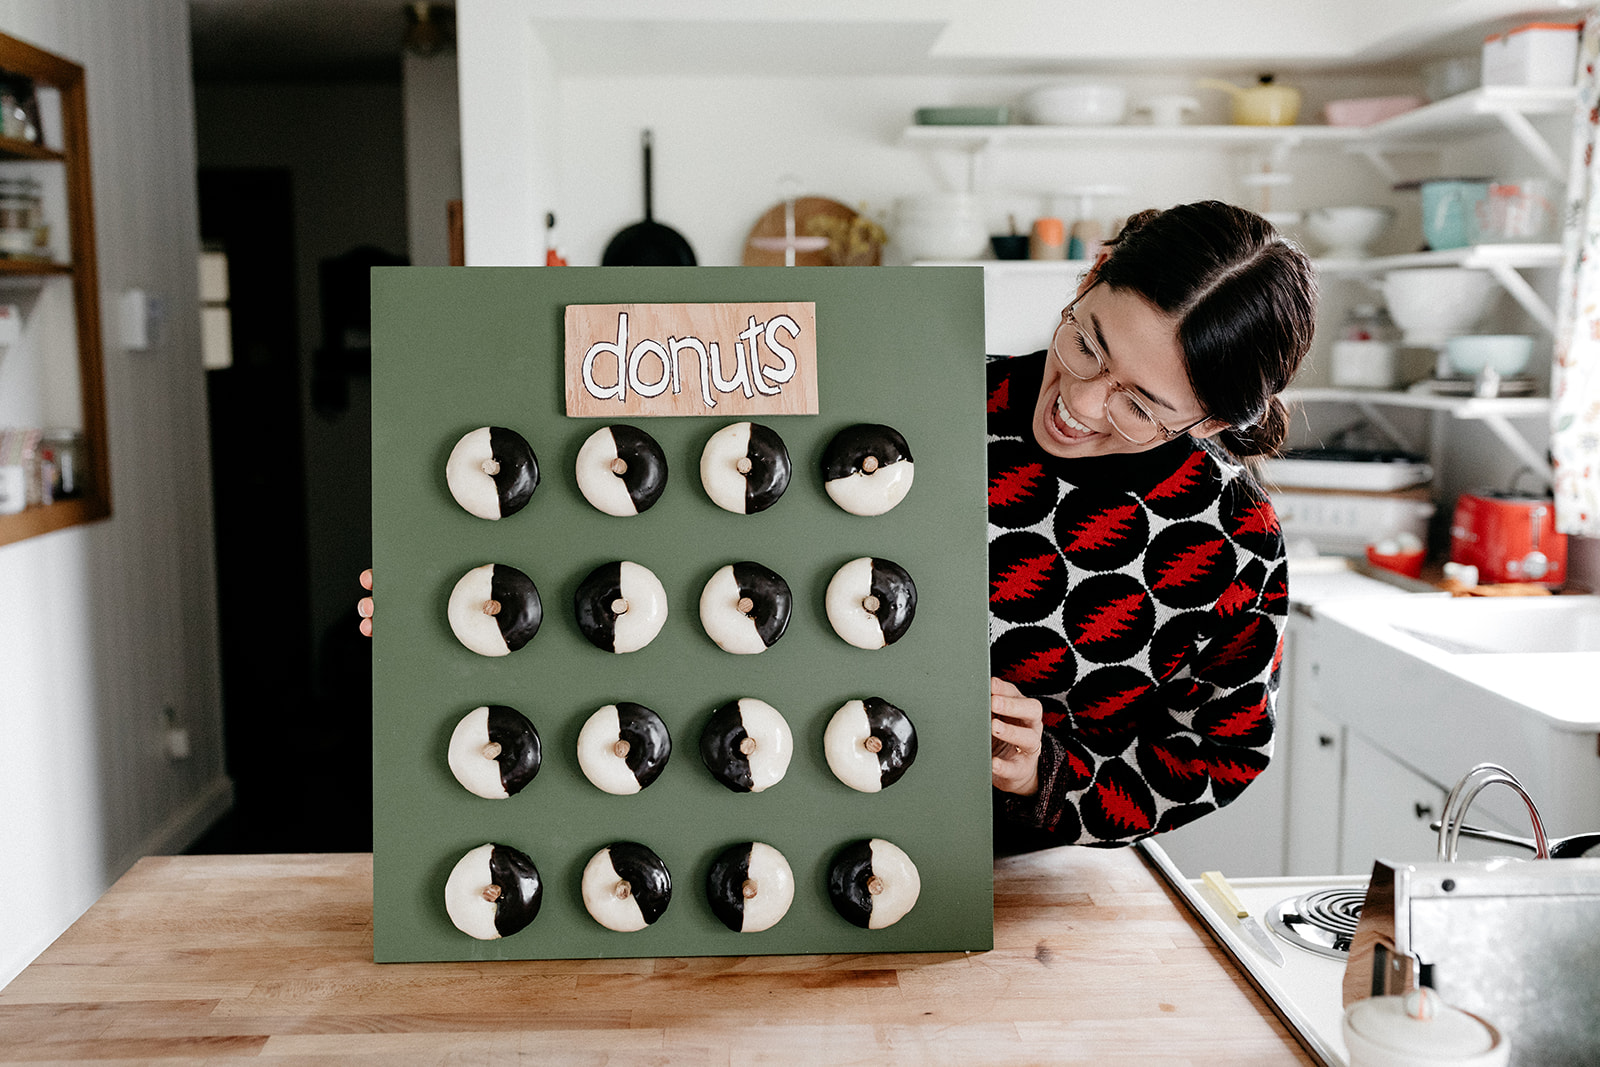
In the case of these black and white donuts, I’d never seen a black and white donut before and they sounded tasty and cute looking, so that’s the purpose! In terms of flavor, they should reflect the black and white cookie, which is cakey and flavored with vanilla and lemon, maybe a tiny bit of almond, and has a light tang thanks to either buttermilk or sour cream in the batter. The glaze should be thick and it should dry nicely, providing a sweet delicious shell.

Also coinciding with this brainstorming session is a research phase where I read all about black and white cookies and their history, as many recipes for them as I can find, I look at the #blackandwhitecookie hashtag to get design inspiration, and basically try and do everything short of rewatching the entirety of Seinfeld in order to find the black and white cookie mentions, because at that point that’s safely considered *getting sidetracked*. 

Basically I become one with the black and white cookie/donut. 

And then I write a first draft of a recipe, buy any necessary groceries, and start the best part, phase 2: making stuff!

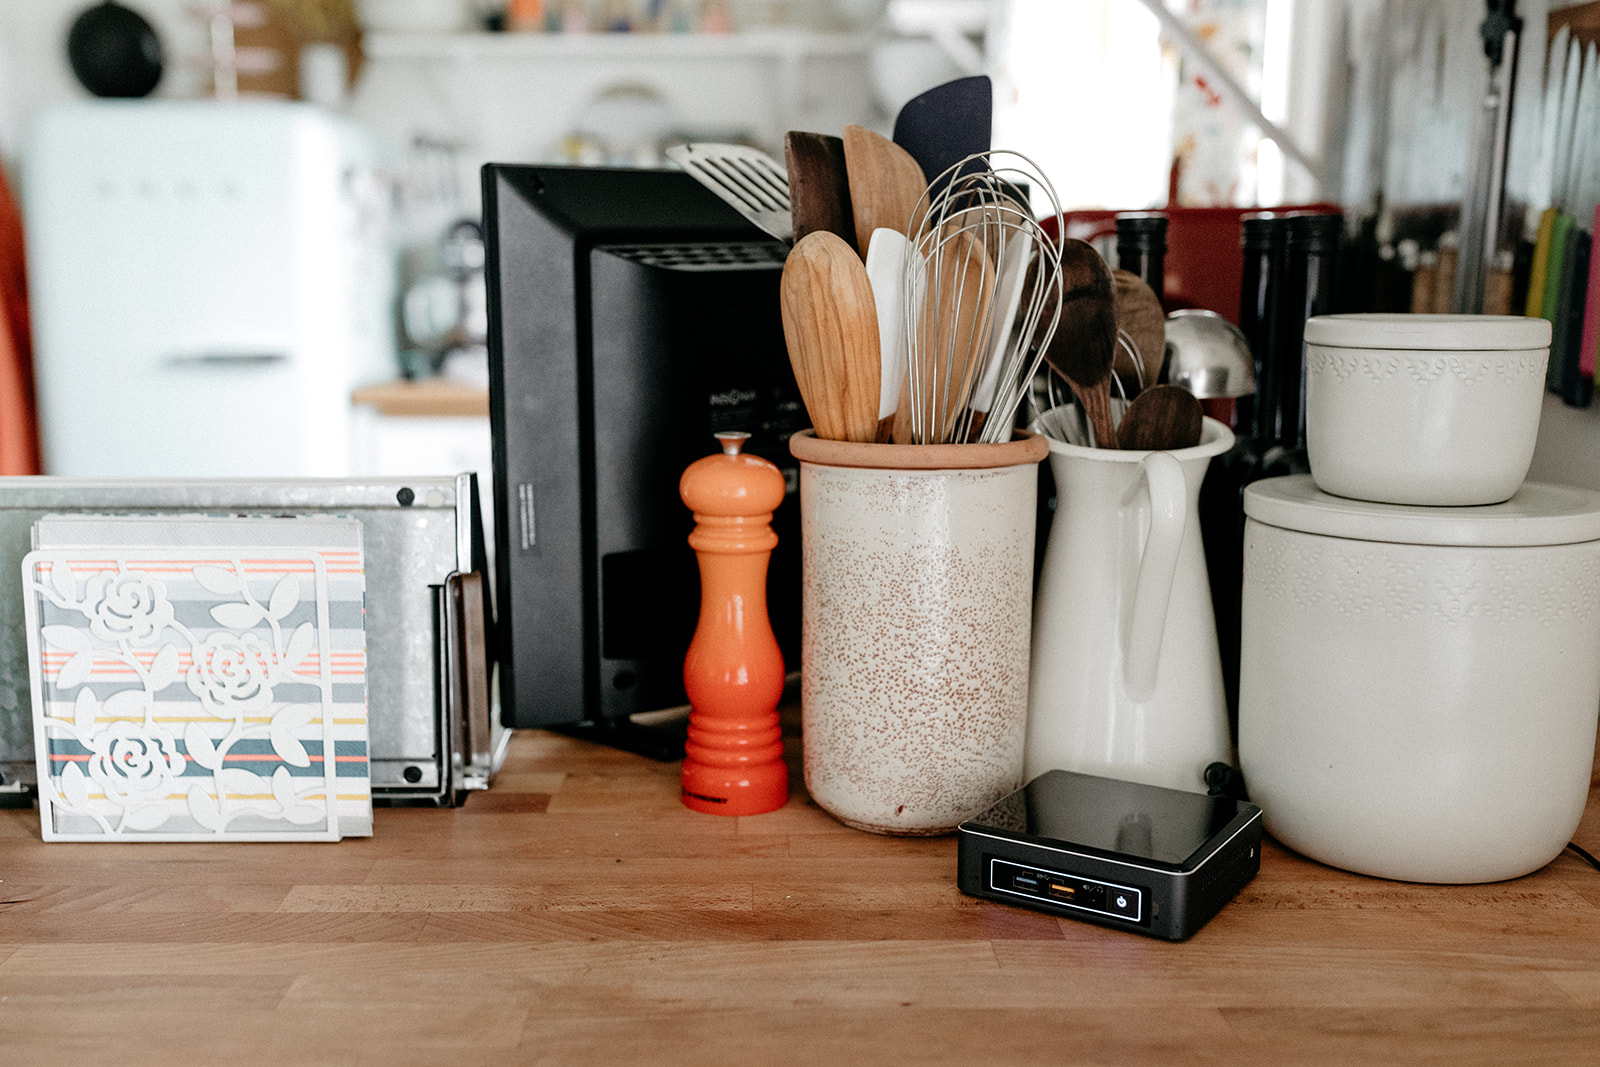
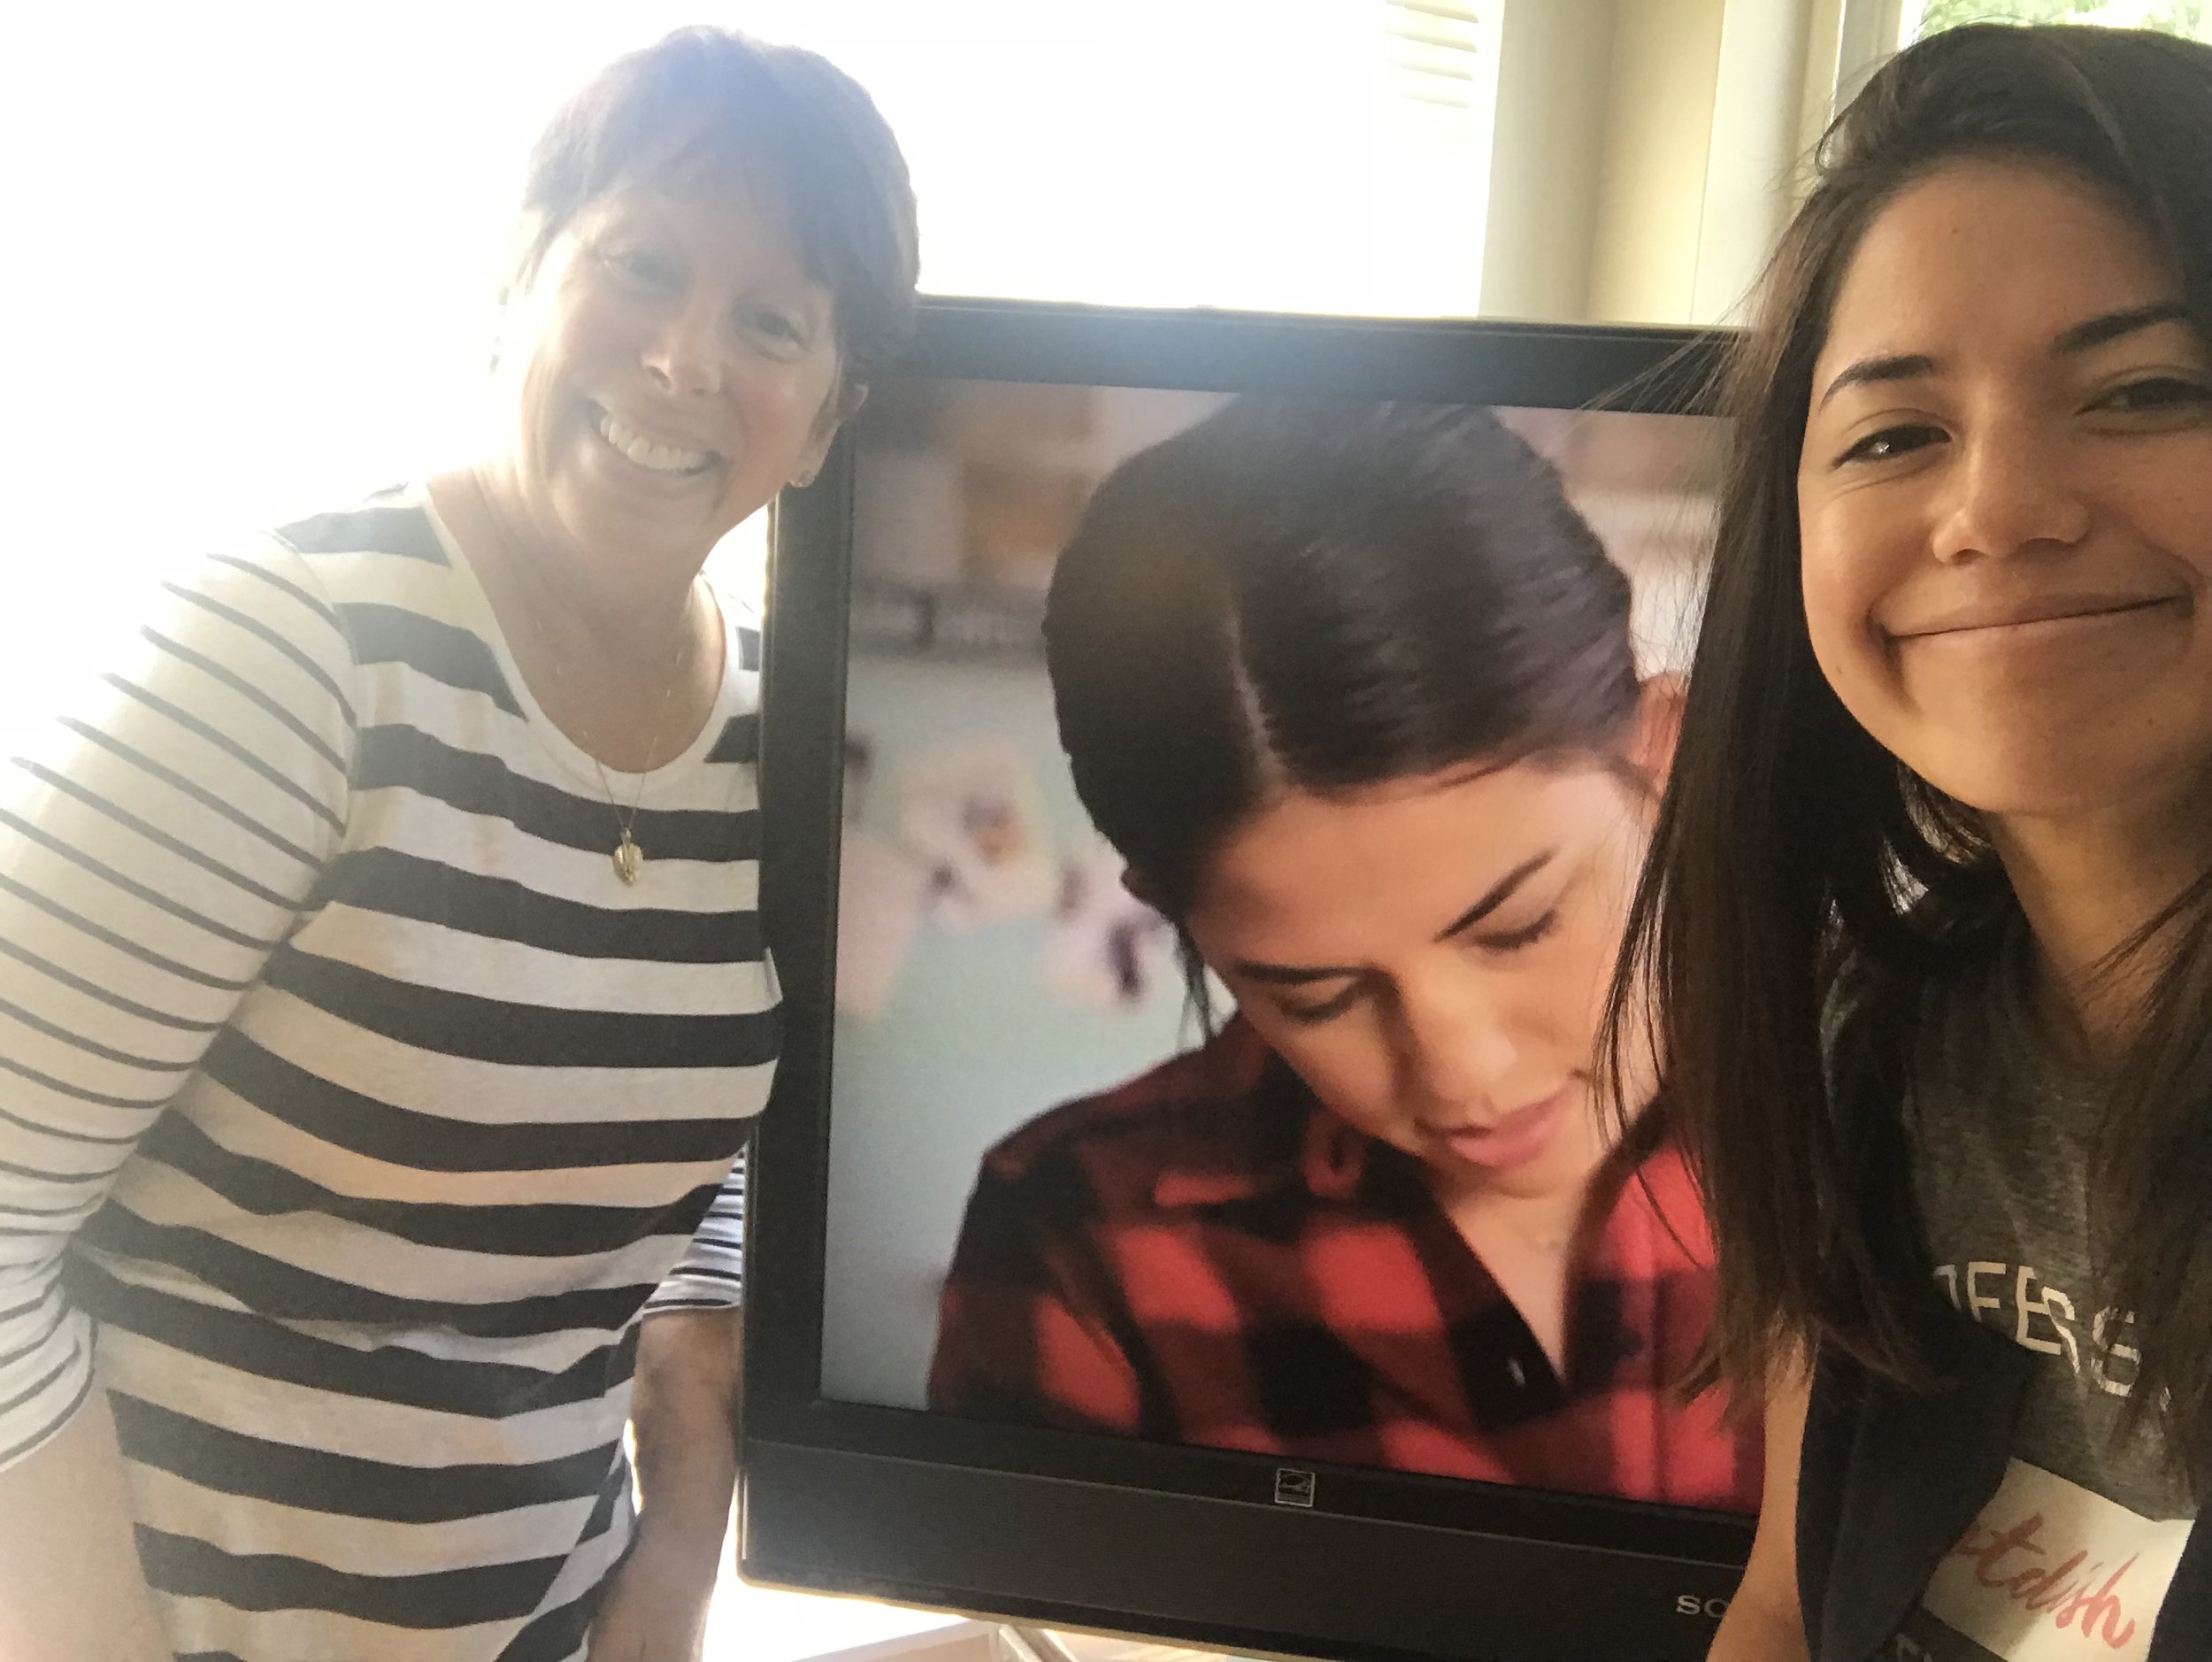
What used to be constant battles of Molly versus the missing/oil-stained post-it note with all of the recipe scribbles or Molly versus counter space versus a laptop that’s balanced on top of the flour canister is now a streamlined system of pulling up the recipe on my TV screen, which is hooked up to the NUC Mini PC. (You’ve rarely seen my TV screen because I always hide it when my photographers, Chantell and Brett, come to photograph recipes! But it’s how I stay sane working by myself most days, because I can have Bojack on in the background and then toggle over to my word doc to make recipe notes.)

I make a version of the recipe according to the draft, taste it, record any notes, and then copy and paste a new recipe draft with any recipe changes in bold. And I also bring in backup in the form of Eggboy. He may not know the first thing about making a donut but he is a really good taste tester! He is not afraid of telling me when a recipe sucks and is articulate in telling me what needs to change. And then it’s up to me to figure out how to achieve those changes. So then I get back to work and continue to test until it’s basically so good that Eggboy just doesn’t have any words and continues to take bites because he can’t help it and it’s as if the donut has taken over his brain. It might take 26 versions, it might just take 3 or 4.

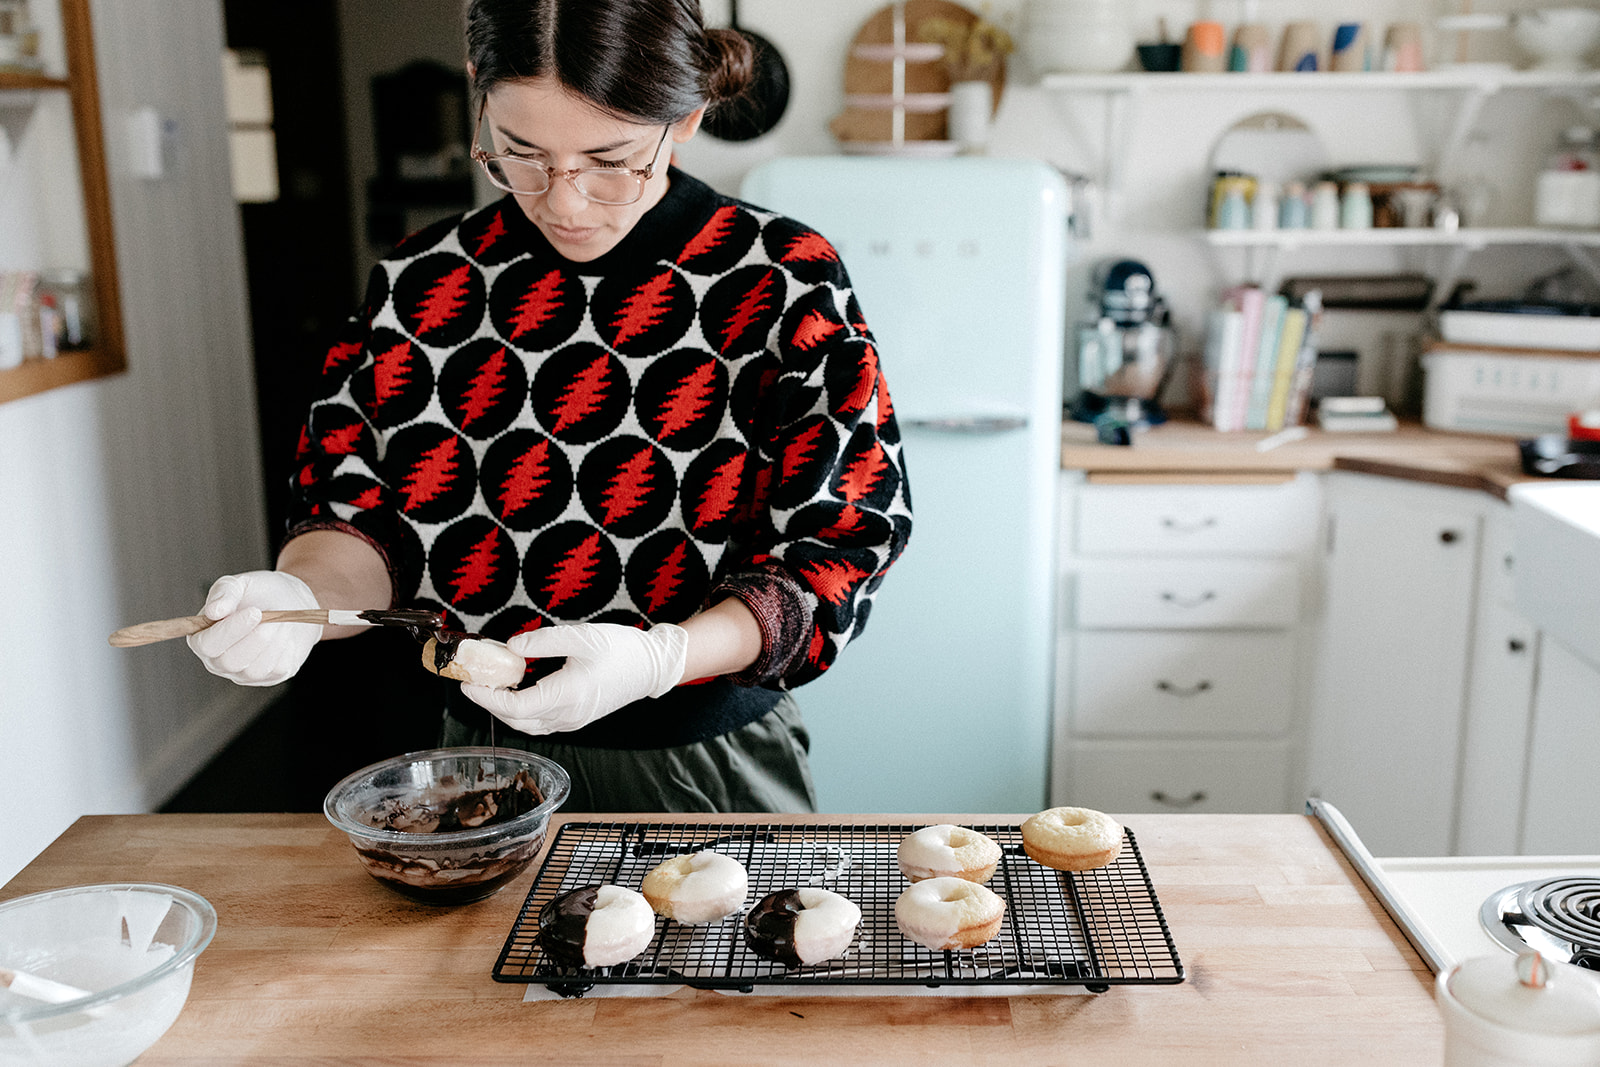
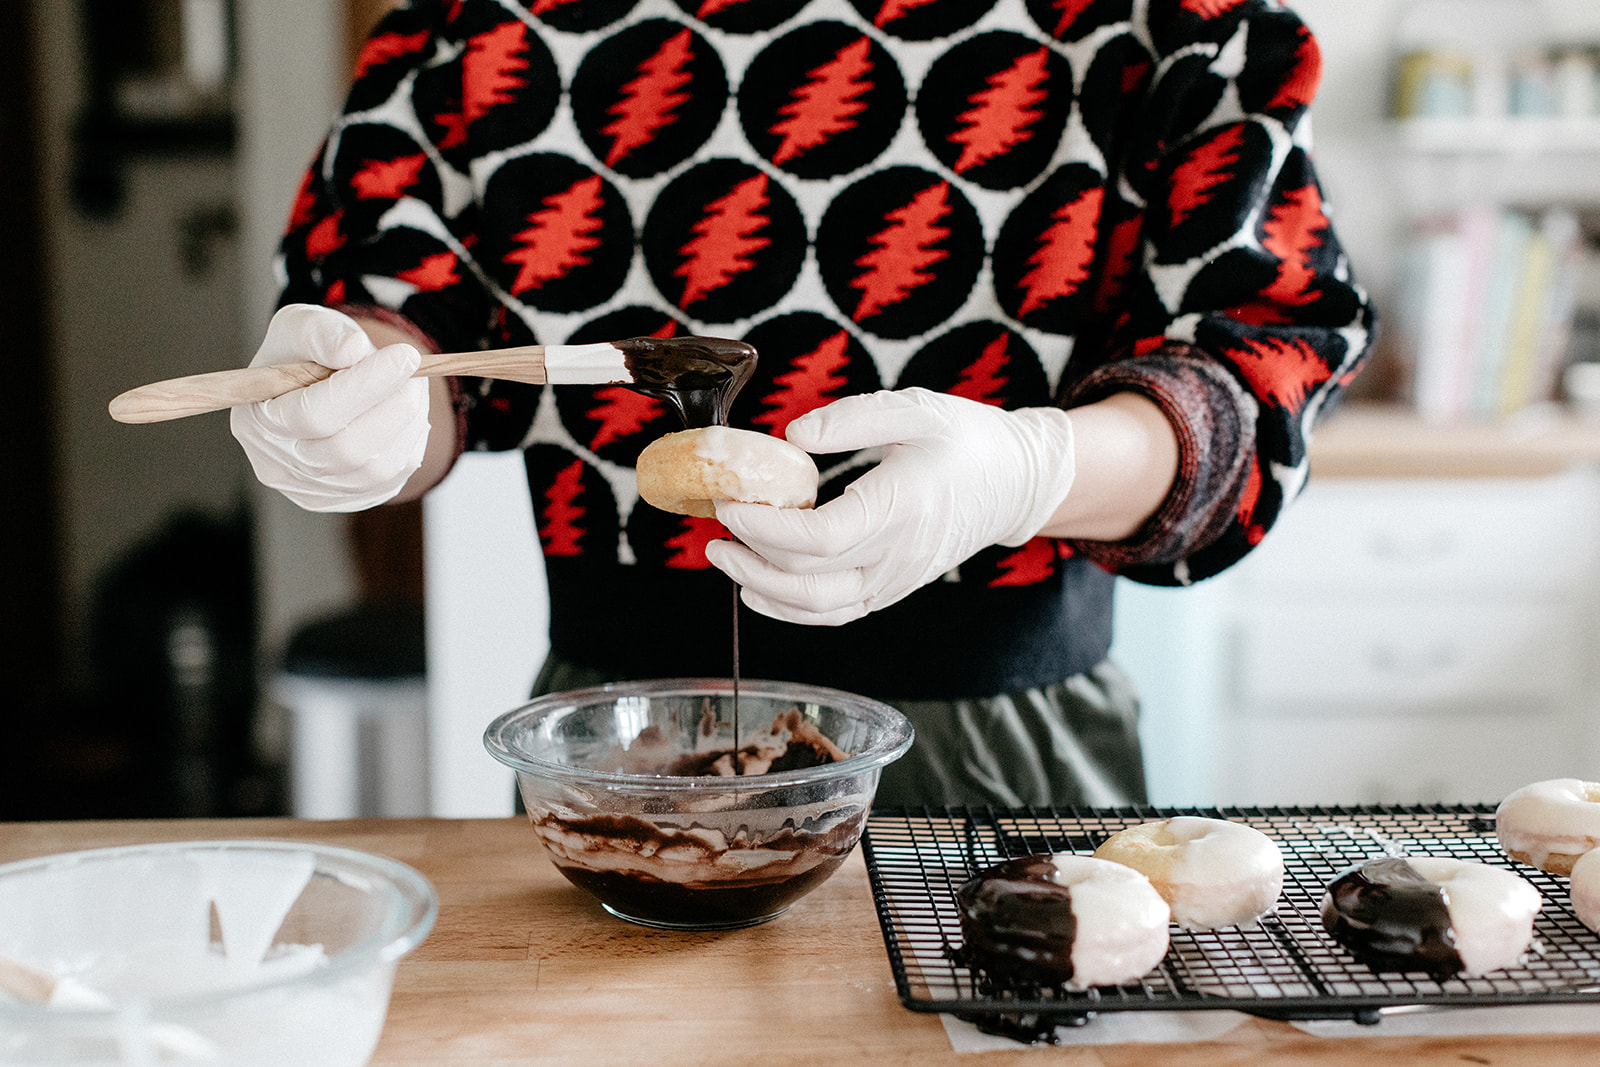
This recipe didn’t take too many versions because I already had a vanilla baked donut recipe that I liked (in Molly on the Range) and my primary focus was on sneaking in the lemon flavor and paying close attention to how that added acidity affected the rise of the donuts. I honed in on baking soda amounts and played around with a few different measurements there. I also tried a couple of different methods of glazing the donuts and found that a combination of dipping the donuts into the glaze and using a spatula to help it onto the donuts created my fave aesthetic.

After this testing period, leftovers get wrapped up and given to people or stuck in the freezer. These donuts will get defrosted and put out for beet harvest next week!

Once the recipe is where I want it to be, I move on to phase 3: prepping its photo shoot. I write down any particular steps I want to document, think about what angles will make the finished product look the best, pick out props and a wardrobe that will match everything, clean the kitchen, prep ingredients and complete any steps of the recipe that I won’t be showing on camera. For these donuts, I made some finished donuts, some unglazed donuts, some that just had white glaze on them, and a bowl each of chocolate and vanilla glaze. This prep usually happens the day before a shoot and I typically am prepping a few recipes at a time since shoot days often include a handful of recipes. I often have an assistant help with this but my kitchen assistant, Grace, just moved to Michigan :(

Phase 4: photo shoot! The morning of a shoot, I brush my hair and put on makeup! The first time in probably a while. And then Chantell and Brett arrive from Fargo and we get to work! Shoot days are fun because it’s so satisfying to play with finished recipes and we listen to music or have movies on in the background and at the end of the day I try to send them home with as many donuts and cakes as they’ll allow me to give them. 

Once I receive the photos, I sit on my couch and do phase 5: write the post. This is great because it’s cozy and also because I can have the NUC Mini PC hooked up to the hot tub-sized TV that Eggboy *had* to get last year to watch bike races. It’s great though because it’s big enough to see clearly from my couch and the NUC is powerful enough to deal with tons of photos on a regular basis without slowing down.

By this time I’ve been thinking about whatever my post is about for so long that ideally the words just flow right out. Sometimes—ok a lot of times—they don’t though and that might be when I get up and walk to the refrigerator, eat a piece of cheese, take a shower, or look at my phone. This is when 90% of procrastination happens. It’s gotta happen sometime!

Once the post is written, I organize which photos I’m going to use and how they’ll be laid out, and edit the recipe. Those get put into the backend of my site either by me or my assistant Hillary, along with any tags and links. And then it’s posted!

Ta da!

*Eats a donut*

black and white donuts

makes 12-16 donuts

Ingredients

Donuts

1 3/4 c (228g) all-purpose flour

1 c (200g) sugar

3/4 tsp kosher salt

1 tsp baking powder

1/2 teaspoon baking soda

Zest of 1/2 a lemon

1 large egg

1/2 c (120 ml) buttermilk

1/4 c (50 ml) flavorless oil

1 tsp vanilla extract

1/2 tsp almond extract

1/4 c (59 ml) water

Vanilla Glaze

2 1/4 c (270g) powdered sugar

1 tb light corn syrup

3-4 tb whole milk or buttermilk

A pinch of kosher salt

A splash of vanilla extract

Chocolate Glaze

2 c (240g) powdered sugar

1/4 c (20g) unsweetened cocoa powder

1 tb light corn syrup

3-4 tb whole milk or buttermilk

A pinch of kosher salt

Clues

To make the donuts: preheat the oven to 375ºF. Coat a 12-cavity donut pan with cooking spray and set aside.

In a large bowl, whisk together the flour, sugar, salt, baking powder, baking soda, and zest. In a medium bowl, whisk together the egg, buttermilk, oil, vanilla, almond extract, and water. Add the wet mixture to the dry mixture and stir until just combined. Fill a piping bag or ziploc bag with a corner snipped off with the batter and pipe the batter into the donut pans, filling each cavity halfway. If you have any remaining batter, you can bake it in a second batch.

Bake for 12 minutes, or until a toothpick inserted into a donut comes out clean. Cool in the pan for 5 minutes. Remove to a rack and cool completely. (A mini spatula helps remove them from the pans!)

To make the glazes, first make the vanilla glaze: mix together the sugar, corn syrup, 3 tablespoons of milk, salt, and vanilla. Add additional milk little by little until the mixture is pourable (you might not need the full remaining tablespoon). You want to be careful not to add too much milk because you want the glaze to be thick and opaque, but if the glaze is too thick it will have a hard time sticking to the donuts. You can always make adjustments by adding more powdered sugar to make it thicker or more milk to thin it out. Place a baking sheet or piece of parchment paper underneath the rack with the donuts and dip each donut halfway into the vanilla glaze, scraping off any excess glaze from the bottom and returning to the rack to dry. Let the vanilla glaze dry, 20-30 minutes if you’re impatient like me, but more like an hour or so if you want it to really be nice and solid, and then make the chocolate glaze.

To make the chocolate glaze, use the same method as mixing the vanilla glaze, and then carefully dip the unglazed half of the donuts into the chocolate glaze. With the chocolate side, I find it’s helpful to use a spatula to help the glaze nudge right up against the vanilla. Scrape excess glaze off of the bottom, place back on the rack, and let dry.

Enjoy!

These are best the day of, but can be kept for an additional couple of days at room temp in an airtight container.

-yeh!

photos by Chantell and Brett Quernemoen

Thank you, Intel, for sponsoring this post! The Intel NUC Mini PC is a small but mighty computer that is shorter than a tennis ball and ready to make photo editing and content creation a breeze. It’s equipped with Windows 10 and the latest Intel Core processors, and videos and movies can be viewed in 4k Ultra HD!

citrus rose thyme loaf cake

This is a fantastic phase of summer!!! Everything in our garden is suddenly ripe or about to be, the weather is still warm but hints to us in the evenings that fall is coming, school supply commercials are on the TV (!!!!!!!), and Eggboy is in his calm before the harvest storm. July is the month that is safely nestled between the end of spring planting the beginning of fall harvest, which means that he can take full days off at a time to do things like zip down to Chicago for a quick lil visit and clean out half of his office to make room for a desk for me so that I can clear out my kitchen desk to make room for our rice cooker and microwave. Going to Chicago and making room for our rice cooker have both provided me with endless amusement and excitement.

We had just a couple of days in Chicago last week, but we packed them to the brim with fun awesome summery things: Rite of Spring at Ravinia followed by a trip down Steak n Shake nostalgia lane with Jaclyn and Katie, falafel twice from my favorite falafel place, a Cubs game (which felt a little weird since I grew up a Sox fan but the Sox were at an away game and E-boy wanted to see Wrigley Field), a stroll around the Botanic Garden that transported us to Japan and back, and a Frank Lloyd Wright walking tour which honestly freaked me out because his houses, while beautiful, look dark and haunted. I also got to sample a ton of sweets that Mia made at baking and pastry camp. Baking and pastry camp!!! Kids are so cool these days. Overall it was a successful trip but I unfortunately could not locate the Caboodles in my stash of childhood things at my mom’s house so after this I’m going to put on my helmet and dig through Ebay. I mean, name a more perfect food coloring and piping tip container.

Speaking of cake decorating supplies, here’s a cake!!!

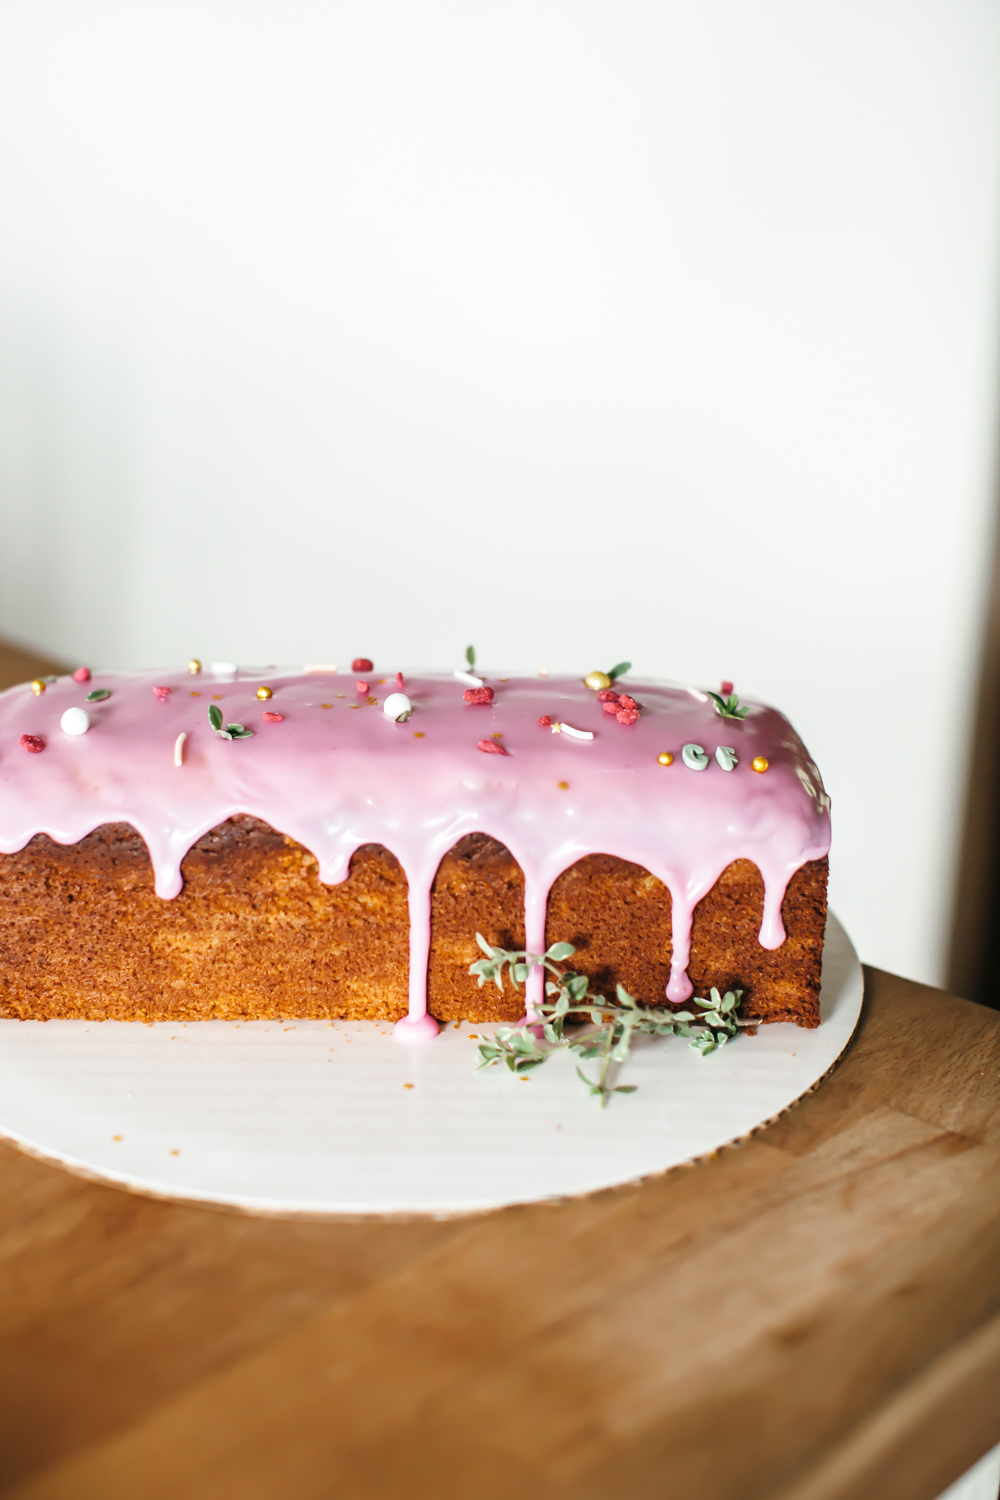
In Paris I spotted a beautiful citrus rose loaf cake at Rose Bakery and promptly wanted to recreate it. My version is similar to the grapefruit olive oil yogurt loaf in Short Stack Yogurt but uses lemon in the batter and rosewater in the glaze, and is sprinkled with fresh thyme since the thyme in our garden is currently very happy. The texture of this cake is what I love most: it is soo dense and luxuriously moist, yet it doesn’t feel too heavy thanks to the brightness of the citrus. And this is a really versatile cake! My friend Sam used orange zest/juice in this to make a layer for her wedding cake, and while I’ve never tried it, I feel like lime would be delicious in this as well. Overall it's a very simple cake to make but between the olive oil, rosewater, and thyme, it totally tastes ~fancy~.


citrus rose thyme loaf cake

makes 1 loaf

ingredients

1 1/2 c (190g) all-purpose flour
1/2 c (56g) almond meal
1 tsp kosher salt
1 tsp baking powder
1/4 tsp baking soda
1 tsp chopped fresh thyme leaves, from about 2 sprigs, plus more for decorating
zest of 1 lemon
1/4 c (68g) lemon juice (from about 1-2 lemons)
3/4 c (169g) whole milk greek yogurt
3/4 c (150g) extra virgin olive oil
1 1/4 c (250g) sugar
2 large eggs
1 tsp almond extract

Glaze
1 c (120g) powdered sugar
2-3 tb (28g-42g) whole milk greek yogurt
3/4 tsp rosewater
1/4 tsp almond extract
A pinch of kosher salt

red or pink food coloring, optional

sprinkles, for decorating, optional
 

clues

Preheat the oven to 350ºf. Grease and line a loaf pan with parchment paper so that the parchment comes up all the way on two of the sides. 

In a medium bowl, whisk together the flour, almond meal, salt, baking powder, baking soda, thyme, and zest. In a separate small bowl, whisk together the lemon juice and yogurt until very smooth. In a large bowl, whisk together the olive oil and sugar until combined.  Add the eggs, one at a time, whisking very well after each. Stir in the almond extract. Add the dry ingredients and yogurt mixture in three alternating additions, whisking after each until just combined. Pour into the loaf pan and bake until a toothpick inserted into the center comes out clean; begin checking for doneness at 55 minutes. Let cool in the pan for 10 minutes and then use the parchment wings to lift the loaf out of the pan and transfer it to a wire rack to cool completely. 

Meanwhile, make the glaze. In a medium bowl whisk together the powdered sugar, 2 tablespoons yogurt, rosewater, almond extract, salt, and food coloring, if using. It will seem like there isn’t enough yogurt at first but keep on stirring. If the mixture is too thick to spread once it’s fully combined, add more yogurt bit by bit until it becomes spreadable but you want it fairly thick so that the drips hold their shape down the side of the cake. Spread the glaze onto the top of the cooled cake, sprinkle with thyme leaves and sprinkles and enjoy.


-yeh!

smoked butter shortbread with violet buttercream

Alright nerds, I have a Twelfth Night cookie for you!!

Last month, North Dakota Shakespeare put on a production of Twelfth Night in our town square and it was so great!! Eggboy and I packed the cutest ever picnic and I was brought way way back to Mrs. Meyer's junior year English class when I triumphed my way through Shakespeare, thanks to Sparknotes. You too? Ok cool. 

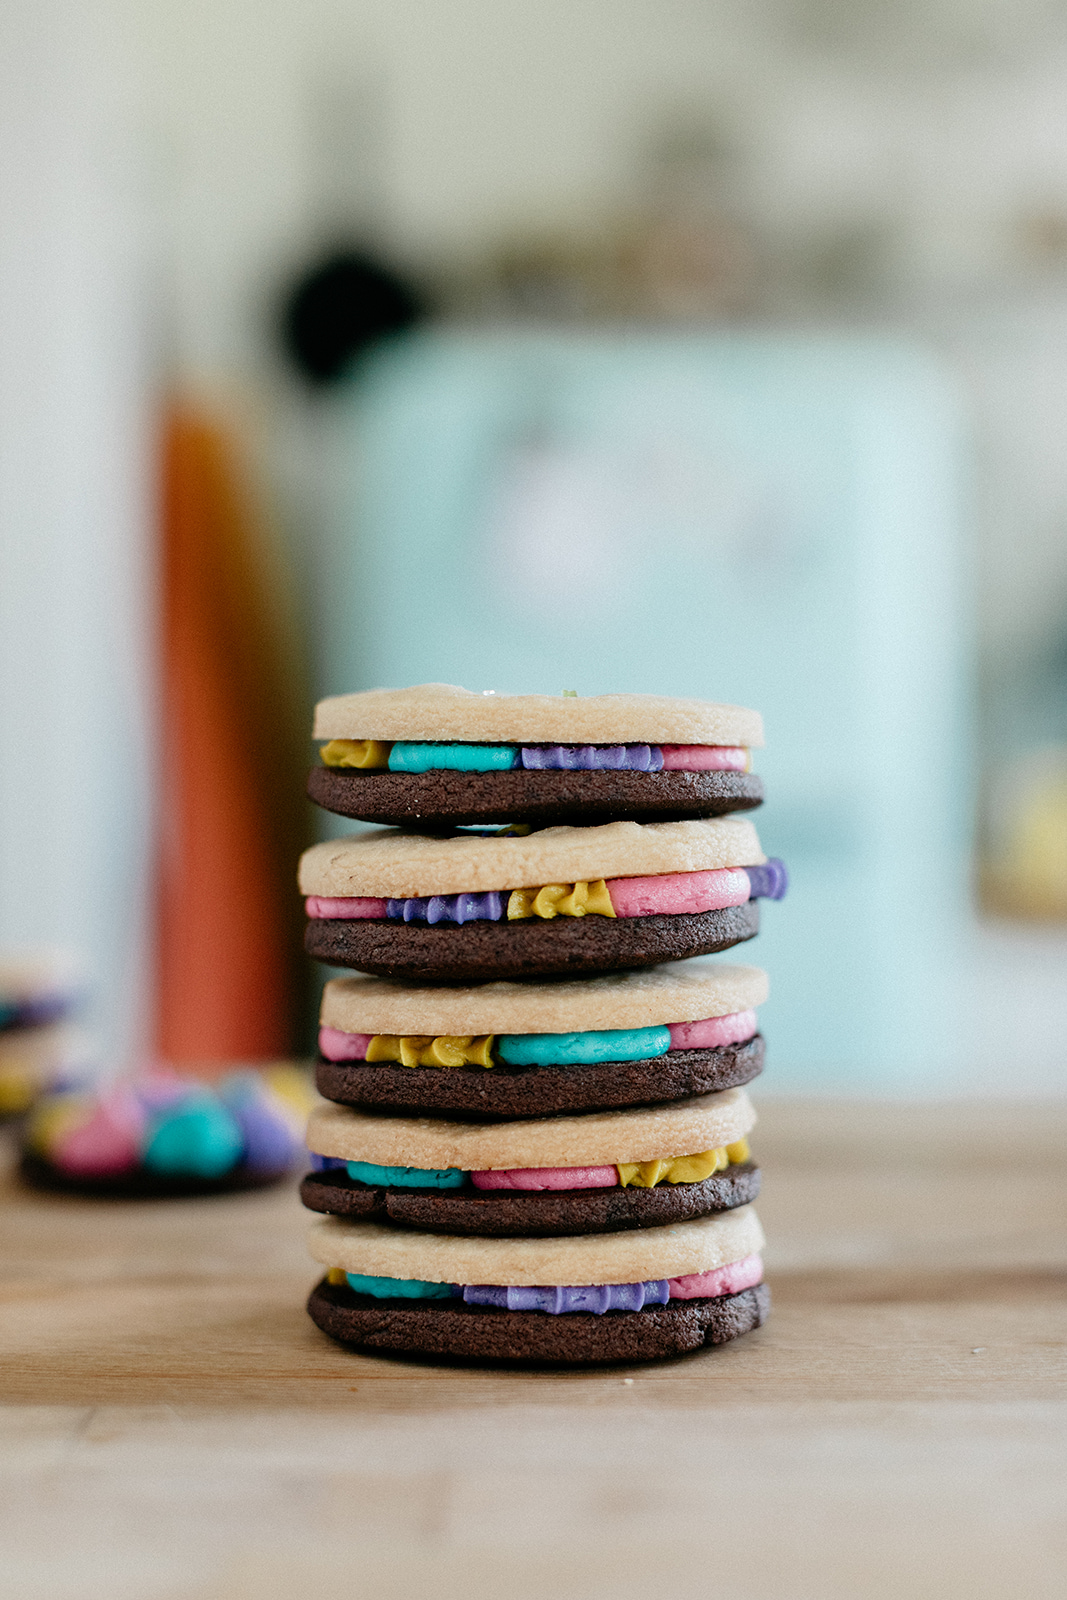
Just like last year’s rose cookies for Romeo and Juliet, I created this special Twelfth Night cookie to be sold the week of shows. This cookie is kind of all over the place but Twelfth Night kind of is too?! Like that play’s a lil drunk right?? But the important part is is that these cookies taste good and get you thinking about the play. So here are all of the references wrapped up into this chocolate and smoked butter and floral sandwich cookie:

Smoked butter cookies with cinnamon, nutmeg, and cloves: these cookies have the same spices as the traditional English Twelfth Night Cake which was the predecessor to the King Cake. And what’s great is that the spices compliment the smoked butter element, which was a nod to this particular performance being outside during the summer, as they smelled faintly like a campfire. 

Yellow lemon buttercream: a nod to Malvolio’s yellow stockings!

Purple violet buttercream:

 “O, it came o’er my ear like the sweet sound

That breathes upon a bank of violets,

Stealing and giving odour.” 

Green rose buttercream: the fact that the rose buttercream is colored green and not pink is a reference to the theme of mistaken identity that’s all throughout the play. Rose is also inspired by Orsino saying something about lying on a rose covered bed.

Yellow, green, and purple buttercream: A nod to the King Cake, which grew out of the Twelfth Night Cake tradition.

Pink buttercream: it symbolizes the role of gender in the play and love, and also throws off the King Cake reference because having something as straightforward as a King Cake reference wouldn’t be in the spirit of this very wild play. It’s also pretty.

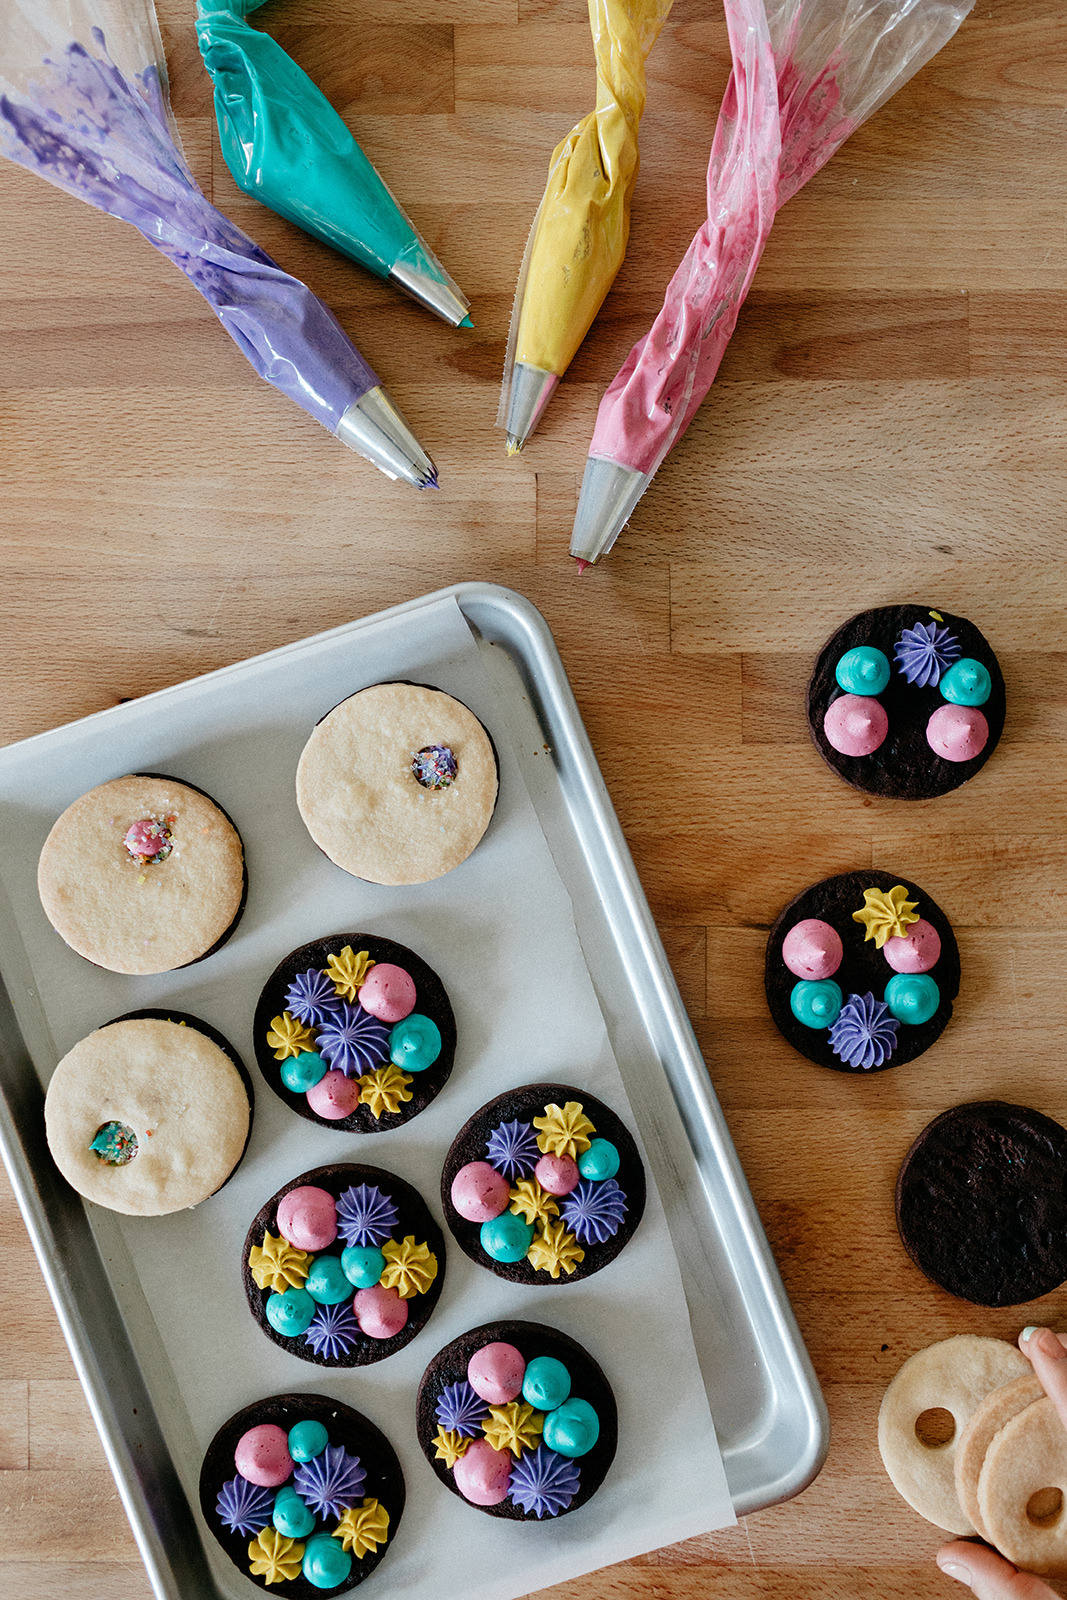
Chocolate shortbread: This represents the darkness of Malvolio’s prison. And it makes this a sandwich cookie, which represents the twins! I was also inspired by the cookies in this photo that I've had saved on my phone for forever.

…that’s it! Did I get a good grade??

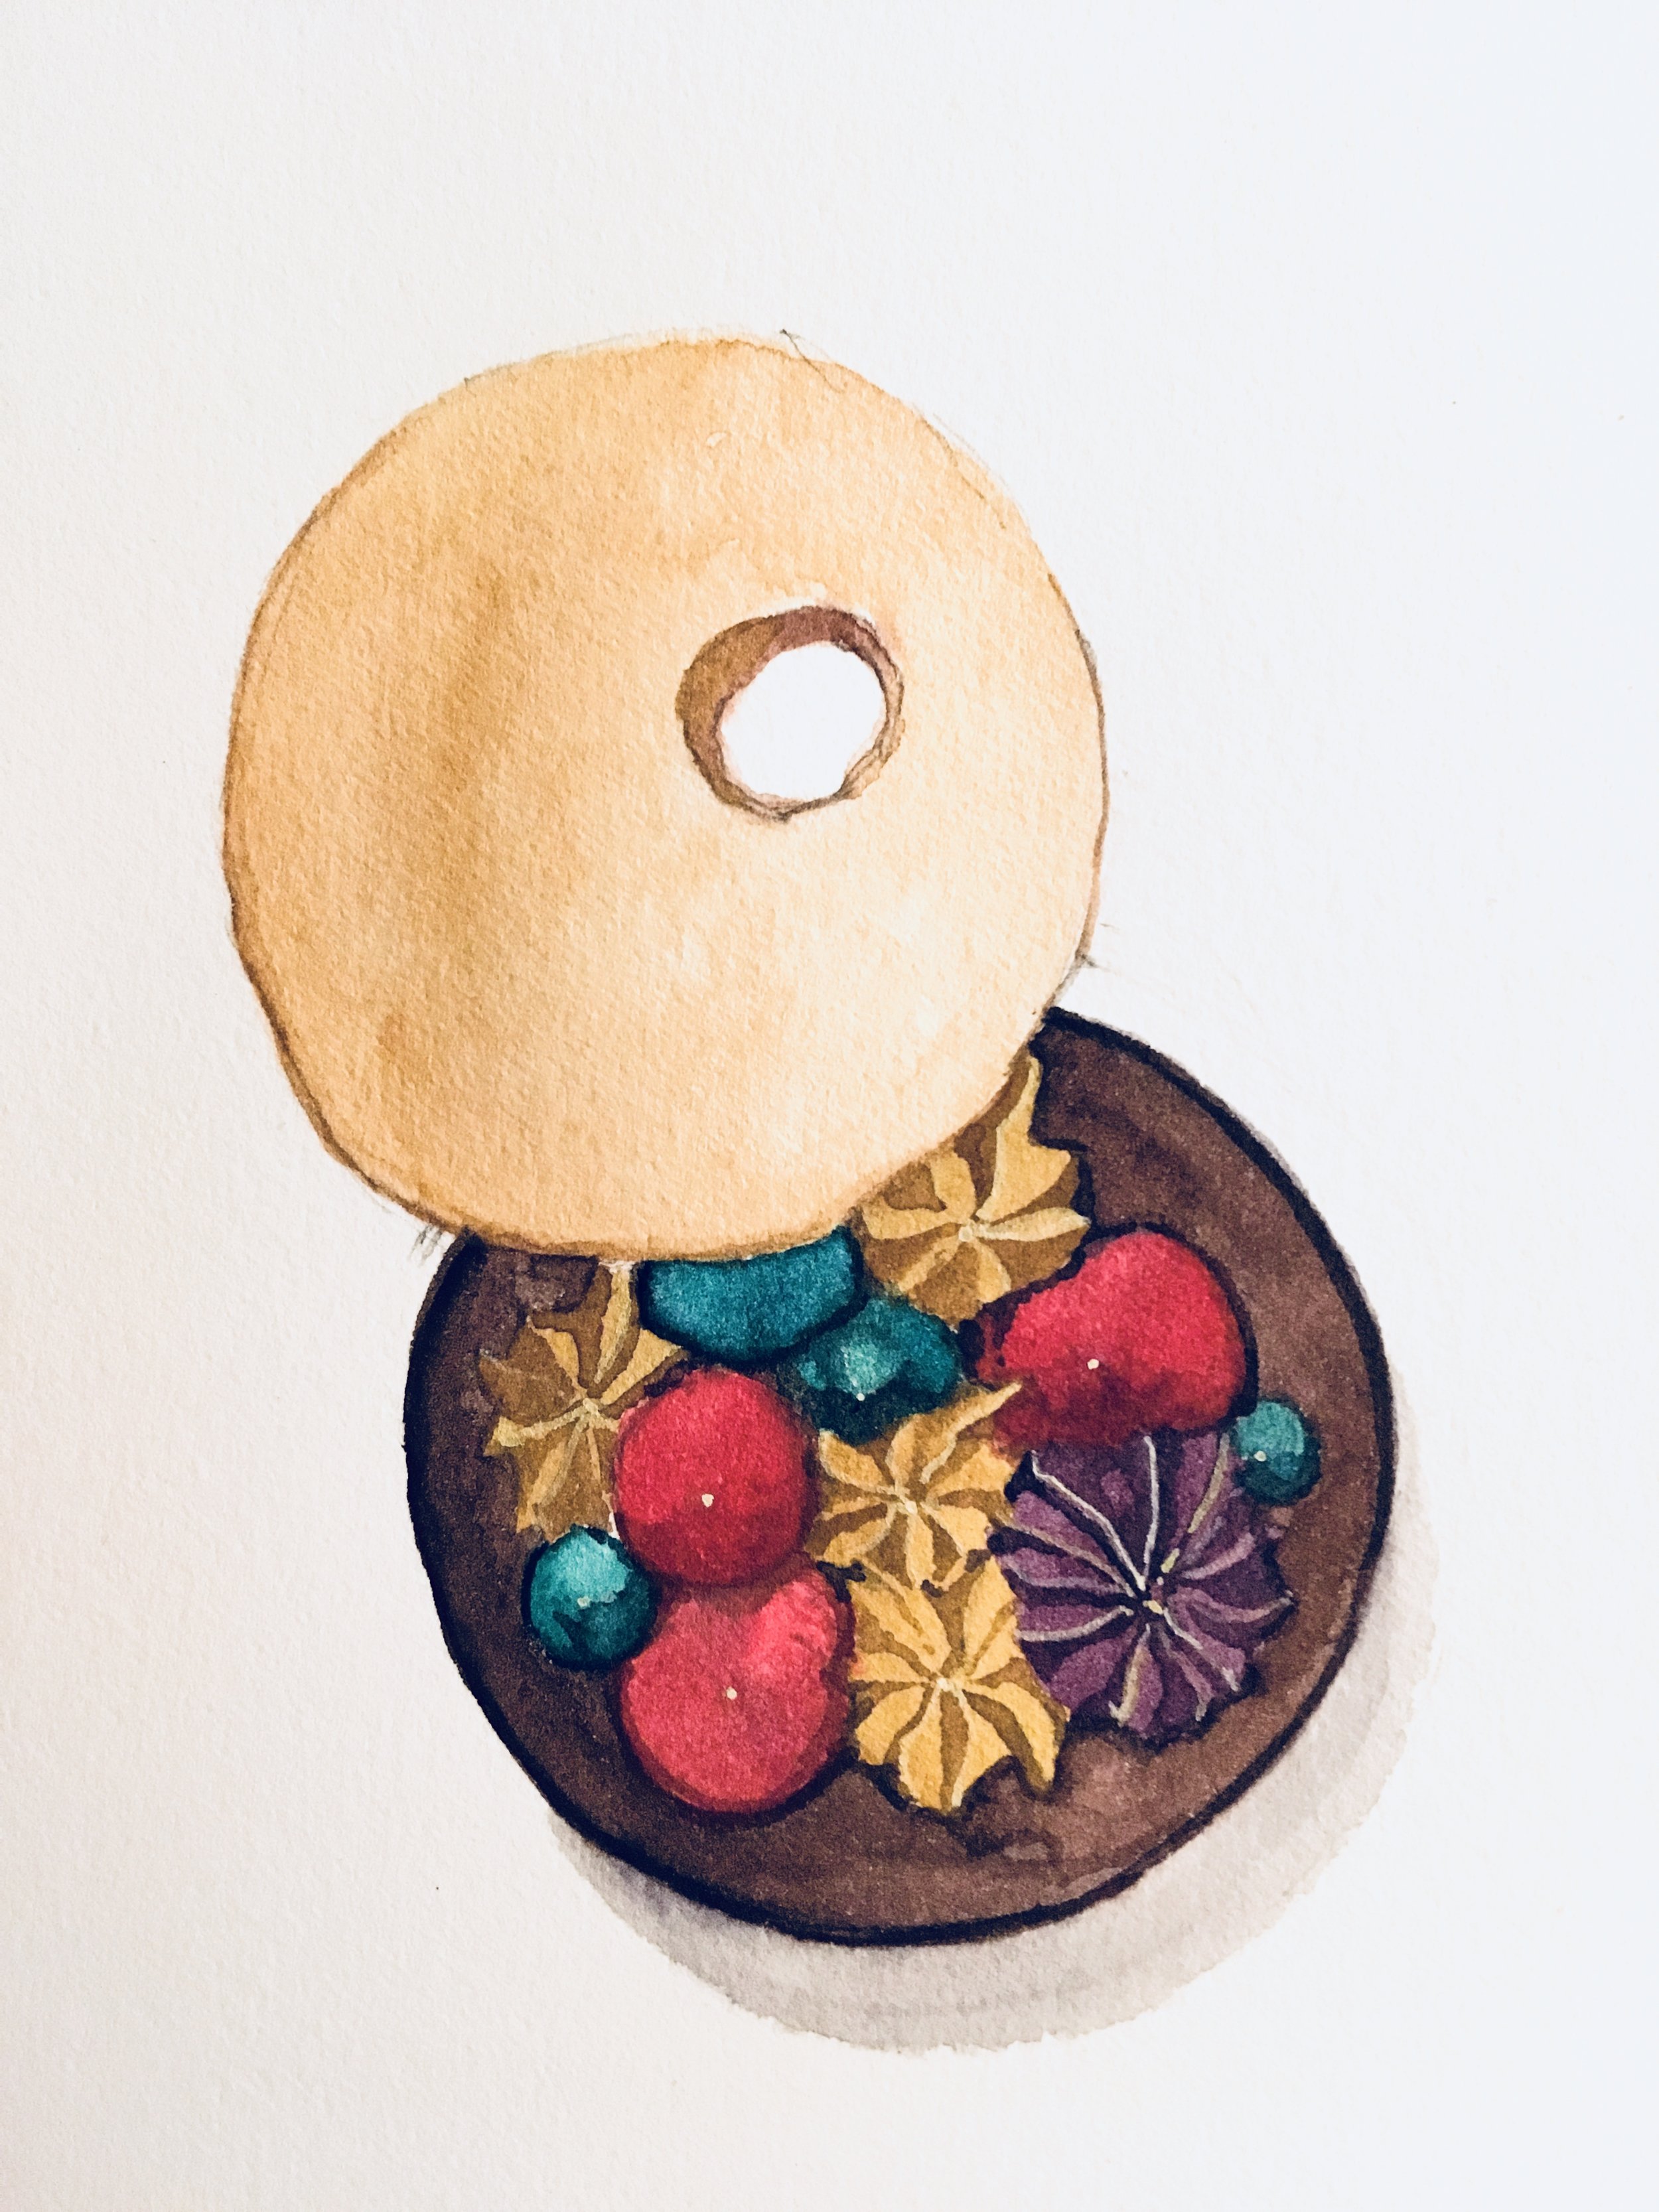
My awesome friend Mollie drew a picture of it that was displayed during the shows with all of these references:

Here is the recipe for the full cookie, four kinds of frosting and everything. The chocolate shortbread, rose buttercream, lemon buttercream, and vanilla buttercream are all things you’ve seen here before, so what I’m most excited about in this recipe are the smoked butter shortbread and violet buttercream. 

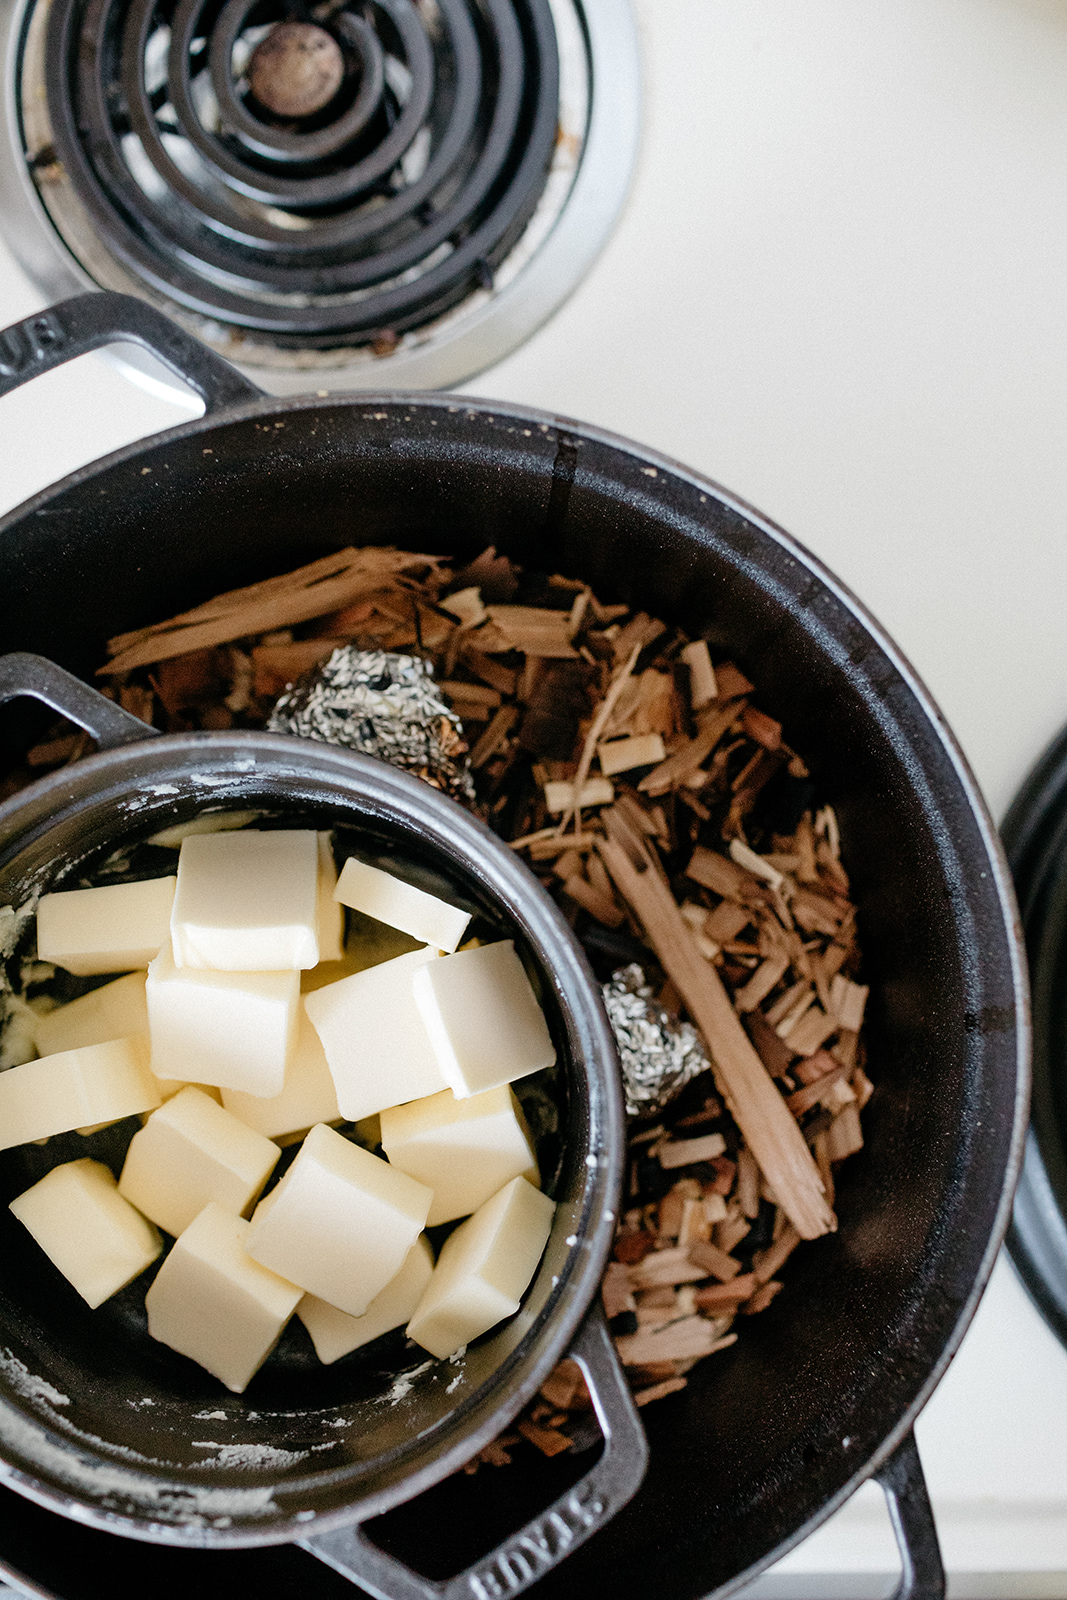
Smoking butter is something I first read about in Katrin Bjork's beautiful cookbook, From the North. I always figured I’d need fancy tools to smoke stuff but when I read this recipe I realized that all I needed were wood chips and a dutch oven. What you do is you heat up some wood chips and then place a bowl of butter on top of them (propped up by some balls of aluminum… if you look in the photo below you can spot them). I found that heating it for about an hour gave it a smoky enough flavor to hold up in baking the cookies, but if you're just smoking butter to serve with bread or radishes, you can smoke it for less time. The process makes the house smell like a campfire which is never a bad thing. The options for what to do with smoked butter are endless and range from spreading it on toast to making a cake with it (how wild would smoked sprinkle cake be?!). It adds a smoky flavor that’s much more subtle than liquid smoke. These shortbread cookies are fairly simple and have some warm spices tossed in that amp up the smoky flavor.

Violet buttercream is a display of my new loyalty to melodramatic purple as the new millennial pink. I ordered violet syrup from Amazon and it smells like a snow cone! Not a specific flavor of snow cone, just general snow cone. Or like, how the blue sparkly snow cone flavored lip gloss that I owned in the 90s smelled. A few splashes of the syrup in a basic buttercream give it a light floral/candy like flavor, and then I added some purple food coloring because the color of the syrup isn’t that concentrated. 

Twelfth Night Cookies

Makes 12

Ingredients

Smoked Butter Shortbread: 

1 c + 2 tb (146g) all-purpose flour, more for dusting
1/2 c (60g) powdered sugar
1/2 tsp kosher salt
1/4 tsp cinnamon
1/8 tsp nutmeg
a pinch of cloves
1/2 c (113g) smoked butter, at room temperature (recipe below)
1 tsp vanilla extract 

Chocolate Shortbread:

3/4 c + 2 tb (113g) all-purpose flour, more for dusting
6 tb (30g) dutch cocoa powder
1/2 c (60g) powdered sugar
1/2 tsp kosher salt
1/2 c (113g) unsalted butter, at room temperature
1 tsp vanilla extract 

Violet Buttercream:

3/4 c (168g) unsalted butter, at room temperature
2c (240g) powdered sugar
A pinch of kosher salt
1 tb heavy cream
2 tb violet syrup
A squeeze of lemon juice
Purple food coloring
 

Clues

To make the smoked butter shortbread, combine the all of the dry ingredients in a stand mixer fitted with a paddle attachment. Add the butter and mix on low until crumbly. Sprinkle in the vanilla and continue to stir, scraping the sides of the bowl down with a rubber spatula occasionally. Increase the speed and continue to mix until the clumps start to get bigger and the dough starts to come together. Scrape the dough onto a surface and bring it together with your hands into a big ball. Pat it out into a disc, wrap it in plastic wrap, and refrigerate for 30 minutes.

Preheat the oven to 350ºF and line two baking sheets with parchment paper.

On surface dusted with flour, roll the dough out until it’s 1/4” thick, dusting with additional flour if it’s sticky. Cut out 2 1/2” circles and transfer to the baking sheets, an inch apart. If desired, cut out smaller circles within the big circles using a round piping tip. Bake until lightly browned around the edges; begin checking for doneness at 12 minutes. Let cool for 5 minutes un the pans and then transfer to a wire rack to cool completely. 


To make the chocolate shortbread, repeat the same steps as the smoked butter shortbread.

To make the buttercream, beat together the butter, sugar, and salt until creamy. Add the heavy cream, violet syrup, lemon juice, and food coloring and beat to combine. Taste and adjust as desired. Alternatively, to make the four buttercream flavors pictured: don’t add the violet syrup or food coloring. Divide into four and mix in 1/2 tb violet syrup to one part, 1/4 tsp rosewater to another, 1/4 tso vanilla extract to another, and a pinch of lemon zest to the last. Add food coloring as desired.

To assemble, pipe the buttercream between two cookies and smoosh. Enjoy! 

These can be stored in the fridge for up to a few days!


Smoked butter

Makes about 1/2 cup


Ingredients

About 2 c Hickory wood chips (other wood chips work too)
10 tb (131g) unsalted butter

Clues

Cover the bottom of a big dutch oven with wood chips. Ball up three big pieces of aluminum foil to make three golfball-sized balls. Place them on top of the chips; they’ll be used to prop up the bowl of butter. Cover the dutch oven and heat over medium high for 10 minutes. Place the butter in a heat safe bowl and place the bowl on top of the aluminum balls. Reduce the heat to medium low and cover the pot, allowing a small opening to vent. Cook for 1 hour. Let the butter cool and allow it to come back to around 65-70ºf. You can let it sit at room temperature overnight or stick it in the freezer for about 20 minutes, stirring occasionally, until spreadable and opaque.