
black and white donuts + behind the scenes of a blog post!
/
Happy Tuesday, friends! Today I’m taking you behind the scenes of a blog post because behind the scenes stuff has always fascinated me and also because sometimes I get asked what a typical work day is like and by the time I’m finished explaining my answer I’ve usually lost whoever I’m talking to because it takes too long. My days are always different, one day I might be watching TV all day and making cake, other days I might be lying on the floor with all of my cookbooks open, reading about chicken. Ideally I’m wearing sweatpants but sometimes I brush my hair and put on lip gloss and we will get into when and why. Even though each individual day is different, the arc of creating a blog post, which typically happens over the course of a few weeks or months, is generally the same and fun though! So hold onto your butts because we’re about to get detailed.
I’m partnering with Intel® on this post because their new Intel NUC Mini PC has helped me streamline the blog post writing process and make it even more fun and organized.
Phase 1: brainstorming and research. I keep a list on my phone of recipes I want to make and add to it often. These are recipes that are inspired by my heritages, my travels, things I’ve learned about around town (like Funeral Hotdish!!), upcoming holidays, seasons, nostalgic food I grew up with, new ingredients, things I see on Instagram, and things I’m just really gosh darn craving. I schedule them out for blog posts based on what makes sense for upcoming holidays and seasons, and if there’s a recipe I want to make but there are already a million recipes for it on the internet and I don’t feel like I have anything to add to the world of, say, pumpkin blondies, I get rid of it.
When I commit to a recipe, I have a brainstorming session of what the outcome should be. It looks like me sitting on the couch, meditating on the theme of… well in this case, the donut. I think about how it should taste, what it should look like, ideally how it should be made, and, importantly, why I’m evening daring to take up space on the internet about it. Each recipe should serve a purpose, whether it’s to share a new idea or new-to-me ingredient or technique, tell a story, create a new design, or put my spin on an already existing idea.
In the case of these black and white donuts, I’d never seen a black and white donut before and they sounded tasty and cute looking, so that’s the purpose! In terms of flavor, they should reflect the black and white cookie, which is cakey and flavored with vanilla and lemon, maybe a tiny bit of almond, and has a light tang thanks to either buttermilk or sour cream in the batter. The glaze should be thick and it should dry nicely, providing a sweet delicious shell.
Also coinciding with this brainstorming session is a research phase where I read all about black and white cookies and their history, as many recipes for them as I can find, I look at the #blackandwhitecookie hashtag to get design inspiration, and basically try and do everything short of rewatching the entirety of Seinfeld in order to find the black and white cookie mentions, because at that point that’s safely considered *getting sidetracked*.
Basically I become one with the black and white cookie/donut.
And then I write a first draft of a recipe, buy any necessary groceries, and start the best part, phase 2: making stuff!
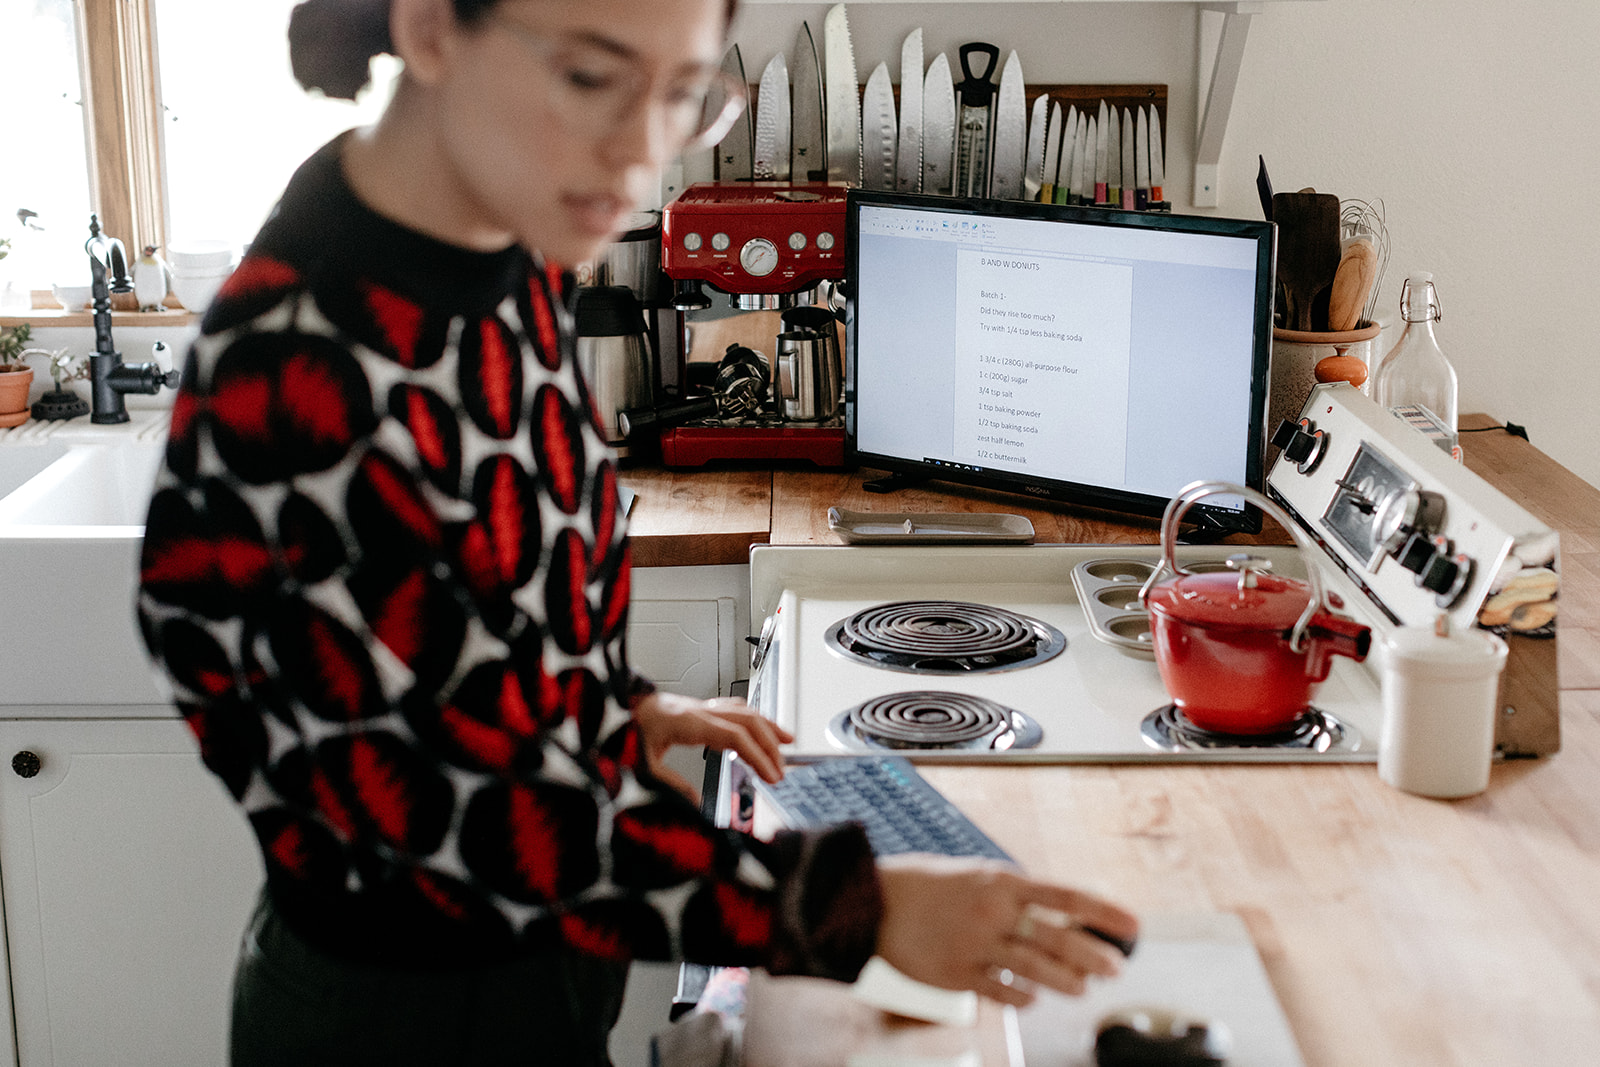
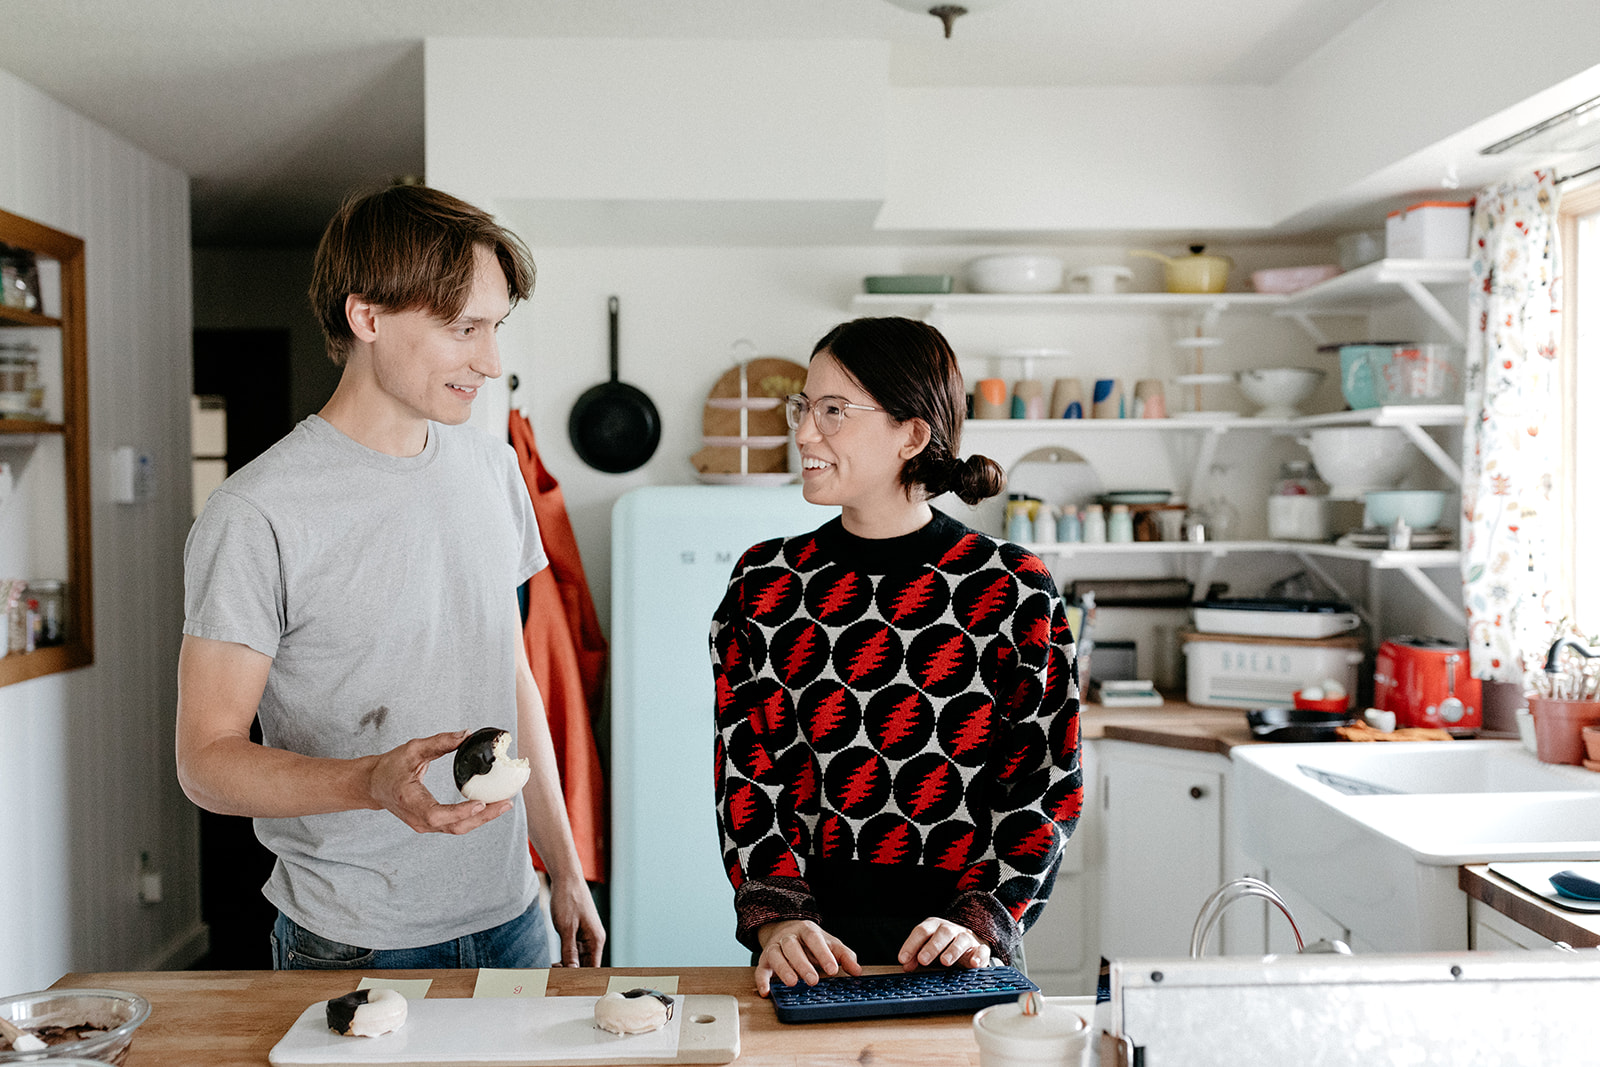
What used to be constant battles of Molly versus the missing/oil-stained post-it note with all of the recipe scribbles or Molly versus counter space versus a laptop that’s balanced on top of the flour canister is now a streamlined system of pulling up the recipe on my TV screen, which is hooked up to the NUC Mini PC. (You’ve rarely seen my TV screen because I always hide it when my photographers, Chantell and Brett, come to photograph recipes! But it’s how I stay sane working by myself most days, because I can have Bojack on in the background and then toggle over to my word doc to make recipe notes.)
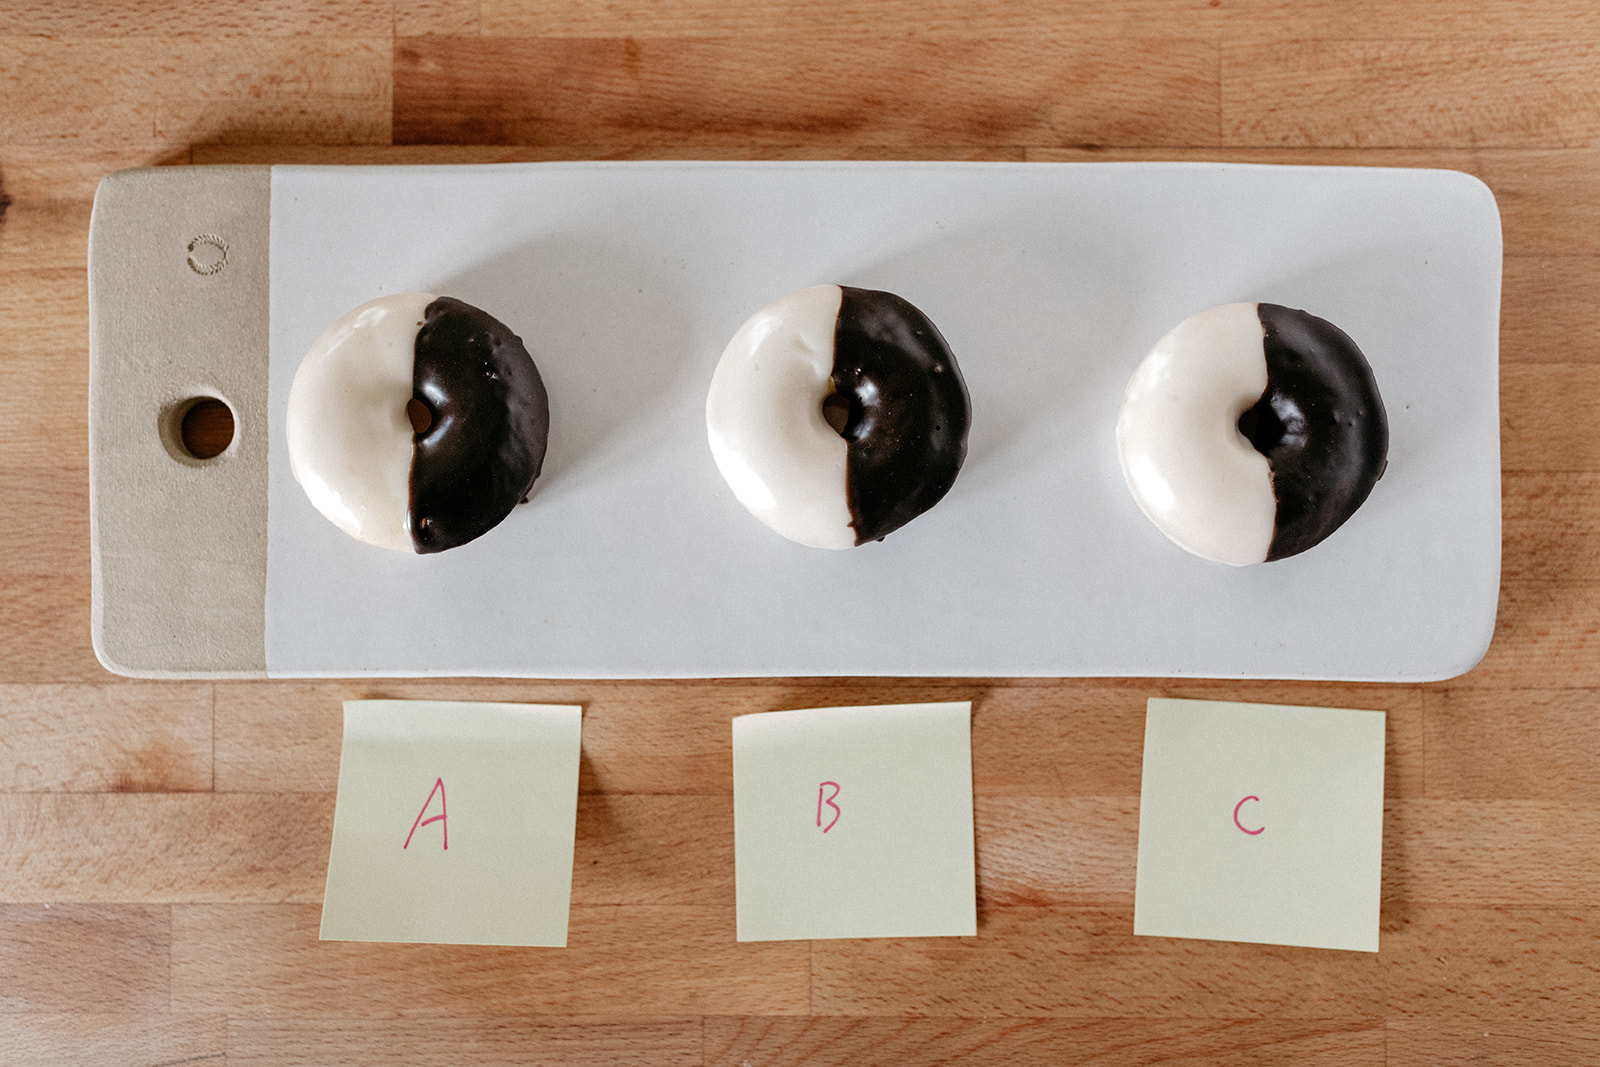
I make a version of the recipe according to the draft, taste it, record any notes, and then copy and paste a new recipe draft with any recipe changes in bold. And I also bring in backup in the form of Eggboy. He may not know the first thing about making a donut but he is a really good taste tester! He is not afraid of telling me when a recipe sucks and is articulate in telling me what needs to change. And then it’s up to me to figure out how to achieve those changes. So then I get back to work and continue to test until it’s basically so good that Eggboy just doesn’t have any words and continues to take bites because he can’t help it and it’s as if the donut has taken over his brain. It might take 26 versions, it might just take 3 or 4.
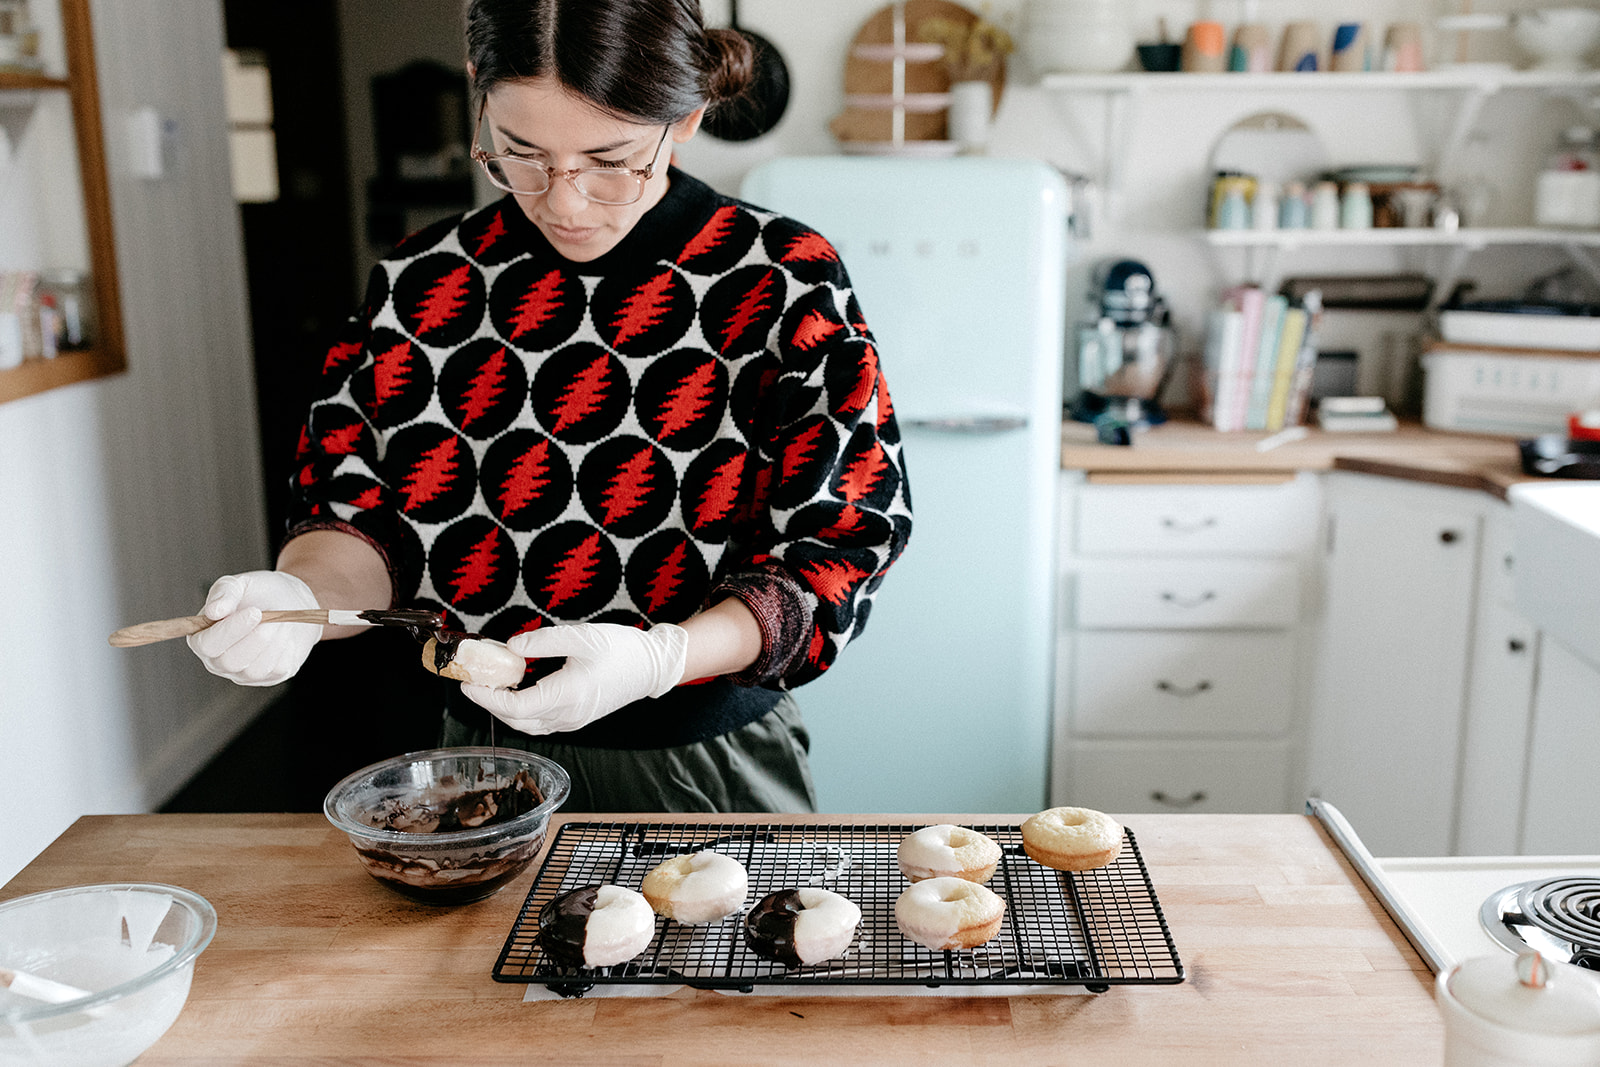
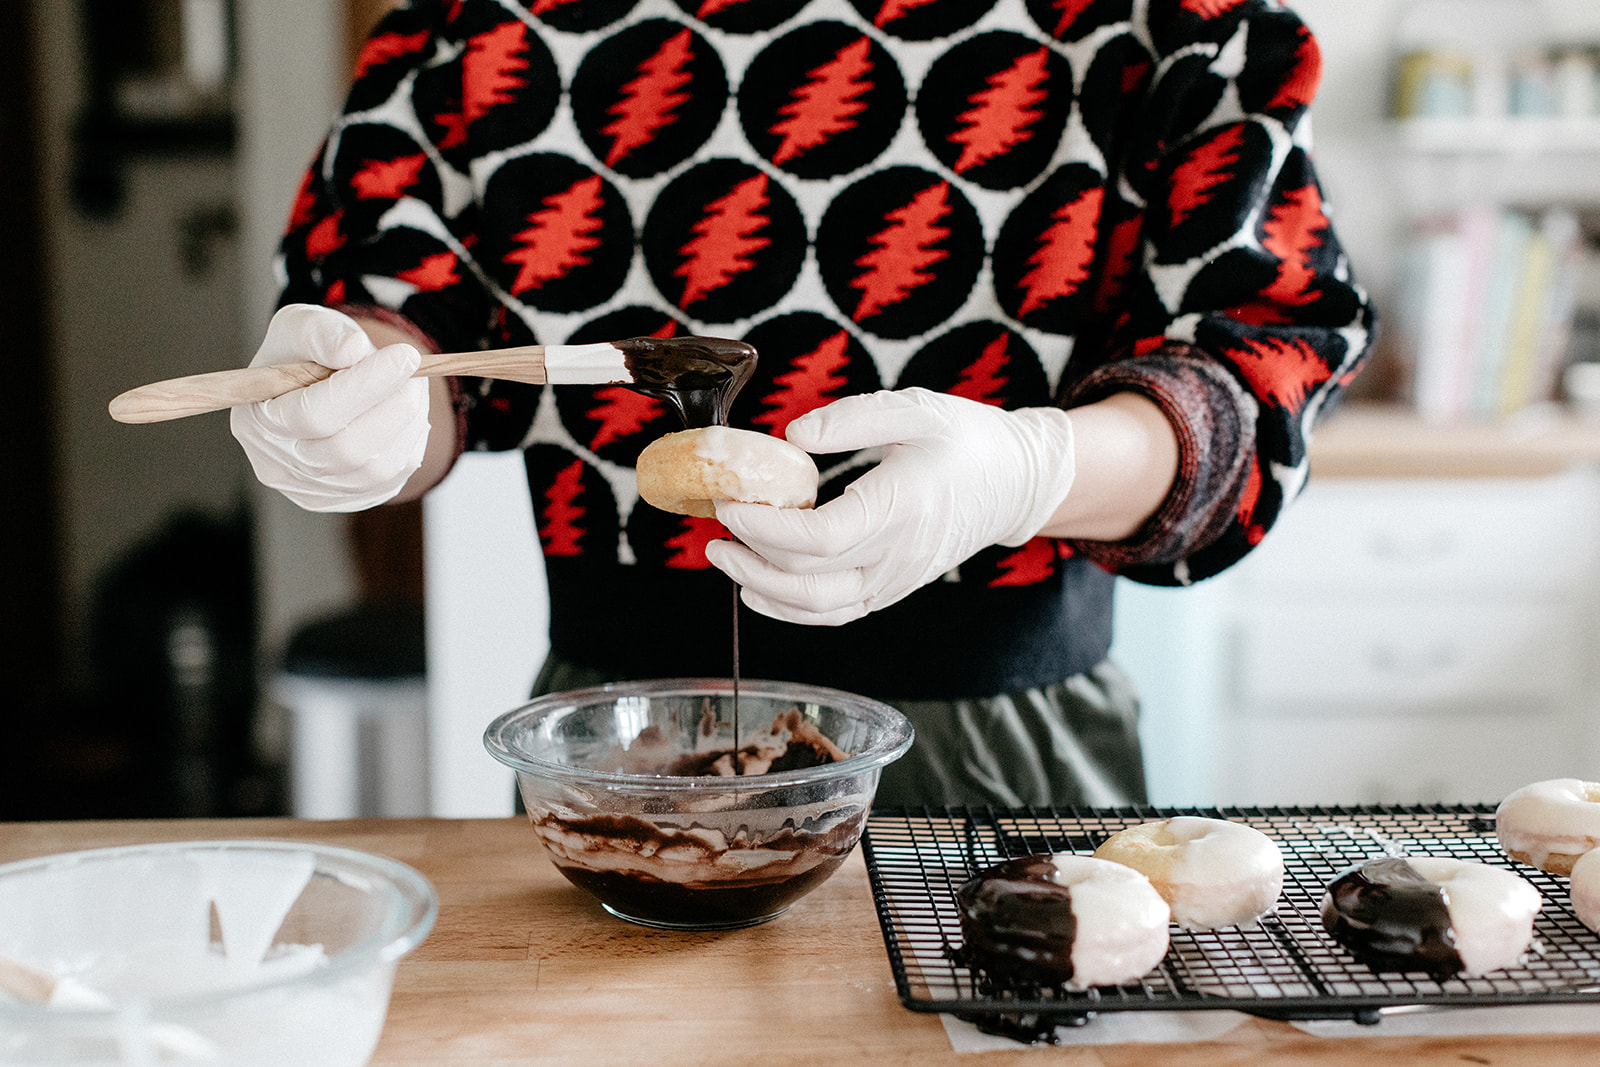
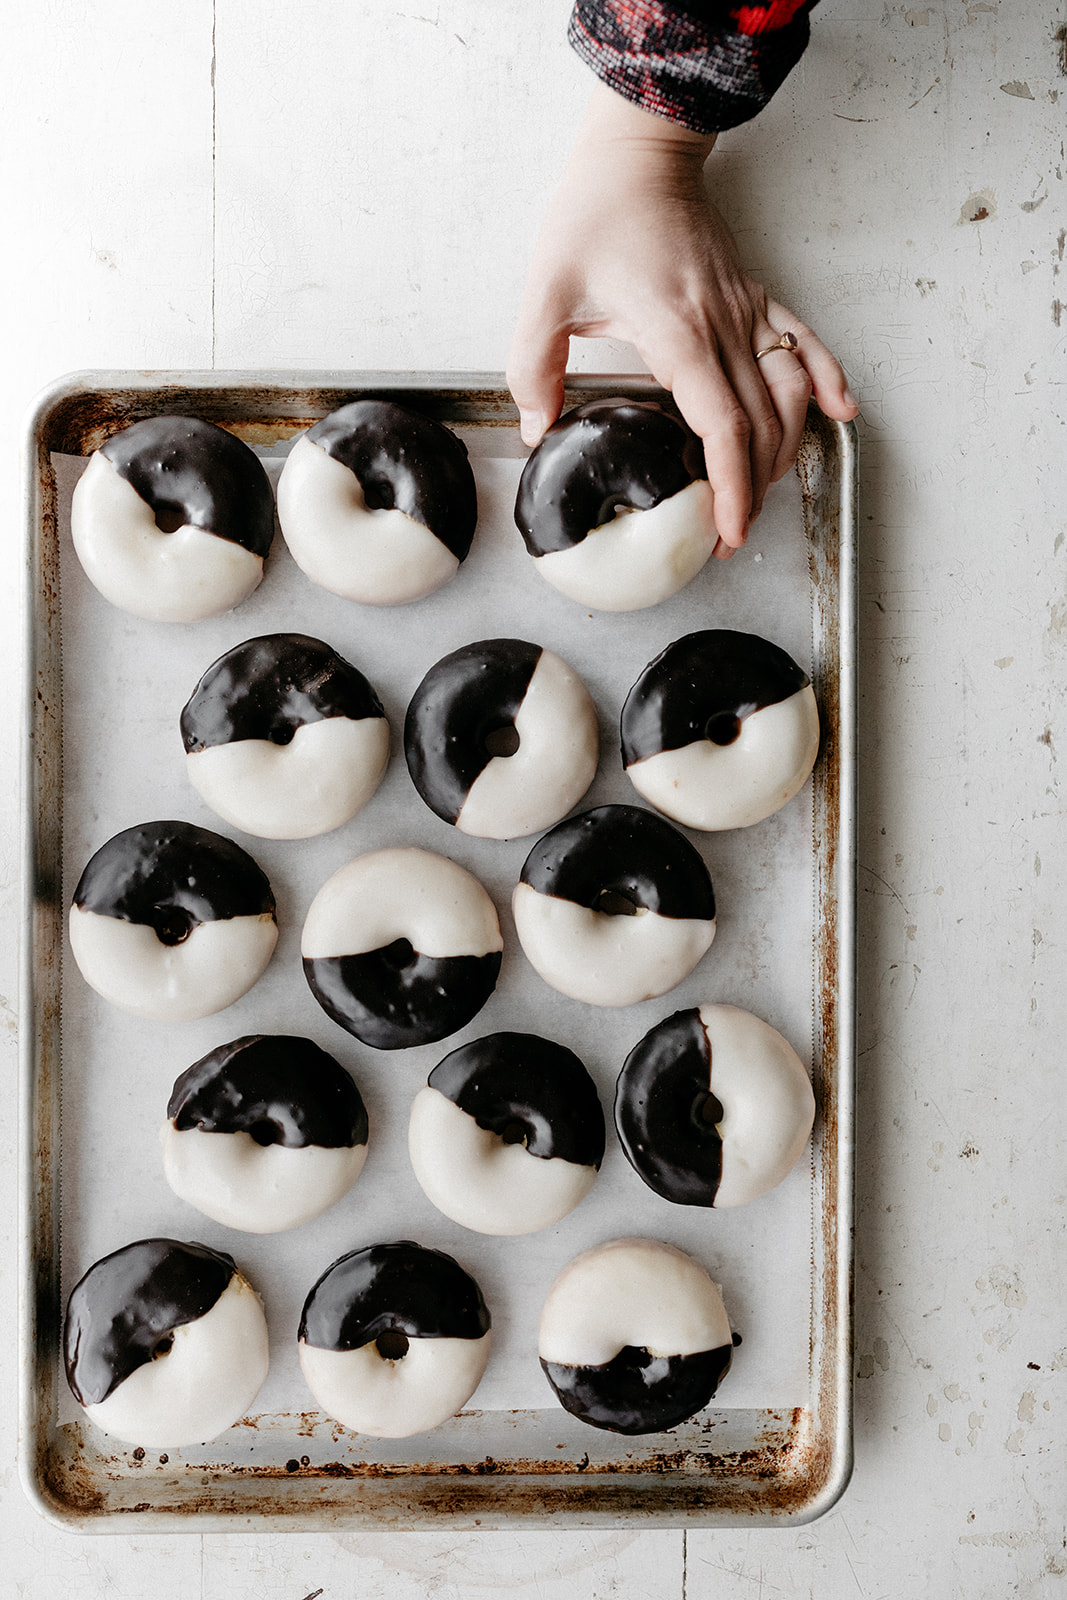
This recipe didn’t take too many versions because I already had a vanilla baked donut recipe that I liked (in Molly on the Range) and my primary focus was on sneaking in the lemon flavor and paying close attention to how that added acidity affected the rise of the donuts. I honed in on baking soda amounts and played around with a few different measurements there. I also tried a couple of different methods of glazing the donuts and found that a combination of dipping the donuts into the glaze and using a spatula to help it onto the donuts created my fave aesthetic.
After this testing period, leftovers get wrapped up and given to people or stuck in the freezer. These donuts will get defrosted and put out for beet harvest next week!
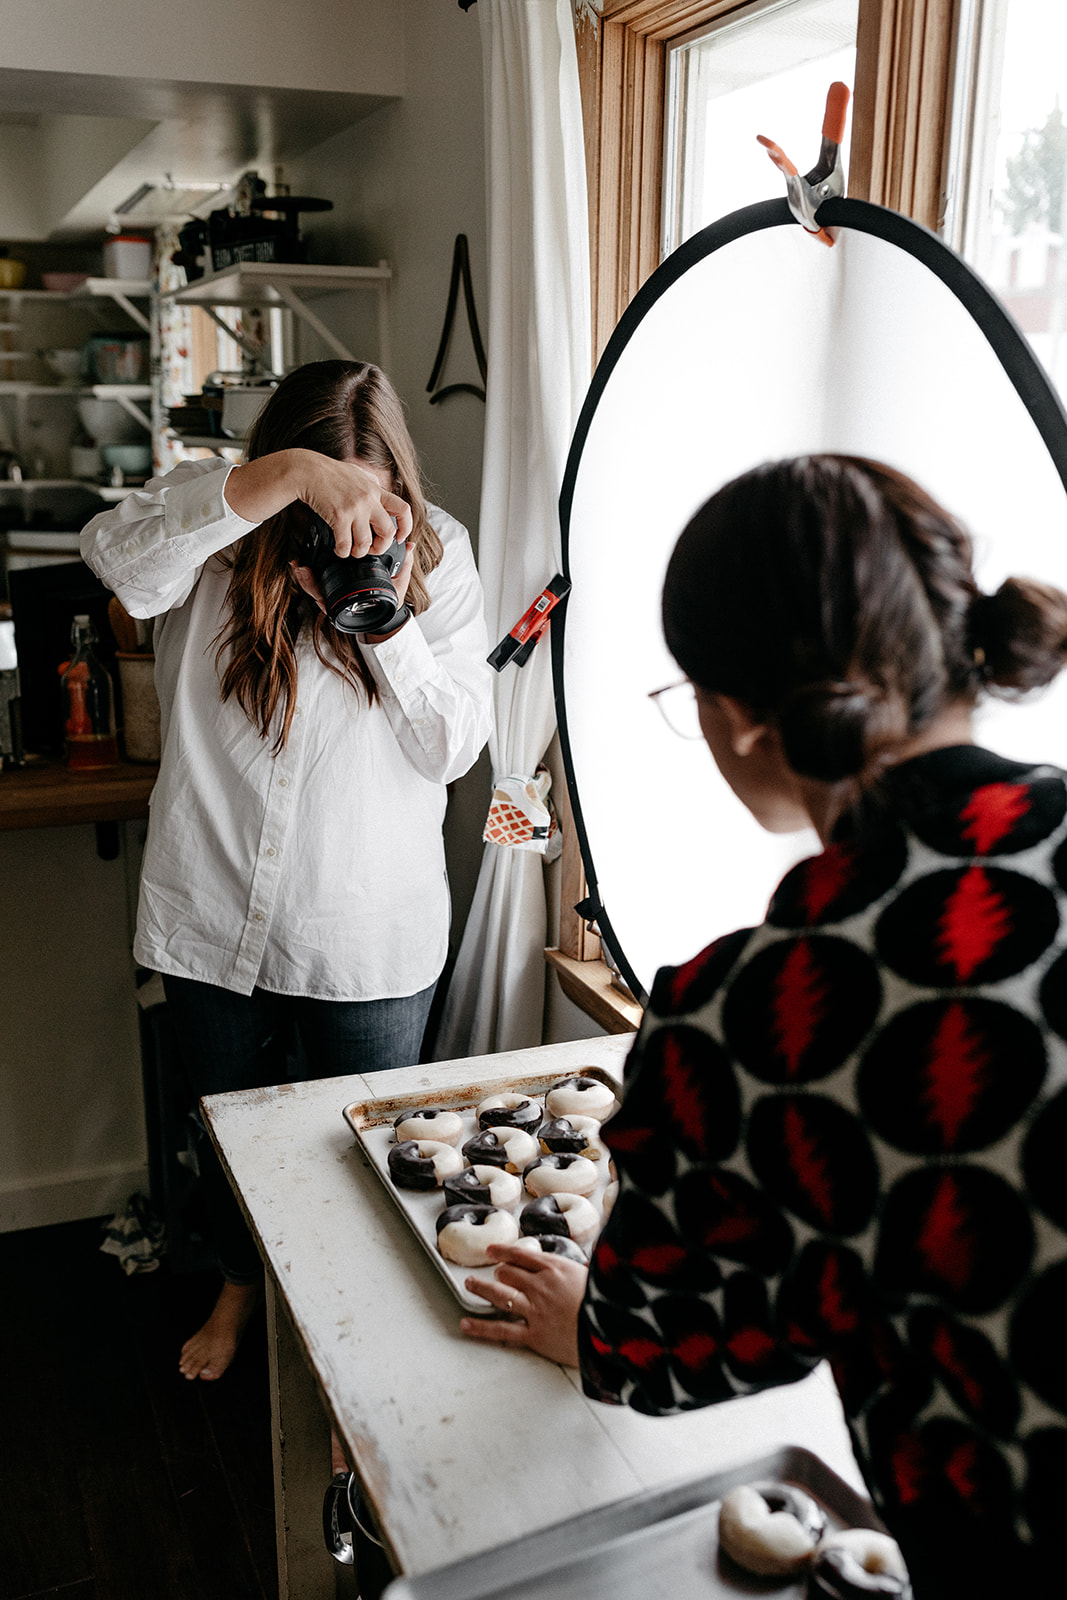

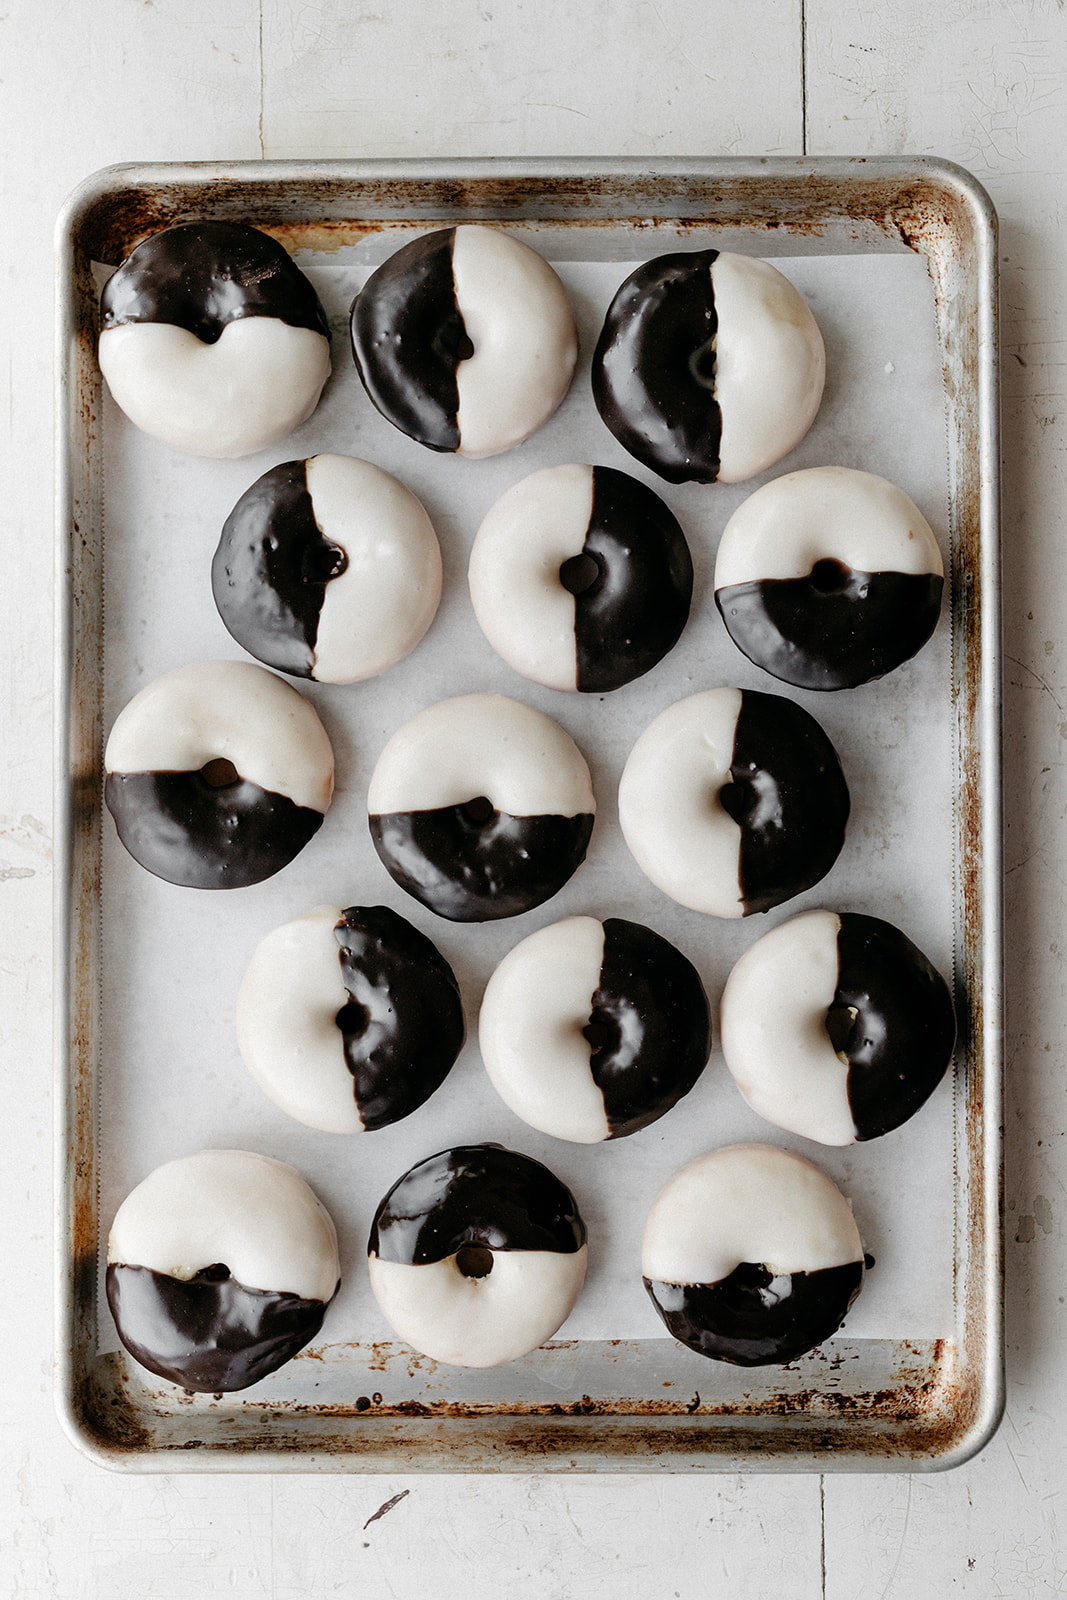
Once the recipe is where I want it to be, I move on to phase 3: prepping its photo shoot. I write down any particular steps I want to document, think about what angles will make the finished product look the best, pick out props and a wardrobe that will match everything, clean the kitchen, prep ingredients and complete any steps of the recipe that I won’t be showing on camera. For these donuts, I made some finished donuts, some unglazed donuts, some that just had white glaze on them, and a bowl each of chocolate and vanilla glaze. This prep usually happens the day before a shoot and I typically am prepping a few recipes at a time since shoot days often include a handful of recipes. I often have an assistant help with this but my kitchen assistant, Grace, just moved to Michigan :(
Phase 4: photo shoot! The morning of a shoot, I brush my hair and put on makeup! The first time in probably a while. And then Chantell and Brett arrive from Fargo and we get to work! Shoot days are fun because it’s so satisfying to play with finished recipes and we listen to music or have movies on in the background and at the end of the day I try to send them home with as many donuts and cakes as they’ll allow me to give them.
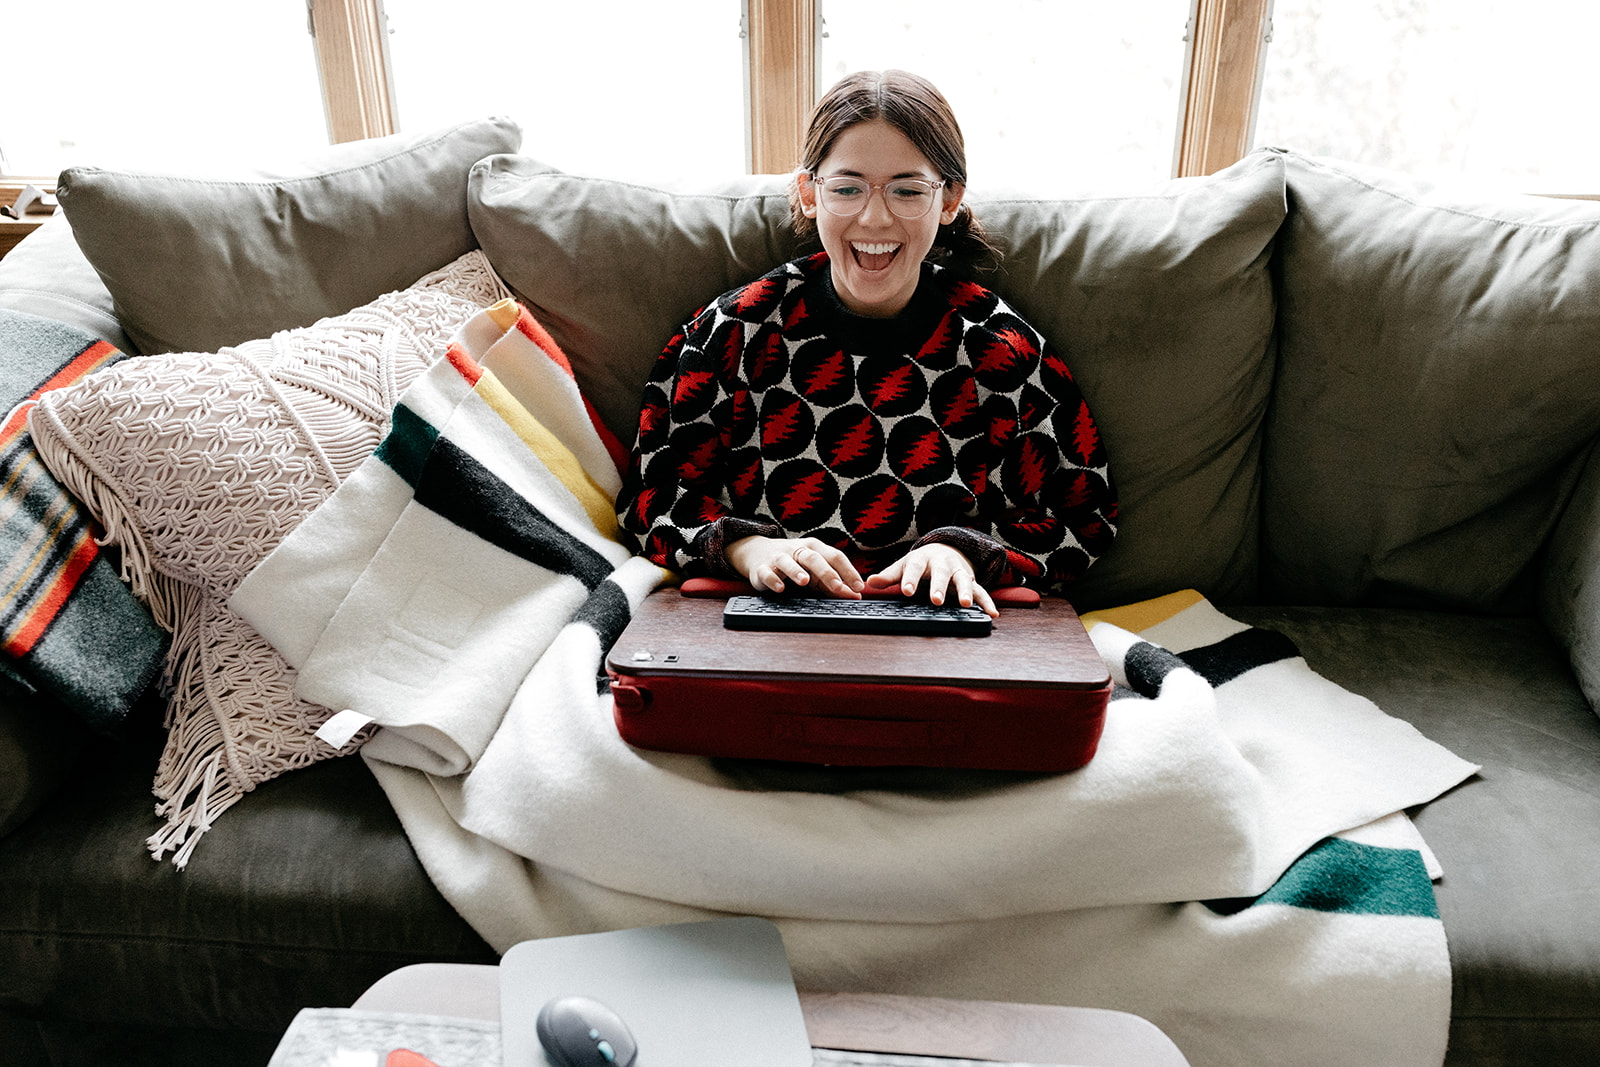
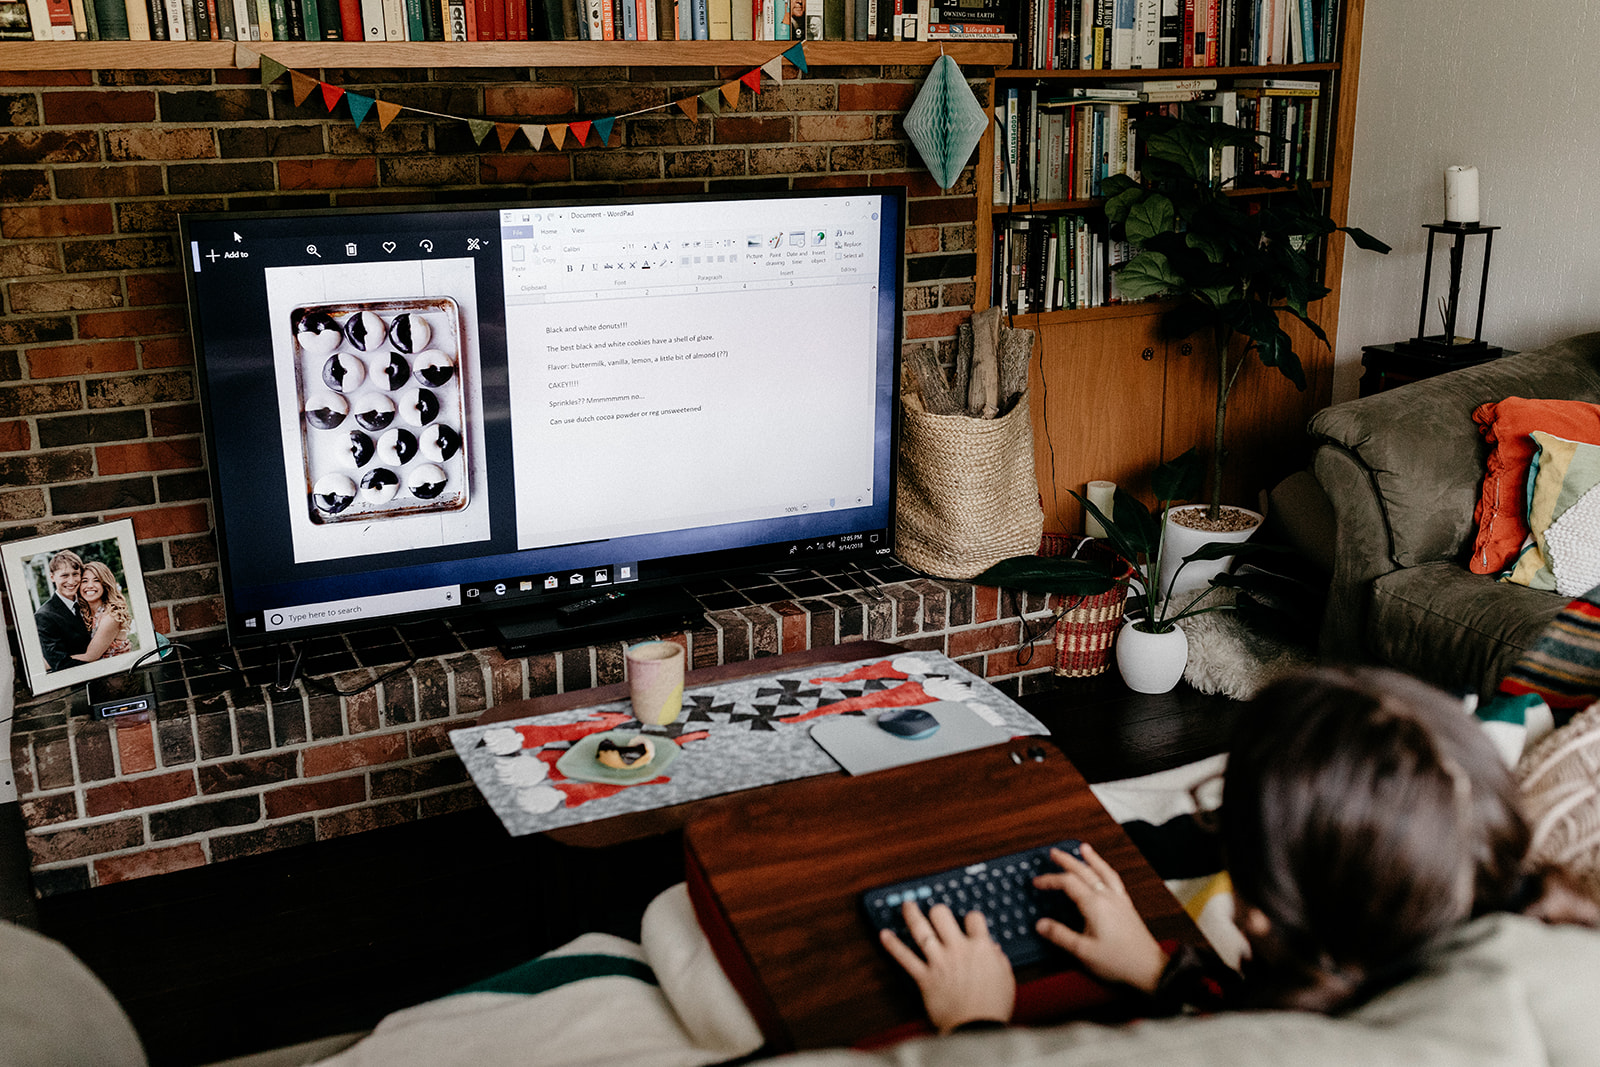
Once I receive the photos, I sit on my couch and do phase 5: write the post. This is great because it’s cozy and also because I can have the NUC Mini PC hooked up to the hot tub-sized TV that Eggboy *had* to get last year to watch bike races. It’s great though because it’s big enough to see clearly from my couch and the NUC is powerful enough to deal with tons of photos on a regular basis without slowing down.
By this time I’ve been thinking about whatever my post is about for so long that ideally the words just flow right out. Sometimes—ok a lot of times—they don’t though and that might be when I get up and walk to the refrigerator, eat a piece of cheese, take a shower, or look at my phone. This is when 90% of procrastination happens. It’s gotta happen sometime!
Once the post is written, I organize which photos I’m going to use and how they’ll be laid out, and edit the recipe. Those get put into the backend of my site either by me or my assistant Hillary, along with any tags and links. And then it’s posted!
Ta da!
*Eats a donut*
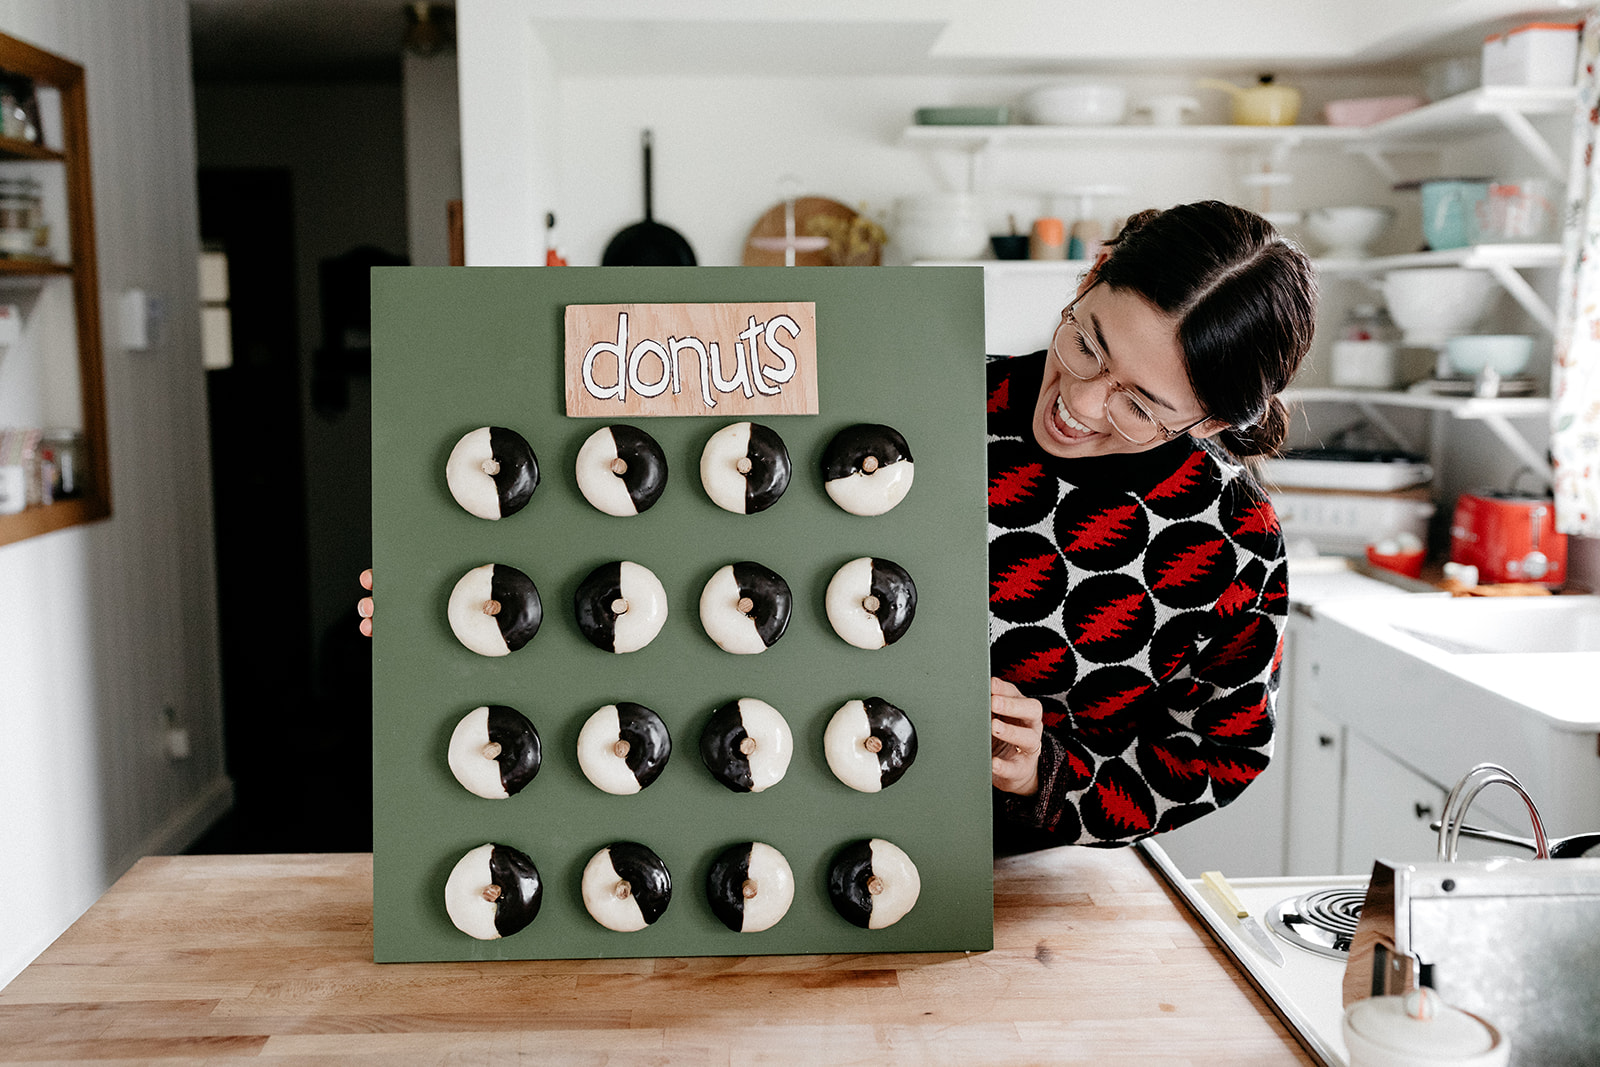
black and white donuts
makes 12-16 donuts
Ingredients
Donuts
1 3/4 c (228g) all-purpose flour
1 c (200g) sugar
3/4 tsp kosher salt
1 tsp baking powder
1/2 teaspoon baking soda
Zest of 1/2 a lemon
1 large egg
1/2 c (120 ml) buttermilk
1/4 c (50 ml) flavorless oil
1 tsp vanilla extract
1/2 tsp almond extract
1/4 c (59 ml) water
Vanilla Glaze
2 1/4 c (270g) powdered sugar
1 tb light corn syrup
3-4 tb whole milk or buttermilk
A pinch of kosher salt
A splash of vanilla extract
Chocolate Glaze
2 c (240g) powdered sugar
1/4 c (20g) unsweetened cocoa powder
1 tb light corn syrup
3-4 tb whole milk or buttermilk
A pinch of kosher salt
Clues
To make the donuts: preheat the oven to 375ºF. Coat a 12-cavity donut pan with cooking spray and set aside.
In a large bowl, whisk together the flour, sugar, salt, baking powder, baking soda, and zest. In a medium bowl, whisk together the egg, buttermilk, oil, vanilla, almond extract, and water. Add the wet mixture to the dry mixture and stir until just combined. Fill a piping bag or ziploc bag with a corner snipped off with the batter and pipe the batter into the donut pans, filling each cavity halfway. If you have any remaining batter, you can bake it in a second batch.
Bake for 12 minutes, or until a toothpick inserted into a donut comes out clean. Cool in the pan for 5 minutes. Remove to a rack and cool completely. (A mini spatula helps remove them from the pans!)
To make the glazes, first make the vanilla glaze: mix together the sugar, corn syrup, 3 tablespoons of milk, salt, and vanilla. Add additional milk little by little until the mixture is pourable (you might not need the full remaining tablespoon). You want to be careful not to add too much milk because you want the glaze to be thick and opaque, but if the glaze is too thick it will have a hard time sticking to the donuts. You can always make adjustments by adding more powdered sugar to make it thicker or more milk to thin it out. Place a baking sheet or piece of parchment paper underneath the rack with the donuts and dip each donut halfway into the vanilla glaze, scraping off any excess glaze from the bottom and returning to the rack to dry. Let the vanilla glaze dry, 20-30 minutes if you’re impatient like me, but more like an hour or so if you want it to really be nice and solid, and then make the chocolate glaze.
To make the chocolate glaze, use the same method as mixing the vanilla glaze, and then carefully dip the unglazed half of the donuts into the chocolate glaze. With the chocolate side, I find it’s helpful to use a spatula to help the glaze nudge right up against the vanilla. Scrape excess glaze off of the bottom, place back on the rack, and let dry.
Enjoy!
These are best the day of, but can be kept for an additional couple of days at room temp in an airtight container.
-yeh!
photos by Chantell and Brett Quernemoen
Thank you, Intel, for sponsoring this post! The Intel NUC Mini PC is a small but mighty computer that is shorter than a tennis ball and ready to make photo editing and content creation a breeze. It’s equipped with Windows 10 and the latest Intel Core processors, and videos and movies can be viewed in 4k Ultra HD!

![IG_Story_1080x1920[2].jpg](https://images.squarespace-cdn.com/content/v1/515ecaf0e4b0875140cb8775/1529419018979-VR6FV7NTV4G7GEYGMFU4/IG_Story_1080x1920%5B2%5D.jpg)


