Chocolate Peanut Butter Oatmeal Muffins

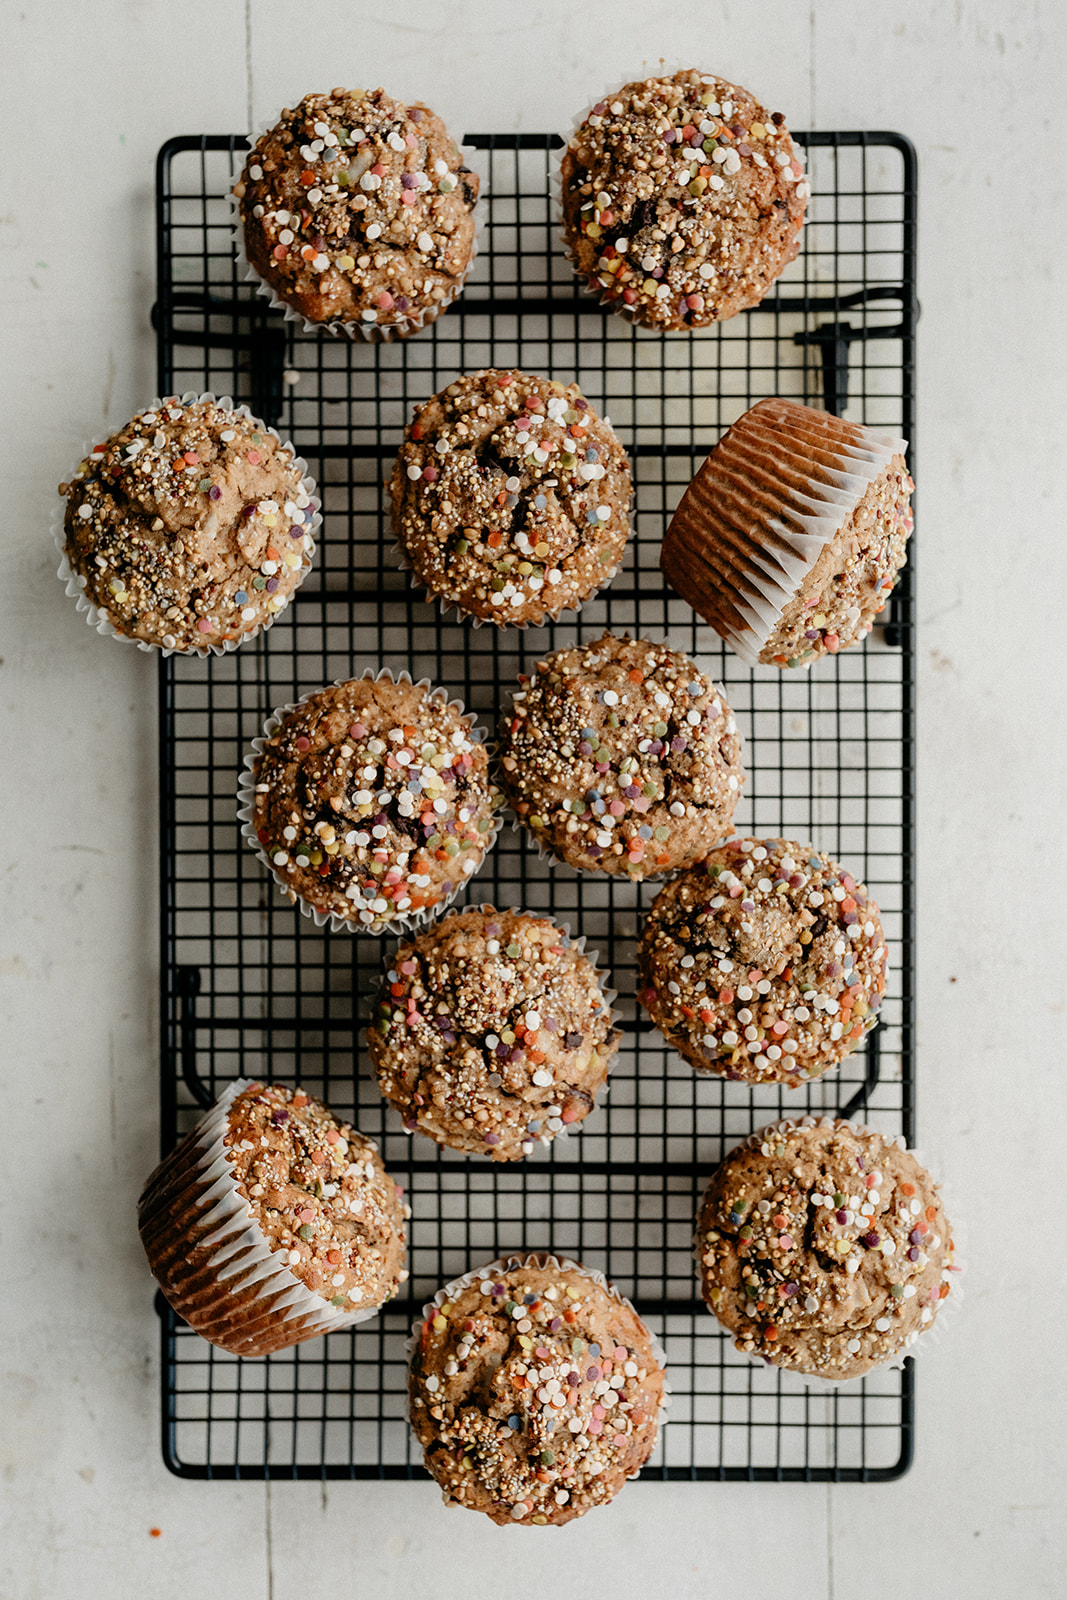
One of the number one things that I was told to prep before Bernie’s arrival was oatmeal muffins! Oatmeal to help with lactation and muffins because they’re quick and easy to thaw from frozen and you can eat them with one hand. I do love oatmeal in the morning, and I usually have it with peanut butter or almond butter, cinnamon, berries, a little dark chocolate, and Trader Joe’s crunchy super seed mix for some Omega-3s, so I made a muffin version of this! They’re super good and filling, they’ve got pockets of melty chocolate, and they’re topped with just a few sprinkles that I thought would add a little humor to times that were destined to be insane, filled with Bernie wails, and true muffin emergencies. This is a pretty versatile recipe— you can add different spices, use butter or coconut oil, and change up the nut butters and mix-ins (don’t skimp on the chocolate though!). I would definitely recommend topping them with something, whether it’s sprinkles or turbinado sugar and/or seed mix, the added crunch on top is the loveliest.

Side note: I can’t really eat these muffins without thinking about the Bojack muffin episode when Neal McBeal the Navy Seal calls dibs on muffins at the store and Bojack eats them all. I wonder how Bojack is doing these days. I’m afraid to watch it with Bernie in ear shot and all. 
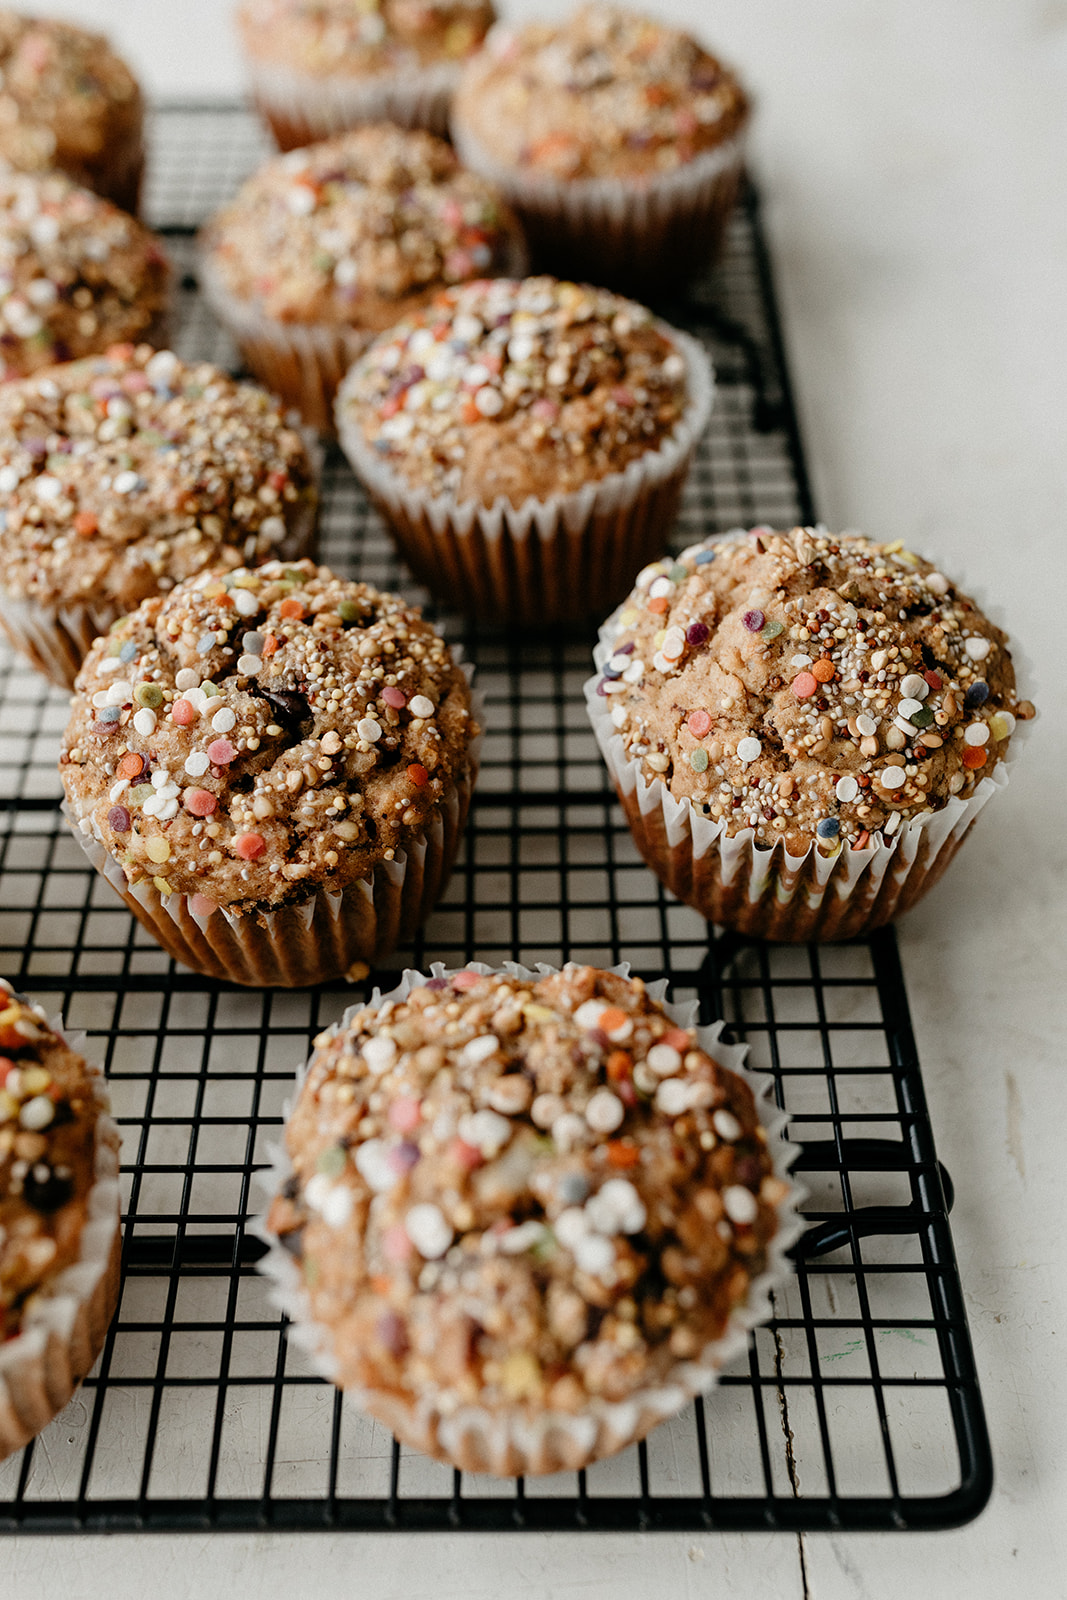

Chocolate Peanut Butter Oatmeal Muffins

Makes 8 Jumbo Muffins

Ingredients

1 1/2 c (120g) rolled oats

1 c (240g) milk (2%, whole, or almond)

1/2 c (65g) all-purpose flour

1/2 c (65g) whole wheat flour or more all-purpose flour

2 tsp baking powder

1 tsp cinnamon 

1/2 tsp kosher salt

1/2 c (113g) unsalted butter or coconut oil, melted and slightly cooled

1/2 c (128g) creamy unsweetened peanut butter (almond butter works too!)

2 tsp vanilla extract

2 large eggs

1/2 c (150g) maple syrup

3/4 c (90g) dried cherries, blueberries, or raisins

3/4 c (4 oz) chopped dark chocolate

3/4 c (45g) unsweetened coconut flakes

Super seed mix, optional, for topping

Coarse sanding sugar or sprinkles, for topping

Clues

Preheat the oven to 400ºf. Line 8 jumbo muffin tins with liners and set aside.

In a medium bowl, combine the oats and milk and let soak for 20 minutes.

In a separate medium bowl, whisk together the flours, baking powder, cinnamon, and salt.

In a large bowl, whisk together the butter or coconut oil, peanut butter, vanilla, eggs, and maple syrup until smooth. Add the oats and flour mixture and stir to combine and then fold in the dried fruit, chocolate, and coconut. Scoop into muffin tins and sprinkle with seeds, if using, and sanding sugar or sprinkles. Bake until a toothpick inserted into the center comes out clean; begin checking for doneness at 22 minutes. Let cool in the pans for a few minutes and then transfer to a wire rack to cool completely or enjoy warm! 

Cooled muffins can be stored in a ziploc bag in the freezer for up to 3 months. Reheat in the microwave for about a minute.


-yeh!

veggie potstickers with spicy dipping sauce

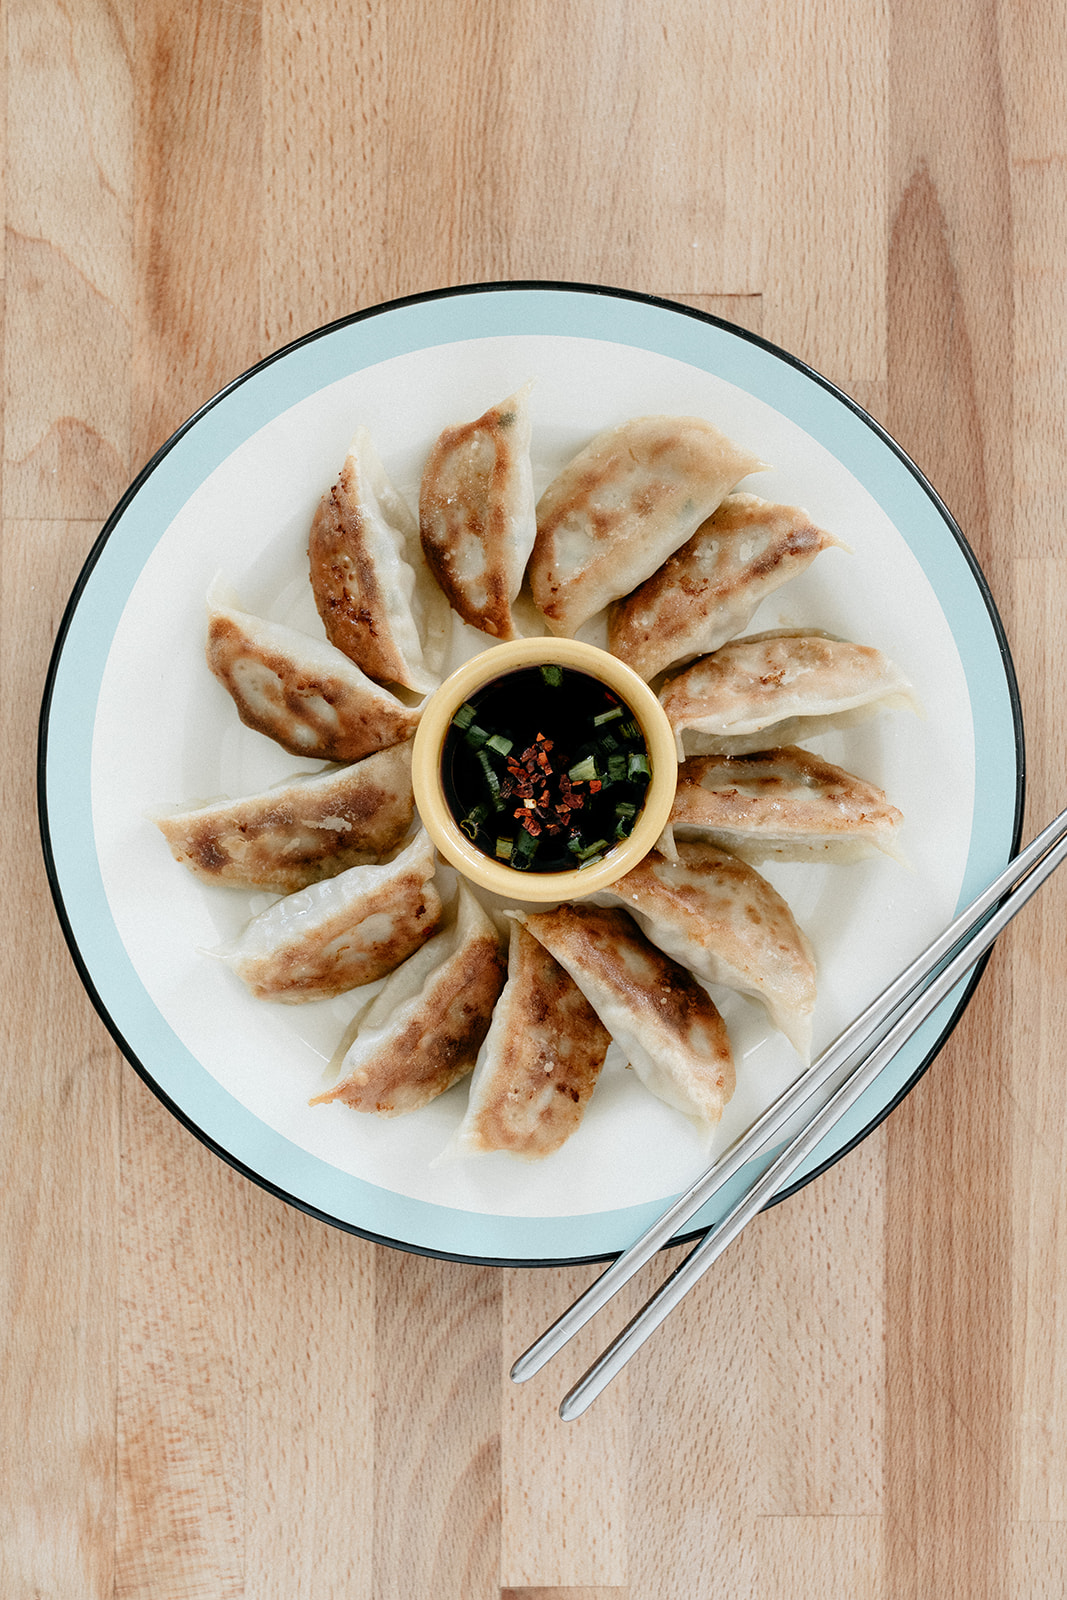
Adam and Ryan from Husbands That Cook are two of the sweetest humans on the planet and I’m so excited to be sharing this recipe from their new book today! I’ve gotten to hang out with them a few times in LA and every time it’s like an espresso shot of joy. Their book totally captures that happy, joyous energy through a ton of delicious approachable everyday recipes that all happen to be vegetarian. I’ve kept their book on the shelf in my kitchen where I keep my most used cookbooks and it exudes great energy all over. One of the first things that I made from their book were these veggie potstickers and they are so good!!! I was deep in meal prep mode when the book arrived and looking for something kind of snacky and vegetabley that I could keep in the freezer, and these checked both of those boxes. So I made a big batch of them and kept a stash in my freezer for dumpling emergencies. The flavors are great, Adam and Ryan understand my need for a very gingery potsticker, and these can be steamed or pan-fried! I prefer them crispy and pan fried, but pulling out my little bamboo steamer and steaming a cute basket of them is also fun :)!

Anyway, if you don’t yet follow Husbands that Cook or have their book, get on it!!!! Your life will be warmer and more delicious, I promise. 


veggie potstickers with spicy dipping sauce

makes about 40

from Husbands that Cook

ingredients

for potstickers:

4 tb vegetable oil, divided

2 c (200g) finely chopped onion (about 1 medium onion)

3 c (185g) sliced bok choy cabbage (about 2 small cabbages)

2 c (155g) grated carrots (about 2 medium carrots)

1 c (120g) grated daikon radish (about one 6-inch piece)

2/3 c (40g) sliced scallions (about 3 scallions)

4 tsp tamari or soy sauce

2 tb (24g) minced ginger

3 large garlic cloves (15g), minced

40 gyoza wrappers

gyoza dipping sauce, for serving (to follow)


for dipping sauce:

1/4 c (60 ml) rice vinegar

1/4 c (60 ml) tamari or soy sauce

1/2 tsp sesame oil

1/4 tsp red pepper flakes

1/8 tsp garlic powder

1/8 tsp ginger powder

clues

for potstickers: place a large, deep skillet over medium heat, and add 2 tablespoons of vegetable oil. when hot add the onion and cook until softened, about 5 minutes. add the bok choy, carrots, daikon, and scallions, and cook for 4 minutes until softened, stirring occasionally. Add the tamari, ginger, and garlic, and cook for 1 to 2 minutes more. remove from heat and transfer the vegetable mixture to a bowl or plate to cool enough to handle comfortably. use the filling immediately, or transfer to a sealed container in the fridge for up to 3 days.

to make the potstickers, first prepare a work station with the gyoza wrappers, the bowl of filling, a small bowl filled with water to wet your fingers, and a tray lined with parchment for the finished dumplings.

hold one gyoza wrapper flat in the palm of your hand. scoop about 2 heaping teaspoons of filling into the center of the wrapper. fold the wrapper over, pinching and pleating the edges to seal them tightly. place on the prepared tray, and repeat with the remaining wrappers until all the filling is used up, arranging the finished potstickers so they are not touching. they can be cooked immediately, or frozen for future use (freeze them directly on the tray, then transfer to a sealed container in the freezer for up to 2 months).

place a large, deep skillet over medium heat, and add the remaining 2 tablespoons of vegetable oil. when hot, place the potstickers flat-side down in the skillet in a single layer, as many as will fit comfortably without touching. cook without stirring until deeply browned on the bottom, 2 to 4 minutes (add 1 to 2 minutes of cooking time if frozen). without stirring, add 1/4 cup of water and immediately cover the pan, as it will spatter aggressively. cook for 2 to 3 minutes, then remove the lid and continue to cook until all of the water evaporates. serve immediately with dipping sauce and enjoy!

for dipping sauce: in a small bowl or measuring cup, stir together all the ingredients. let sit for 15 minutes before serving to allow the flavors to blend. use immediately or keep in a sealed container in the fridge for up to a week. makes about 1/2 cup.


-yeh!

photos by chantell and brett!

Al Pastor Taco Pizza

I first met a taco pizza when I visited Dubuque, Iowa for the first time, seven years ago! I was seriously into the concept of taco toppings on a pizza crust and got totally jazzed when I moved to Grand Forks the following year and discovered that taco pizza is everywhere here too. Even though I didn’t grow up with it, it made me nostalgic for the kind of tacos that my mom would make when I was little, from the boxed kits- ground meat mixed with a packet of seasonings, shredded orange cheddar, and shredded iceberg lettuce. Super basic. Common taco pizza is essentially that on a pizza crust, plus olives, crushed tortilla chips, and side ramekins of sour cream and salsa. It’s tasty, but a lot of its tastiness for me comes from the nostalgia factor, not necessarily from the fact that it’s an exceptionally good taco situation.

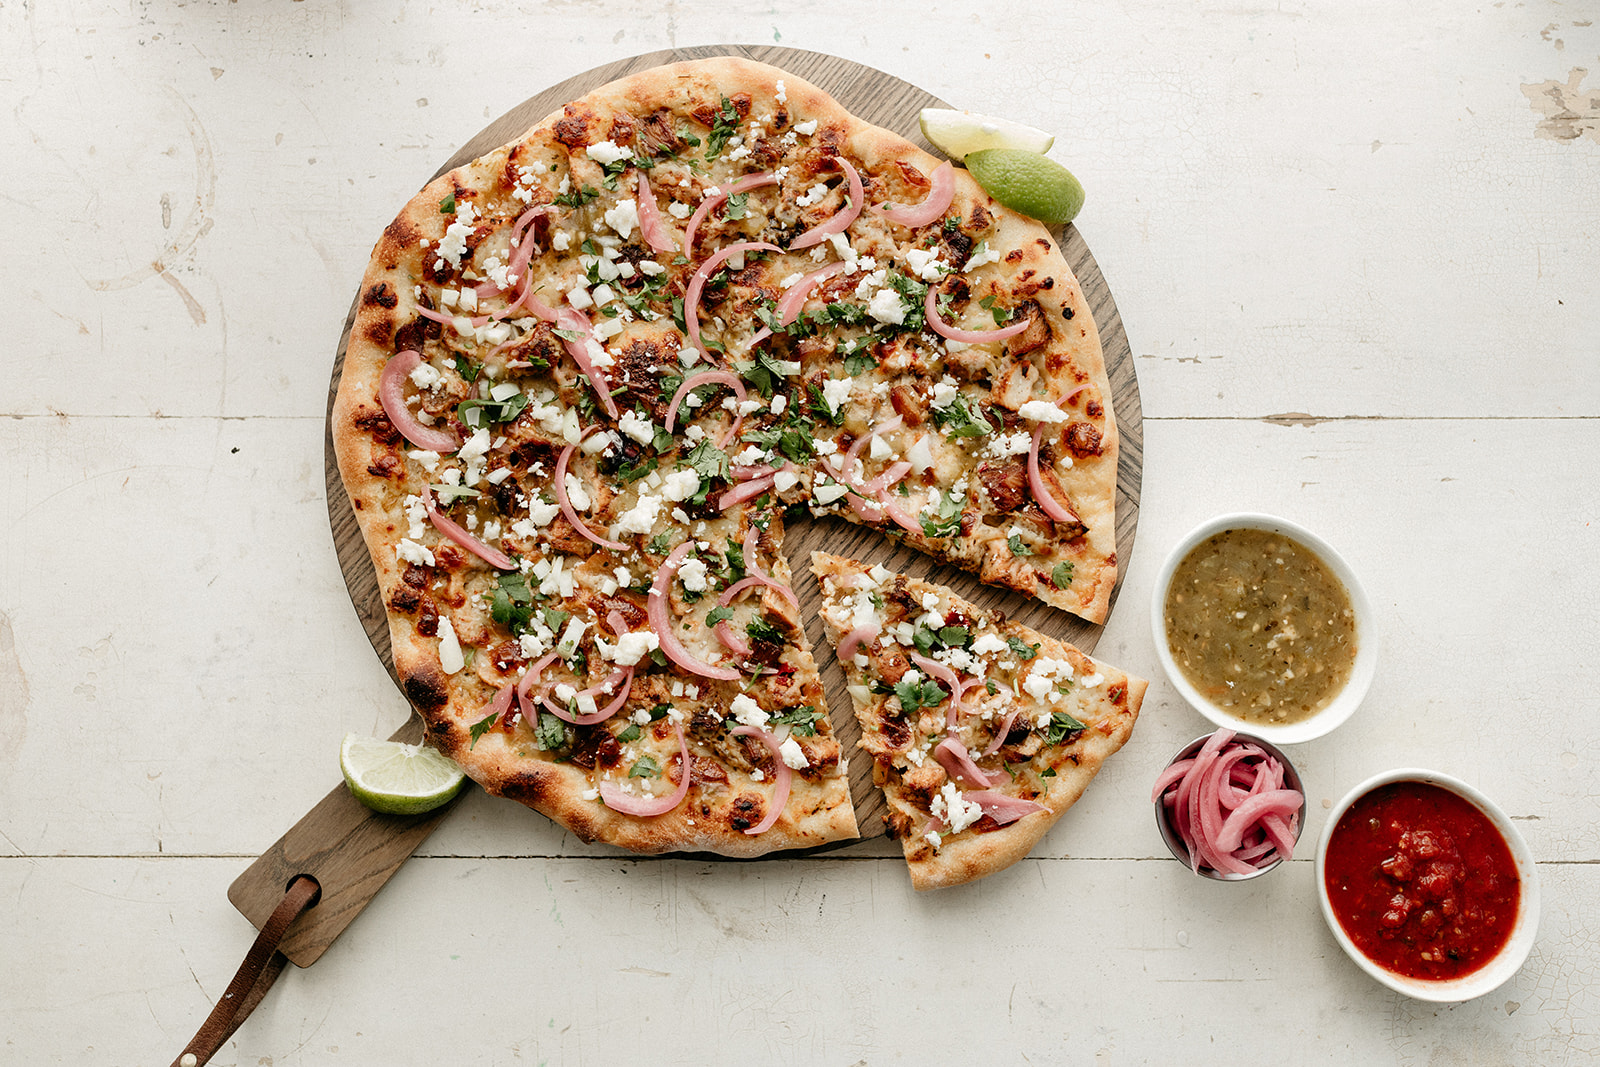
Eggboy and I have had too many extremely good taco situations in LA and Chicago to let this go unnoticed. Our joint dream taco is al pastor, complete with pineapple, cilantro, onion, lots of lime, and tomatillo salsa. (His fave is from Los 3 Ponchos, in Chicago. He once ditched me at a Purim party nearby there to go eat three of their tacos. This was after we’d had dinner there before the party. Where does he find the stomach space for all of this food??) So when his birthday last year fell on pizza Friday, I got to work combining the magic of a great al pastor with the perfection that is Jim Lahey’s no-knead pizza dough. I quickly learned that when you have two perfect things like that, you don’t need much else. I held it all together with melty oaxaca cheese and salty fresh queso fresco, and we just about lost our eyeballs in the back of our heads, it was so good. All of the perfect smoky/sweet/salty flavors of al pastor were there and the doughy pizza crust with the melty cheese took it to a crazy level. The cheeses here don’t overpower, they just bind everything together in meltiness and allow the al pastor to shine. The grilled pineapple makes an entirely new case for pineapple on pizza, and the cilantro and onions sprinkled on at the end add freshness, crunch, and prettiness! I’m obsessed with this pizza. Eggboy is too. It’s 10000% worth the two-day process it takes to make—day one: mix the dough, marinate the meat. Day two: grill the meat and assemble. So as part of my meal prep back in March, I made one and stuck it in the freezer for Eggboy’s first Father’s Day!!!! 

Happy Almost Father’s Day to the best taco eater and Bernie dad in the world! 


Al Pastor Taco Pizza

Makes 2 14” Pizzas

Ingredients:

Al Pastor:

1 (14oz) can pineapple rings, juice and rings separated

1/4 c distilled white vinegar

3 cloves garlic

1 tsp dried oregano

1 tsp sweet paprika

1 tsp kosher salt

1/2 tsp ground cumin

1/2 tsp black pepper

1/4 tsp ground cloves

2 guajillo chiles, dried, seeds tapped out

1 lb pork shoulder, cut into bite-sized pieces

Assembly:

All-purpose flour, for dusting

About 2 pounds pizza dough (I recommend Jim Lahey’s no-knead dough)

1/2 c tomatillo salsa, plus more for topping and serving

10 oz queso fresco, crumbled

10 oz oaxaca cheese, torn into small pieces

Chopped fresh cilantro

Chopped yellow onion or pink pickled onions

Lime wedges

Clues

To make the al pastor, in a food processor, combine the pineapple juice, vinegar, garlic, oregano, paprika, salt, cumin, black pepper, cloves, and chiles and blend until smooth. Place the pork shoulder in a bowl and pour in the mixture from the food processor. Fold to combine, cover, and let marinate for 4 hours or overnight. (If letting this sit overnight, this is a good time to start your pizza dough.)

Heat a grill pan or skillet over medium high heat. Use tongs to lift the pork out of the marinade and grill in batches until browned and cooked through. Also grill 8 of the pineapple rings until charred. Transfer the pork and pineapple to a cutting board and chop the pineapple into bite sized pieces.

Preheat the oven to 500ºf with a pizza stone if you have one. On a floured surface, divide the pizza dough in half and roll each into a 14” round, dusting with flour as needed. Transfer to a baking sheet or parchment paper (which will make getting it on and off a pizza peel much easier). Top each pizza with 1/4 cup tomatillo salsa, about 5 oz queso fresco (reserving a little bit for topping after baking), 5 oz oaxaca cheese, and 1/2 of the al pastor and pineapple. Bake for about 9-12 minutes, or until crust is golden and cheese has brown splotchy marks. Top with a splatter of salsa, cilantro, onions, lime, and reserved queso fresco. Slice and enjoy!


-yeh!

photos by chantell and brett quernemoen

Rhubarb and Pistachio Rugelach

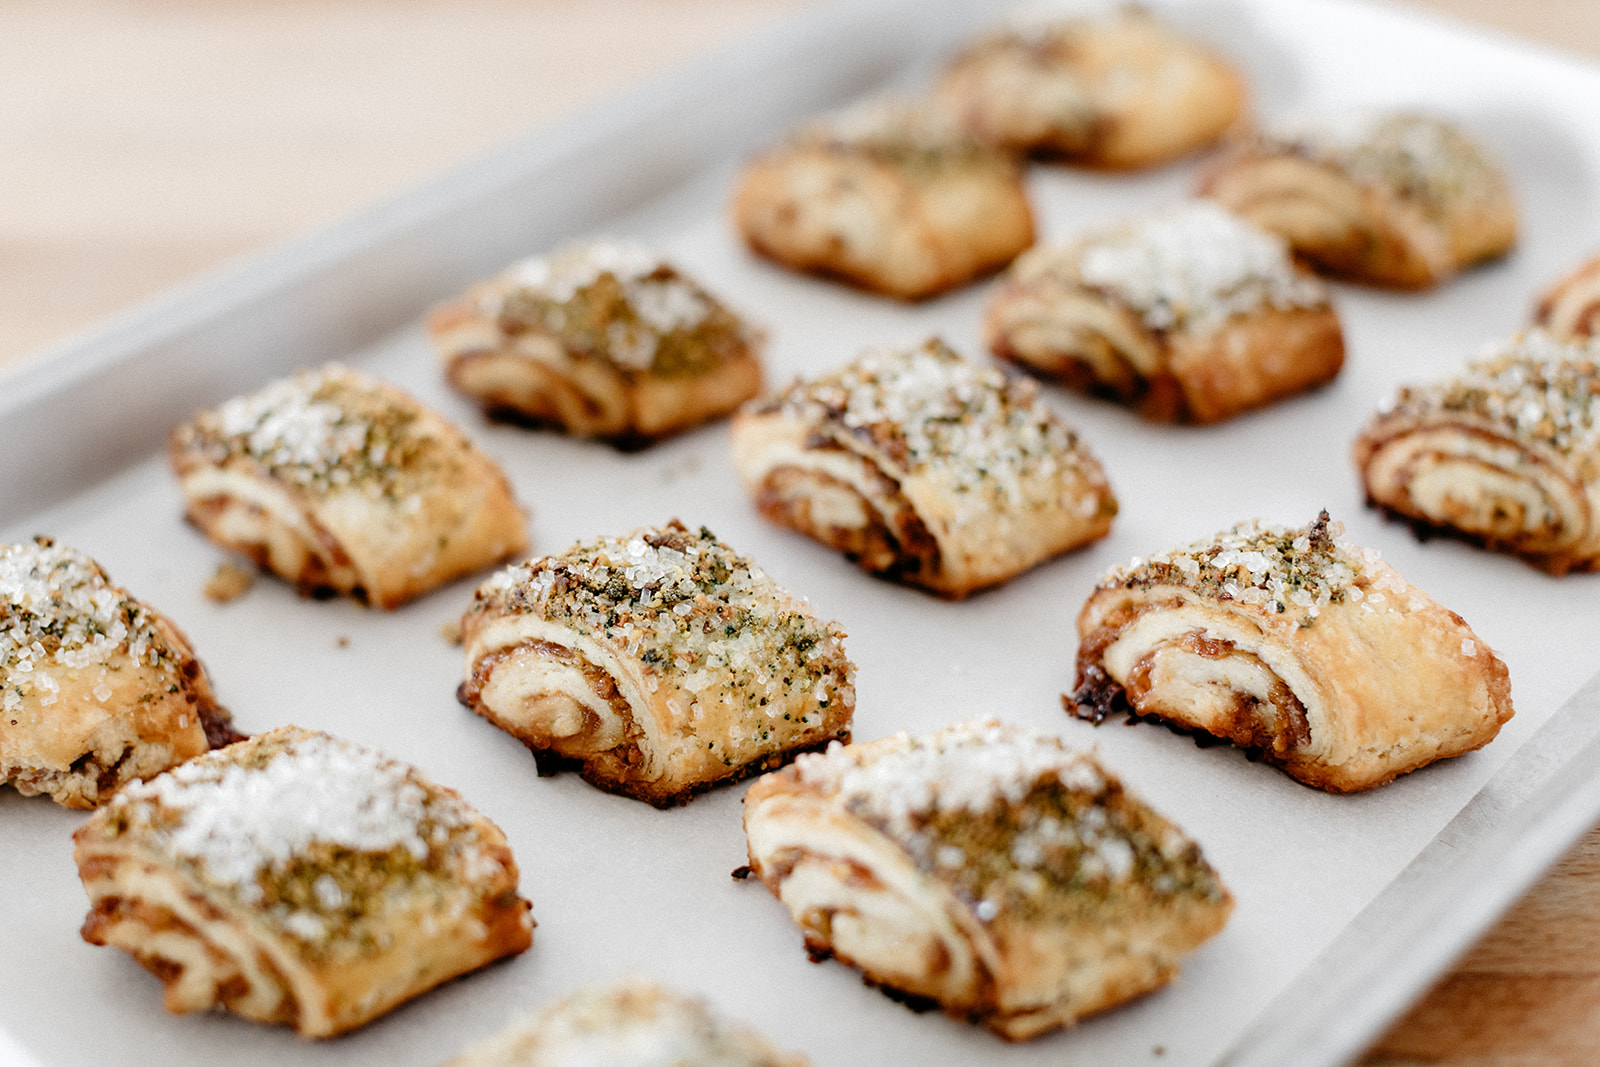
Rhubarb season, la dee da! [Insert Disney princess humming and singing with the birds!] Everything in the yard is green and happy, the chickens are laying, the cats are hunting, and the rhubarb is very bright pink!!! Let’s get down to business. With dreams of last year’s sea salt chocolate rugelach, I realized it was time for a springtime jam version! And what makes the best springtime jam? Rhubarb from the backyard, of course! And you know I love rhubarb with rosewater and pistachios, so those naturally wiggled their way in too. The result is a buttery, not-too-sweet, nutty cookie that has a hint of sourness from both cream cheese and rhubarb. It’s rustic yet a little fancy, and it’s an ode to both my Jewishness and the farm because without the rhubarb patch on the farm, I probably would have never made these. And they certainly couldn’t have been done without my mom’s perfect rugelach in my cookie genes.

That’s all! 

(And hey, if you want to switch up the jams and/or nuts, do it!!)


Rhubarb and Pistachio Rugelach

Makes 24 cookies

Ingredients

Dough

2 1/2 c (325g) all-purpose flour, plus more for dusting

1/3 c (66g) sugar

1/2 tsp kosher salt

zest of 1/2 orange or lemon

1 c (226g) unsalted butter, cold and cubed

8 oz (226g) cream cheese, straight from the fridge

2 large egg yolks

1 tsp vanilla extract


Filling

3/4 c (245g) rhubarb jam, homemade or store-bought

1 tb orange or lemon juice

optional: 1 tsp rosewater, or to taste

1/2 c (64g) finely chopped toasted pistachios

Egg wash: 1 large egg beaten with a splash of water

Topping

a few pinches flaky salt

2 tb sugar or coarse sanding sugar

1/4 c (32g) ground toasted pistachios

Clues

To make the dough, combine the flour, sugar, salt, and zest in a stand mixer fitted with a paddle. Add the cubed butter, distributing it all over the top of the dry ingredients, and dollop in the cream cheese (1” dollops should do it, but it doesn’t need to be perfect). Turn the mixer on low and stir until the mixture is mostly mealy and there are still some larger clumps of butter and cream cheese in tact. Continue mixing and add the yolks and vanilla and then continue mixing until the dough comes together. Divide the dough in half and shape into discs. Wrap tightly in plastic wrap and refrigerate for at least 2 hours or up to 2 days.

To form the rugelach, first make the filling by combining the jam with the orange or lemon juice and rosewater, if using, and set it aside. Working with one dough disc at a time, roll it out on a lightly floured surface, dusting with flour as needed to prevent it from sticking, until it is a wide rectangle, 18” by 9”. Use an offset spatula to spread on half of the jam in a thin even layer, leaving a 1” border along the long edge that’s furthest from you. Sprinkle with half of the finely chopped pistachios. Brush the 1” border with a thin layer of egg wash and then start on the end closest to you and roll the dough into a long tight log, placing it seam side down. transfer to a cutting board or baking sheet and refrigerate for at least 2 hours or up to 2 days (depending on fridge space, you might want to cut the log in half so you’re dealing with four shorter logs as opposed to two really long ones). 

If you’re only refrigerating for a couple of hours, no need to cover the logs. If longer than that, cover with plastic wrap. 

To bake, preheat the oven to 375ºf and line two baking sheets with parchment paper. brush the logs with a thin layer of egg wash, sprinkle with a few pinches of flaky salt, a lot of pinches of sanding sugar, and a good pile of ground pistachios. Cut into 1 1/2” slices and transfer to the baking sheets, 1” apart. Bake until golden brown on top; begin checking for doneness at 24 minutes. (You might notice that the cookies seem to sweat and leak out some fat and jam while in the oven, this is completely normal.) Let cool on the pans for 5 minutes and then transfer to a wire rack to cool completely. Or enjoy them warm! Leftovers can be stored at room temp for several days.


-yeh!

photos by chantell and brett quernemoen